Wood Siding Installation Details: A Comprehensive Guide
Types of Wood Siding
Wood siding installation details – Choosing the right wood siding for your home involves considering several factors, including durability, cost, aesthetic appeal, and suitability for your climate. Different wood species and siding profiles offer unique properties that cater to various architectural styles and homeowner preferences.
This section will explore the popular options available.
Wood Species for Siding
Several wood species are commonly used for exterior siding due to their natural beauty, durability, and workability. Each offers a distinct combination of properties impacting both longevity and cost.Cedar, redwood, and pine are among the most popular choices. Cedar, prized for its natural resistance to rot and insects, offers a rich, reddish hue that weathers to a silvery gray.
Its relatively high cost reflects its superior durability and aesthetic appeal. Redwood, another naturally rot-resistant wood, boasts a similar longevity but often exhibits a deeper red tone. While slightly less expensive than cedar, it remains a premium choice.
Pine, a more affordable option, requires more maintenance due to its susceptibility to decay and insect infestation, but its versatility and availability make it a popular choice for various projects. Proper treatment with preservatives can significantly extend its lifespan.
Wood Siding Profiles
The profile of the siding significantly impacts its appearance and performance. Different profiles offer distinct visual characteristics and functional properties.
| Siding Type | Durability | Cost | Appearance |
|---|---|---|---|
| Clapboard (Bevel Siding) | Moderate to High (depending on wood type and treatment); susceptible to moisture damage if not properly installed and maintained. | Moderate to High (depending on wood type) | Classic, traditional look; overlapping boards create a staggered pattern. |
| Shiplap | Moderate to High (depending on wood type and treatment); similar moisture concerns to clapboard. | Moderate to High (depending on wood type) | Clean, modern lines; boards butt together with a slight overlap, creating a continuous, horizontal plane. |
| Board and Batten | Moderate to High (depending on wood type and treatment); similar moisture concerns to clapboard and shiplap. | Moderate to High (depending on wood type) | Rustic, vertical lines; wide boards are covered with narrower battens to create a shadow line and added structural strength. |
Advantages and Disadvantages of Wood Siding by Climate and Architectural Style
The ideal wood siding choice depends heavily on the climate and the architectural style of the house. For example, in humid climates, cedar or redwood’s natural resistance to rot is a significant advantage, mitigating the risk of damage from moisture.
In drier climates, pine, while requiring more maintenance, might be a cost-effective option. Furthermore, clapboard siding complements traditional homes, while shiplap suits modern or farmhouse styles. Board and batten often features prominently in rustic or craftsman-style architecture. Careful consideration of these factors is crucial for maximizing the longevity and aesthetic appeal of the siding.
Preparation and Planning
Proper preparation and planning are crucial for a successful wood siding installation. Careful attention to detail in these initial stages will save time, reduce material waste, and ensure a high-quality, long-lasting result. This section Artikels the necessary steps to prepare your surface, gather materials, and accurately calculate the required siding quantity.
Surface Preparation for Wood Siding Installation
Preparing the surface for wood siding involves several key steps, beginning with the removal of any existing siding. If the existing siding is damaged or deteriorated, it must be completely removed down to the sheathing. This process may involve using pry bars, hammers, and other demolition tools.
Care should be taken to avoid damaging the underlying structure. Once the old siding is removed, the substrate—typically plywood or OSB sheathing—should be inspected for damage. Any rotted, damaged, or loose sheathing should be replaced. The sheathing should be clean, dry, and level.
Any gaps or cracks should be filled with appropriate sealant or patching material. Finally, the surface should be treated with a suitable primer to promote adhesion and protect the wood from moisture.
Pre-Installation Checklist
A comprehensive checklist ensures a smooth and efficient installation process. This checklist should be reviewed and updated before starting the project.
- Material Ordering:Verify siding quantity calculations (detailed below), order siding, trim, fasteners, flashing, and sealant with sufficient lead time. Consider purchasing extra material to account for cuts and potential damage.
- Tool Gathering:Assemble necessary tools including measuring tapes, levels, saws (circular saw, hand saw), drills, nail guns (optional but recommended), safety glasses, work gloves, and ladders.
- Site Preparation:Clear the work area of debris and obstacles. Ensure proper access to the building and adequate workspace. Protect landscaping and other features from damage.
- Building Permits:Check local building codes and obtain necessary permits before starting the project.
- Weather Conditions:Monitor weather forecasts and schedule installation during favorable conditions. Avoid working in rain, extreme heat, or high winds.
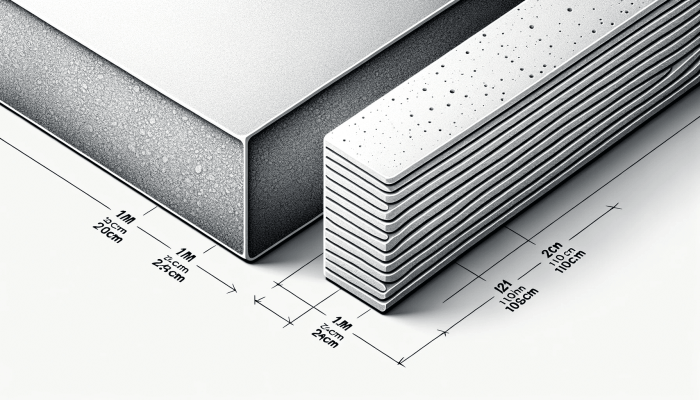
Calculating Wood Siding Quantity
Accurate measurement and calculation of the required wood siding is essential to avoid material shortages or excessive waste. The following steps and formula will guide you through this process.
- Measure the total wall area:Measure the height and width of each wall section to be sided. Add the areas of all wall sections together. Account for windows and doors by subtracting their areas from the total wall area.
- Account for waste:Add 10-15% to the total wall area to account for cuts, waste, and potential errors. This percentage can vary depending on the complexity of the project and the experience of the installer.
- Calculate the number of siding boards:Divide the total wall area (including waste) by the area of a single siding board. The area of a single board is calculated by multiplying its length and width.
Formula: Total Siding Area = (Wall Height x Wall Width)
(Window Area + Door Area) + Waste Percentage
Example Calculation
Let’s assume a wall with the following dimensions:Height: 10 feetWidth: 20 feetWindow Area: 10 square feetDoor Area: 20 square feetUsing the formula and assuming a 15% waste factor:Total Wall Area (without openings): 10 ft x 20 ft = 200 sq ftArea of Openings: 10 sq ft + 20 sq ft = 30 sq ftNet Wall Area: 200 sq ft
30 sq ft = 170 sq ft
Waste: 170 sq ft x 0.15 = 25.5 sq ftTotal Siding Area Needed: 170 sq ft + 25.5 sq ft = 195.5 sq ftAssuming each siding board covers 10 sq ft:Number of Boards Needed: 195.5 sq ft / 10 sq ft/board = 19.55 boards.
Round up to 20 boards to ensure sufficient material.
Installation Methods and Techniques: Wood Siding Installation Details
Proper installation is crucial for the longevity and aesthetic appeal of your wood siding. This section details the techniques for installing various types of wood siding, emphasizing nailing patterns, fastening methods, and the critical role of flashing and water management.
Understanding these techniques will ensure a durable and weather-resistant exterior for your home.
Nailing Patterns and Fastening Methods
The choice of nails and nailing pattern significantly impacts the performance of wood siding. Using the wrong nails or improper spacing can lead to warping, cracking, and water damage. Generally, galvanized or stainless steel nails are preferred for their resistance to corrosion.
The nails should be long enough to penetrate at least 1 1/2 inches into the framing, providing secure fastening.
- Horizontal Siding:Nails are typically driven near the top of each lap, slightly offset from the previous course to avoid splitting the wood. The exact spacing will depend on the siding’s thickness and the manufacturer’s recommendations. For example, 6-inch wide siding might use nails spaced every 8-12 inches along the top edge.
- Vertical Siding:Nailing patterns for vertical siding often involve driving nails near the edges of each board, again slightly offset from adjacent boards to avoid splitting. Spacing is similar to horizontal siding, adjusted based on board width and manufacturer guidelines.
- Shiplap Siding:Shiplap siding, with its overlapping design, typically uses a single nail near the top edge of each board, driven through the overlap and into the underlying board. This secures the board while maintaining a clean, even appearance.
Flashing and Water Management
Proper flashing is paramount to preventing water intrusion, a major cause of wood siding failure. Flashing involves using waterproof materials to redirect water away from vulnerable areas. Effective flashing prevents water from seeping behind the siding, leading to rot and structural damage.
- Window and Door Flashing:Flashing around windows and doors is crucial. A continuous piece of flashing should be installed under the siding, extending several inches beyond the window or door frame and sloped to direct water outwards. This prevents water from running behind the siding and into the wall cavity.
- Corner Flashing:Exterior corners are vulnerable to water damage. L-shaped flashing, installed at the corner, directs water away from the intersection of the two siding planes. Properly installed corner flashing is essential to prevent water from penetrating the joint.
- Drip Edge Flashing:Drip edges are installed along the bottom edge of the roofline or other overhangs. These metal strips prevent water from running down the siding and behind it. Their downward slope redirects water away from the wall.
Comparison of Installation Methods
Different installation patterns offer unique aesthetic and practical benefits. Understanding the pros and cons of each will help you choose the best option for your project.
- Horizontal Siding:
- Pros:Traditional look, relatively easy installation, effective water shedding.
- Cons:Can show horizontal lines more prominently, potentially more susceptible to water damage if not installed correctly.
- Vertical Siding:
- Pros:Modern look, less visible horizontal lines, can visually increase the height of a structure.
- Cons:Can be more challenging to install, may require more frequent maintenance in high-rain areas.
- Staggered Siding:
- Pros:Unique aesthetic, good water shedding, hides nail holes effectively.
- Cons:More complex installation, requires more precise planning and cutting.
Finishing and Maintenance
Protecting your newly installed wood siding is crucial for its longevity and aesthetic appeal. Proper finishing and regular maintenance will safeguard your investment and ensure your siding remains beautiful for years to come. This section details the application of primers, stains, and sealants, as well as essential maintenance practices.
Primer Application
Primers are essential for preparing the wood surface for the final finish. They enhance stain penetration, improve adhesion, and provide a uniform base for a more even color. Oil-based primers offer superior penetration into the wood grain, while water-based primers are generally easier to clean up and have lower VOCs (Volatile Organic Compounds).
The choice depends on the type of wood and the desired final finish. Application should be done using a brush, roller, or sprayer, ensuring complete coverage without excessive buildup. Allow ample drying time before proceeding to the next step.
Stain and Sealant Application
Stains and sealants protect wood siding from the elements, preventing damage from moisture, UV rays, and insects. Several types exist, each with its own advantages and disadvantages. Oil-based stains penetrate deeply, providing excellent protection and rich color, but may take longer to dry and have a stronger odor.
Water-based stains are easier to clean up and dry faster, but may offer less protection in harsh climates. Solid-color stains completely hide the wood grain, while semi-transparent stains allow some of the natural wood color to show through. Sealants, often applied in conjunction with stains, provide an additional layer of protection against moisture.
Application techniques are similar to primers, requiring even coverage and appropriate drying time. For optimal protection, consider applying multiple coats, allowing each to dry completely before applying the next.
Maintenance Procedures
Regular maintenance is key to extending the life of your wood siding. This includes cleaning, repair, and periodic replacement. Cleaning should be performed at least annually, using a gentle cleaning solution and a soft-bristled brush or pressure washer (used cautiously to avoid damage).
Repairs, such as replacing damaged or rotted boards, should be addressed promptly to prevent further deterioration. Replacement of individual boards is often straightforward, requiring only basic carpentry skills and the appropriate tools. More extensive repairs may require professional assistance.
Preventative Maintenance
Regular inspections and prompt attention to potential issues are crucial for preventing costly repairs down the line. A proactive approach can significantly extend the lifespan of your wood siding.
- Annual Inspections:Conduct thorough inspections twice a year, in spring and fall, to check for signs of damage, such as rot, insect infestation, or loose boards.
- Prompt Repairs:Address any minor damage immediately to prevent it from escalating into larger, more expensive problems. This includes repairing loose boards, filling cracks, and treating any signs of rot or insect infestation.
- Cleaning:Clean the siding annually to remove dirt, mildew, and other debris. Use a gentle cleaning solution and avoid harsh chemicals that could damage the finish.
- Re-staining/Sealing:Re-stain and re-seal the siding every 3-5 years, or as needed, depending on the type of finish and climate. This will help maintain its protection and aesthetic appeal.
- Gutter and Downspout Maintenance:Ensure gutters and downspouts are clean and functioning properly to prevent water damage to the siding.
- Tree and Shrub Trimming:Keep trees and shrubs trimmed away from the siding to prevent moisture buildup and damage from branches.
Building Codes and Regulations

Proper wood siding installation requires adherence to local, regional, and national building codes and regulations. These codes are designed to ensure the safety, structural integrity, and longevity of buildings, and variations exist significantly depending on geographical location, climate, and specific building characteristics.
Understanding and complying with these regulations is crucial for homeowners and contractors alike.Building codes related to wood siding address various aspects, including material specifications, installation techniques, fire safety, and moisture control. These codes often dictate the type of wood allowed, its treatment for rot and insect resistance, the proper spacing and fastening methods, and the requirements for flashing and water barriers.
For instance, areas prone to wildfires may have stricter regulations regarding the type and treatment of wood siding, potentially requiring the use of fire-resistant materials or specific installation techniques to minimize fire spread. Similarly, coastal regions may have more stringent requirements for moisture resistance and protection against decay.
Relevant Building Codes and Their Variations
Building codes are established at various levels—national, state/provincial, and local—leading to a complex patchwork of regulations. The International Building Code (IBC) provides a widely adopted model code, but individual jurisdictions may adopt, modify, or supplement it with their own specific requirements.
For example, the IBC might specify minimum fastener spacing for wood siding, but a local jurisdiction might impose stricter requirements due to high wind loads in the area. Contractors must research and comply with all applicable codes at every level, which often necessitates consulting local building departments for specific requirements.
Failure to do so can result in delays, costly rework, and potential legal consequences.
Importance of Obtaining Necessary Permits
Securing the necessary permits before commencing any wood siding installation is mandatory. Building permits demonstrate compliance with local regulations and provide legal protection for both the homeowner and the contractor. The permit application process typically involves submitting detailed plans, specifications, and material selections to the building department for review and approval.
This review ensures the project meets all code requirements before work begins. Without a permit, homeowners and contractors risk facing fines, stop-work orders, and even the requirement to demolish improperly installed siding. The permit process, while requiring time and paperwork, offers substantial protection against legal and financial liabilities.
Common Code Violations and Their Consequences
Several common code violations relate to wood siding installation. These include improper flashing installation, leading to water damage and rot; inadequate fastener spacing, resulting in siding failure during high winds; insufficient fire-retardant treatment in fire-prone areas; and the use of non-compliant or substandard materials.
Consequences of such violations can range from minor fines to significant legal action, depending on the severity of the violation and the resulting damage. In extreme cases, homeowners may be required to remove and reinstall the siding to correct the violations, incurring substantial additional costs.
Furthermore, insurance companies may deny claims for damages resulting from code violations, leaving homeowners to bear the financial burden.
Tools and Equipment
Proper tools and equipment are crucial for efficient and safe wood siding installation. The right tools will ensure accurate cuts, secure fastening, and a professional-looking finish. Using inappropriate or poorly maintained tools can lead to injury, damage to the siding, and ultimately, a substandard installation.
The following list details essential tools and equipment, categorized for clarity. Appropriate personal protective equipment (PPE) such as safety glasses, gloves, and hearing protection should be used at all times.
Essential Hand Tools
A variety of hand tools are necessary for precise work and tasks that power tools cannot easily accomplish. These tools are critical for preparation, measurement, and finishing touches.
- Measuring Tape:Accurate measurement is paramount for proper siding placement and cutting. A 25-foot tape measure is recommended for most projects.
- Level:Ensures horizontal and vertical alignment of siding for a professional appearance and structural integrity. A 4-foot level is generally sufficient.
- Chalk Line:Used to mark straight lines for cutting and installation, ensuring consistent spacing and alignment.
- Hammer:For driving nails (though nail guns are preferred for larger projects), and for general construction tasks.
- Utility Knife:Used for cutting caulk, trimming flashing, and various other small cutting tasks.
- Putty Knife:For applying and smoothing caulking around windows and doors, and for scraping away old paint or debris.
- Screwdrivers (Phillips and Flathead):For various fastening and adjustment tasks, particularly useful for trim and accessories.
- Combination Square:Used for marking precise angles and checking for squareness during installation.
Essential Power Tools
Power tools significantly increase efficiency and accuracy in wood siding installation, but their use requires careful attention to safety procedures.
- Circular Saw:Used for cutting siding boards to length. Always use a sharp blade and a clamp to secure the wood for accurate and safe cuts. Ensure the blade guard is functioning correctly.
- Reciprocating Saw (Sawzall):Useful for cutting in tight spaces or for demolition work, such as removing existing siding. Similar safety precautions to the circular saw apply.
- Nail Gun:Significantly speeds up the installation process. Different types are available (discussed below). Always ensure the nail gun is properly maintained and used according to manufacturer instructions.
- Drill/Driver:Used for pre-drilling pilot holes to prevent wood splitting, especially when using screws. Can also be used for driving screws for trim work.
Nail Gun Types and Usage, Wood siding installation details
Choosing the right nail gun is essential for efficiency and safety. Different nail guns offer varying advantages and disadvantages.
| Nail Gun Type | Advantages | Disadvantages |
|---|---|---|
| Pneumatic Nail Gun | Powerful, fast, and consistent driving. | Requires an air compressor, which adds to the overall cost and setup. Can be noisy. |
| Cordless Nail Gun | Portable and convenient, no need for an air compressor. | Can be less powerful than pneumatic guns, and battery life can be a limitation. |
| Coil Nailer | High capacity, fast driving. | Heavier than other types and can jam more easily. |
| Strip Nailer | Lightweight and easy to handle. | Lower capacity than coil nailers. |
Safe Use of Power Tools
Safe operation of power tools is paramount to prevent injuries. Always follow manufacturer’s instructions and use appropriate safety equipment.
- Nail Guns:Always point the nail gun away from yourself and others. Never dry-fire a nail gun. Use the proper safety glasses and hearing protection. Regularly inspect the nail gun for proper function.
- Circular and Reciprocating Saws:Always use a sharp blade and secure the workpiece firmly. Never reach over the blade while it is running. Use a push stick for added safety when cutting smaller pieces. Ensure the blade guard is in place and functioning correctly.
- Drills:Use appropriate drill bits for the material and application. Ensure the workpiece is firmly clamped to prevent slippage. Use safety glasses to protect your eyes from flying debris.
Outcome Summary
Mastering wood siding installation involves a blend of careful planning, precise execution, and ongoing maintenance. By understanding the nuances of wood selection, preparation, installation techniques, and finishing, you can achieve a beautiful and durable exterior that enhances your home’s curb appeal and protects it from the elements for years to come.
Remember, proper preparation and attention to detail are key to a successful project. This guide provides a strong foundation, but always consult with local professionals for specific advice tailored to your project and region.