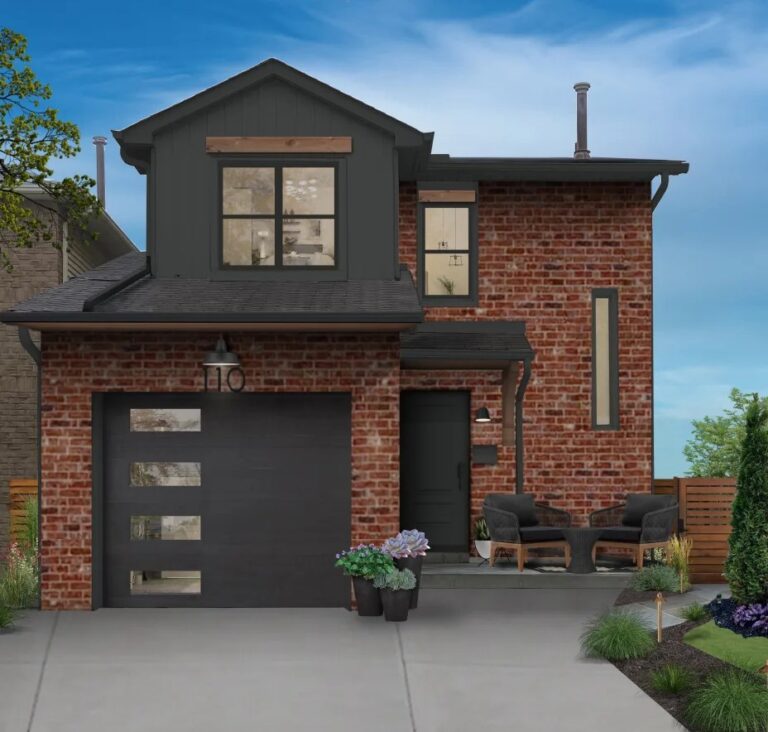
Wood Siding Lowes: A Comprehensive Guide
Product Overview
Wood siding lowes – Lowe’s offers a diverse selection of wood siding options to suit various home styles and budgets. Choosing the right siding involves considering factors like material, style, durability, maintenance needs, and aesthetic preferences. This overview will detail the types of wood siding available at Lowe’s, highlighting key features to assist in your selection process.
Types of Wood Siding at Lowe’s
Lowe’s carries a range of wood siding materials, each with its unique characteristics. Popular choices include cedar, pine, and composite wood siding. Cedar siding is prized for its natural beauty, resistance to rot and insects, and pleasant aroma.
Pine siding, while more affordable, offers a rustic charm and is readily available. Composite wood siding blends the aesthetic appeal of natural wood with enhanced durability and lower maintenance requirements. The specific availability of each type may vary by location and season.
Styles of Wood Siding at Lowe’s
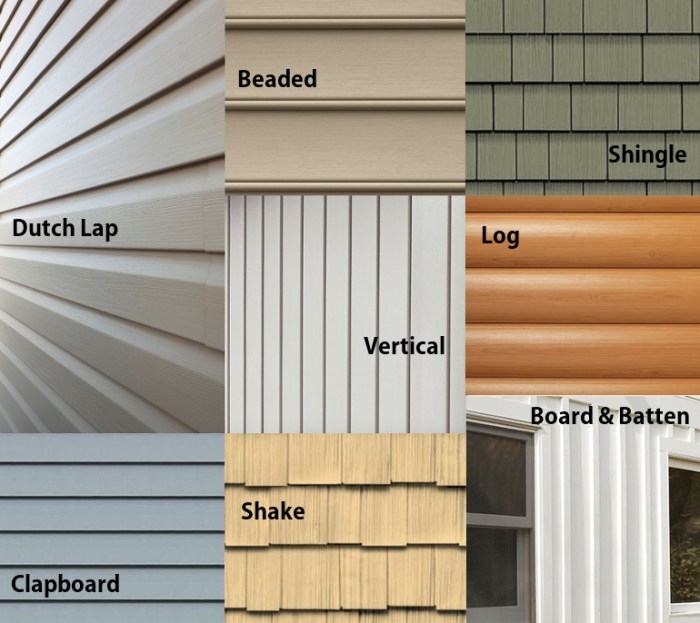
Lowe’s offers a variety of wood siding styles to complement different architectural designs. Common styles include clapboard, shiplap, and shingle siding. Clapboard siding, characterized by its overlapping horizontal boards, provides a classic and traditional look. Shiplap siding, with its clean, flush edges, creates a modern and minimalist aesthetic.
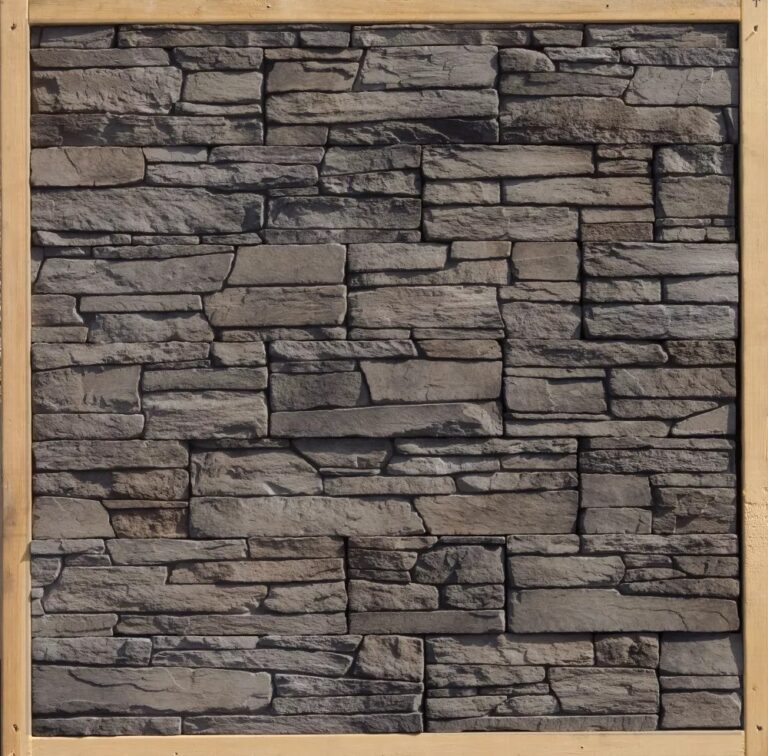
Shingle siding, composed of individual wood shingles, offers a more rustic and textured appearance. The choice of style often depends on personal preference and the overall architectural style of the house.
Comparison of Wood Siding Options
The following table compares five common wood siding options available at Lowe’s. Note that pricing can fluctuate based on factors such as quantity purchased, regional availability, and current market conditions. The durability and maintenance requirements are also general estimations and can vary depending on the specific product and environmental factors.
Aesthetic appeal is subjective and depends on personal preference.
| Siding Type | Price (Approximate Range) | Durability | Maintenance Requirements | Aesthetic Appeal |
|---|---|---|---|---|
| Cedar Clapboard | $$$-$$$$ | High | Moderate (periodic staining/sealing) | Classic, elegant |
| Pine Shiplap | $$-$$$ | Moderate | Moderate (periodic staining/sealing) | Modern, minimalist |
| Cedar Shingle | $$$-$$$$ | High | High (requires more frequent maintenance) | Rustic, textured |
| Composite Clapboard | $$-$$$$ | High | Low (minimal maintenance) | Versatile, mimics natural wood |
| Pine Bevel Siding | $-$$ | Low to Moderate | High (frequent painting/sealing) | Rustic, traditional |
Installation and DIY Considerations
Installing wood siding from Lowe’s, while achievable for DIYers, requires careful planning and execution. Success hinges on proper preparation, the right tools, and a methodical approach to ensure a professional-looking and long-lasting result. This section details the necessary steps and considerations for a successful installation.
The process of installing wood siding involves several key stages, from preparation and measurement to installation and finishing. Understanding these stages and anticipating potential challenges will significantly improve the outcome of your project. Improper installation can lead to issues such as warping, gaps, and premature deterioration of the siding.
Tools and Materials
Prior to commencing the installation, gather all necessary tools and materials. This ensures a smooth and efficient workflow. Failing to have the correct tools readily available can lead to delays and potentially compromise the quality of the installation.
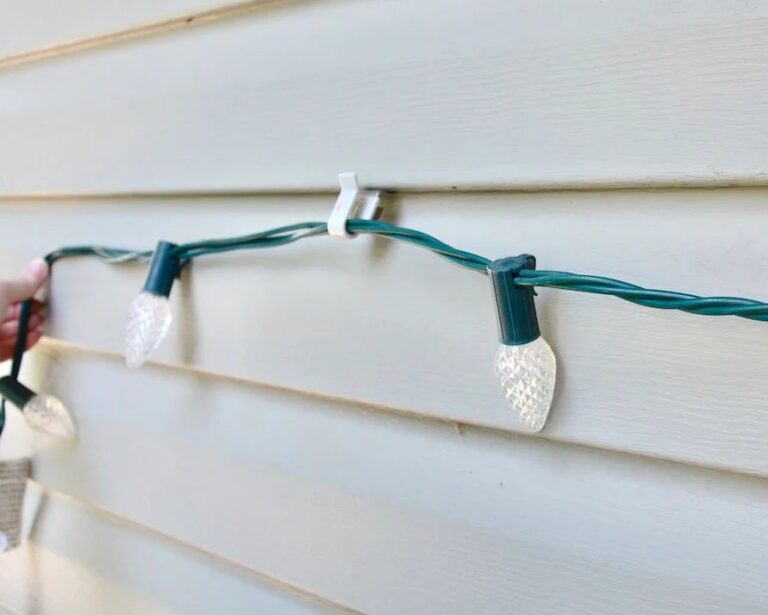
Essential tools include a measuring tape, level, circular saw or miter saw (for precise cuts), hammer, nail gun (recommended for efficiency), safety glasses, work gloves, and a chalk line. Materials needed depend on the project’s size and the type of wood siding chosen but generally include the wood siding itself, appropriate nails or fasteners, starter strips, J-channels (for corners and edges), flashing (for moisture protection), and possibly caulk or sealant.
Step-by-Step Installation Process
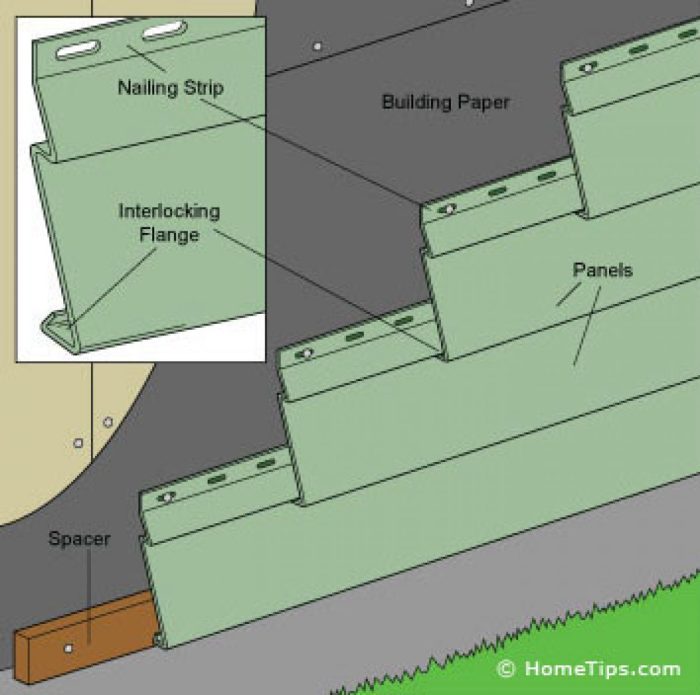
The installation process begins with careful preparation of the wall surface. This involves ensuring the wall is clean, dry, and free from any obstructions. A properly prepared surface is crucial for a secure and aesthetically pleasing installation. Neglecting this step can lead to problems later on.
- Prepare the Wall:Clean the wall thoroughly, removing any loose debris or old siding. Ensure the wall is plumb and level, making necessary repairs as needed.
- Install Starter Strip:Install a starter strip along the bottom of the wall, providing a level base for the first row of siding. This strip ensures consistent spacing and alignment.
- Install First Row of Siding:Attach the first row of siding to the starter strip, ensuring proper alignment and spacing. Use appropriate nails or fasteners, following manufacturer’s recommendations.
- Install Subsequent Rows:Continue installing subsequent rows, overlapping each row according to the manufacturer’s instructions. Maintain consistent spacing and alignment throughout the installation.
- Install Corner and Edge Trim:Use J-channels or other trim pieces to finish corners and edges neatly. This provides a clean and professional finish.
- Caulk and Seal:Apply caulk or sealant to any gaps or seams to prevent moisture intrusion. This is essential for long-term durability.
Wood Siding Cutting and Fitting Techniques
Accurate cutting and fitting are critical for a seamless appearance. Improper cuts can lead to gaps and an unprofessional finish. Understanding proper techniques is essential for a successful installation.
Visual Guide: Imagine a piece of wood siding needing to be cut to fit around a window. First, measure the space carefully, accounting for any overlap with adjacent siding pieces. Then, using a pencil, mark the cut line on the back of the siding.
Next, use a sharp blade (circular saw or miter saw) to make a clean, precise cut along the marked line. For inside corners, use a miter saw to create a 45-degree angle cut on both pieces of siding, ensuring they fit together tightly.
For outside corners, a similar 45-degree cut is needed, but the pieces will overlap rather than meet perfectly. Always practice cuts on scrap pieces before cutting the actual siding.
Maintenance and Longevity

Proper maintenance is crucial for maximizing the lifespan and beauty of your Lowe’s wood siding. Different wood types require varying levels of care, and a proactive approach will protect your investment and enhance your home’s curb appeal for years to come.
Understanding the specific needs of your siding and establishing a regular maintenance schedule are key to achieving longevity.
Maintenance Requirements for Different Wood Siding Types
Lowe’s offers a variety of wood siding options, each with unique characteristics impacting maintenance needs. For example, cedar siding, known for its natural resistance to decay, may require less frequent sealing than redwood, which can be more susceptible to moisture damage.
Pressure-treated lumber, while durable, still benefits from periodic cleaning and inspection. Specific product information sheets from Lowe’s should be consulted for detailed guidance on the recommended maintenance schedule for your chosen siding type. Generally, all wood siding will benefit from regular cleaning to remove dirt, debris, and mildew.
Extending the Lifespan of Wood Siding
Preventative measures are key to extending the life of your wood siding. Regular cleaning helps prevent the buildup of dirt and grime, which can trap moisture and promote rot. Proper sealing protects the wood from moisture penetration, a leading cause of decay.
Annual inspections are vital for early detection of insect infestations or signs of damage, allowing for prompt repairs. Consider installing insect screens or barriers to deter pests. Regularly trimming overhanging branches prevents moisture accumulation and reduces the risk of damage from falling limbs.
Promptly addressing any damage, such as cracks or loose boards, will prevent further deterioration.
Yearly Maintenance Schedule
A yearly maintenance schedule, broken down by season, ensures consistent care.
| Season | Maintenance Tasks |
|---|---|
| Spring | Inspect siding for damage (cracks, loose boards, insect infestation). Clean siding with a pressure washer (low pressure setting) and mild detergent. Repair any damage found. Reapply sealant to any areas showing wear. |
| Summer | Regularly inspect siding for signs of insect activity or damage from severe weather. Clean away any bird nests or debris that might accumulate. |
| Autumn | Clean away leaves and debris that may accumulate on the siding, preventing moisture buildup during winter months. Inspect for any damage caused by autumn storms. |
| Winter | Inspect for ice damage, particularly in areas with heavy snowfall. Remove any ice buildup carefully to avoid damaging the siding. |
Cost and Budgeting: Wood Siding Lowes
Planning the budget for your wood siding project from Lowe’s requires careful consideration of several factors. The total cost will depend on the size of your home, the type of wood siding chosen, and whether you opt for professional installation or a DIY approach.
Understanding these variables is crucial for accurate budgeting and avoiding unexpected expenses.
Material Costs
The cost of wood siding from Lowe’s varies considerably depending on the type of wood (e.g., cedar, pine, redwood), the grade of the wood (affecting appearance and durability), and the thickness of the siding. Premium woods like cedar generally command higher prices than pine, reflecting their superior resistance to rot and insect damage.
Lowe’s typically offers a range of options, allowing for flexibility based on your budget and aesthetic preferences. For example, a basic pine siding might cost between $2 and $5 per square foot, while premium cedar could range from $6 to $12 or more per square foot.
Additional materials such as trim, fasteners, and underlayment should also be factored into your budget. It’s advisable to obtain detailed pricing from Lowe’s based on your specific needs and the quantity of materials required.
Labor Costs
If you choose to hire professionals for installation, labor costs can significantly impact the overall project expense. The cost of labor is typically calculated per square foot and varies based on geographical location, the complexity of the project, and the contractor’s experience and reputation.
Expect to pay anywhere from $2 to $6 or more per square foot for professional installation. Factors influencing labor costs include the need for specialized equipment, the complexity of the house’s design, and the need for additional work such as removing existing siding.
Obtaining multiple quotes from reputable contractors is essential to ensure competitive pricing.
Permitting Costs
Building permits are usually required for exterior home renovations, including siding replacement. The cost of permits varies considerably by location and the scope of the project. It’s recommended to check with your local building department to determine the exact permit requirements and associated fees.
These fees can range from a few hundred dollars to several thousand, depending on your location and project size. Failure to obtain the necessary permits can lead to fines and potential legal issues.
Comparison to Other Cladding Options, Wood siding lowes
Wood siding, while aesthetically pleasing and durable, is often more expensive than other exterior cladding options. Vinyl siding typically represents the most budget-friendly alternative, with prices often ranging from $1 to $4 per square foot. Fiber cement siding offers a balance between cost and durability, typically falling between vinyl and wood in terms of price, usually ranging from $3 to $8 per square foot.
The longevity and maintenance requirements of each material should be carefully weighed against initial cost considerations.
Sample Budget for a Medium-Sized Home
Let’s consider a hypothetical medium-sized home with 1500 square feet of siding area. Using average cost estimates:
| Item | Cost per sq ft | Total Cost |
|---|---|---|
| Wood Siding (Cedar) | $8 | $12,000 |
| Underlayment | $1 | $1,500 |
| Trim & Fasteners | $2 | $3,000 |
| Professional Labor | $4 | $6,000 |
| Permits | $500 | $500 |
| Total Estimated Cost | $23,000 |
Note: This is a rough estimate. Actual costs may vary significantly depending on specific material choices, labor rates, and permit fees in your area. Always obtain detailed quotes from Lowe’s and contractors before finalizing your budget.
Environmental Impact and Sustainability
Choosing wood siding involves considering its environmental footprint throughout its lifecycle, from forest to final disposal. Sustainable practices in sourcing and manufacturing are crucial for minimizing negative impacts and maximizing the long-term benefits of this natural building material.The environmental impact of wood siding is multifaceted.
It encompasses the harvesting of trees, the manufacturing process (including energy consumption and waste generation), transportation, installation, and ultimately, disposal or recycling. Understanding these stages allows for informed decisions regarding the selection and responsible use of wood siding.
Sourcing and Manufacturing Processes
The environmental impact of wood siding begins in the forest. Unsustainable logging practices can lead to deforestation, habitat loss, and soil erosion. Conversely, responsible forestry, including sustainable harvesting techniques and reforestation efforts, mitigates these negative impacts. The manufacturing process itself consumes energy and generates waste.
Modern mills often employ technologies to minimize waste and improve energy efficiency, but the overall impact varies depending on the scale and methods employed. Transportation of the lumber from the mill to the construction site also contributes to greenhouse gas emissions, with the distance traveled being a key factor.
Choosing locally sourced wood can significantly reduce this impact.
Sustainability of Different Wood Types
Different wood species vary significantly in their sustainability. Some woods, like responsibly harvested cedar or redwood, grow relatively quickly and are managed sustainably in certified forests. These certifications, such as the Forest Stewardship Council (FSC) certification, ensure that the wood comes from forests managed according to strict environmental and social standards.
In contrast, sourcing wood from non-certified forests or those undergoing unsustainable practices can contribute to deforestation and biodiversity loss. Hardwoods, while often more durable, may require longer growth cycles, potentially increasing the environmental impact compared to faster-growing softwoods.
The choice of wood species directly impacts the overall sustainability of the siding.
Disposal and Recycling Options
At the end of its lifespan, wood siding presents disposal challenges. Landfilling wood siding contributes to greenhouse gas emissions through decomposition. However, several more sustainable options exist. Recycling wood siding is possible, with some companies specializing in reclaiming and repurposing old lumber for various applications.
Wood siding can also be chipped and used as biomass fuel, providing a renewable energy source. In some cases, depending on the condition and type of wood, old siding can be reused in other construction projects or repurposed for other applications.
Proper disposal and recycling options should be explored to minimize the environmental burden associated with the end-of-life stage of wood siding.
Customer Reviews and Feedback
Customer reviews offer valuable insights into the performance and perceived value of Lowe’s wood siding products. Analyzing this feedback provides a comprehensive understanding of customer experiences, highlighting both strengths and weaknesses of the various options available. This analysis considers both positive and negative comments to present a balanced perspective.Customer reviews for Lowe’s wood siding products reveal a range of experiences, reflecting the diversity of products and individual installation circumstances.
Positive feedback frequently centers on aesthetic appeal, ease of installation for certain products, and the overall durability of the material when properly maintained. Negative comments often focus on issues related to warping, cracking, or inconsistent quality within a single batch of siding.
These issues, however, are often attributed to improper installation or exposure to extreme weather conditions.
Positive Customer Feedback
Positive customer feedback consistently highlights the visual appeal of wood siding. Many reviewers praise the natural beauty and variety of wood types available at Lowe’s, noting the ability to enhance curb appeal significantly. The ease of installation, particularly with certain pre-finished or engineered wood siding options, is another recurring theme.
Reviewers appreciate the time and effort saved compared to working with more traditional, unfinished wood siding. Finally, the longevity and durability of the siding, when properly installed and maintained, are frequently mentioned as significant advantages. One customer described their Lowe’s cedar siding as “beautiful and holding up incredibly well after five years.”
Negative Customer Feedback
While many reviews are positive, negative feedback often points towards potential challenges. Warping and cracking are common complaints, particularly with less expensive or unfinished wood siding options. These issues are often linked to inadequate sealing or exposure to moisture.
Inconsistent color or quality within a single order is another concern raised by some customers. This highlights the importance of careful inspection upon delivery and selection of higher-quality products. One review mentioned experiencing significant warping after only a year, emphasizing the need for proper installation and preventative maintenance.
Examples of Real-World Applications
One customer used Lowe’s pre-finished redwood siding to create a charming farmhouse aesthetic for their newly constructed home. The rich reddish-brown color provided a warm and inviting feel, complementing the surrounding landscape. Another customer chose a more rustic look, using reclaimed wood siding from Lowe’s to give their cabin a rugged and weathered appearance.
This project demonstrated the versatility of the available wood siding options. A third customer opted for a modern design, utilizing vertical installation of white painted wood siding to create a clean and contemporary feel for their home’s exterior. These examples illustrate the diverse applications of Lowe’s wood siding products.
Closing Summary
Ultimately, choosing wood siding from Lowe’s involves careful consideration of your budget, aesthetic preferences, and long-term maintenance commitment. By understanding the various options available, the installation process, and the ongoing care required, you can confidently select the perfect wood siding to enhance your home’s beauty and value for years to come.
Remember to factor in the total cost, including materials, labor, and potential future maintenance, and weigh the environmental impact of your chosen wood type. With thorough planning and preparation, your Lowe’s wood siding project can be a rewarding and successful endeavor.