Siding Cleaner Sprayer: A Comprehensive Guide
Product Overview
Siding cleaner sprayers offer a convenient and efficient solution for maintaining the pristine appearance of your home’s exterior. These tools significantly reduce the time and effort required for cleaning compared to traditional methods like scrubbing with brushes and buckets.
The selection available caters to various needs and budgets, ensuring there’s a suitable option for every homeowner.
Types of Siding Cleaner Sprayers
Choosing the right siding cleaner sprayer depends on the size of your house, the type of siding, and your budget. The following table summarizes the key differences between common types:
| Type | Features | Price Range | Best Use Case |
|---|---|---|---|
| Electric Pressure Washer | High pressure, adjustable nozzle tips, various power settings, often includes detergent tanks. | $200
|
Large houses, heavily soiled siding, various siding materials (with appropriate nozzle and pressure settings). |
| Gas Pressure Washer | Higher pressure than electric models, greater power for stubborn dirt, more portability for larger areas. | $300
|
Very large houses, heavily soiled siding, tough cleaning tasks, areas without readily available electricity. |
| Pump Sprayer (Handheld) | Manual operation, lower cost, suitable for smaller areas or spot cleaning. | $20
|
Small houses, lightly soiled siding, touch-up cleaning, areas inaccessible to larger sprayers. |
| Battery-Powered Sprayer | Cordless convenience, adjustable pressure settings, suitable for medium-sized areas. | $100
|
Medium-sized houses, moderately soiled siding, convenient cordless operation. |
Key Features and Benefits of Siding Cleaner Sprayers
Siding cleaner sprayers offer several advantages over traditional cleaning methods. The high-pressure spray effectively removes dirt, grime, mildew, and other contaminants, resulting in a cleaner and more attractive exterior. Furthermore, the speed and efficiency of these sprayers significantly reduce cleaning time and physical effort compared to manual scrubbing.
The consistent pressure ensures even cleaning across the entire surface, preventing streaks and unevenness. Using a detergent solution with the sprayer further enhances cleaning power and helps to remove stubborn stains.
Nozzle Types and Applications
Different nozzle types are designed for specific cleaning tasks. The selection of the appropriate nozzle is crucial for effective and safe siding cleaning.
For example, a fan nozzleprovides a wide spray pattern ideal for covering large areas quickly and efficiently. A pencil jet nozzle, on the other hand, delivers a concentrated stream of water, suitable for removing stubborn dirt or cleaning hard-to-reach areas. A rotating nozzleoffers a combination of high pressure and wide coverage, effective for various cleaning tasks.
Using the incorrect nozzle can lead to damage to the siding, so careful consideration is essential. Always refer to the manufacturer’s instructions for recommended nozzle settings and usage.
Choosing the Right Sprayer
Selecting the appropriate sprayer for your siding cleaning project is crucial for efficiency and effectiveness. The right tool will significantly impact the speed of the job, the quality of the clean, and the overall ease of the process. Consider your needs carefully before making a purchase.
Different sprayer types offer varying levels of pressure, capacity, and ease of use. These factors are interdependent and should be considered together when making your selection. The best choice will depend on the size of your house, the type of siding, and your personal comfort level with different equipment.
Sprayer Type Comparison
The following comparison highlights key differences between common sprayer types used for siding cleaning. Understanding these differences will help you make an informed decision.
- Electric Sprayers:These offer good pressure for most siding types, generally have a moderate capacity (1-3 gallons), and are relatively easy to use. They are lightweight and require less physical effort compared to gas-powered models. However, their pressure is typically lower than gas-powered options, potentially requiring more passes for thorough cleaning.
- Gas-Powered Sprayers:Gas-powered sprayers provide higher pressure than electric models, ideal for stubborn dirt and mildew on larger houses. They often have larger capacities (up to 5 gallons or more), reducing the need for frequent refills. However, they are heavier, require more maintenance, and can be louder and more cumbersome to operate.
They are a better choice for professional use or large-scale projects.
- Pump Sprayers (Manual):These are the most basic and affordable option, suitable for smaller areas and lighter cleaning tasks. They are lightweight and easy to use, but require significant manual effort and are not ideal for large houses or heavy-duty cleaning. The pressure is significantly lower compared to electric or gas models.
Selecting a Sprayer Based on Siding and House Size
This step-by-step guide helps determine the ideal sprayer based on your specific needs. Remember that safety is paramount; always wear appropriate personal protective equipment (PPE).
- Assess your siding type:Vinyl, wood, brick, and aluminum siding all have different cleaning requirements. Delicate materials like wood might require lower pressure to avoid damage.
- Measure your house’s surface area:Estimate the square footage of your siding to determine the necessary tank capacity. Larger houses will require sprayers with larger tanks to minimize refills.
- Consider the level of soiling:Is your siding lightly soiled, or does it have significant dirt, mildew, or algae buildup? Heavily soiled siding might necessitate a higher-pressure sprayer for effective cleaning.
- Evaluate your physical capabilities:Gas-powered sprayers are powerful but require more physical strength and stamina. Electric sprayers are lighter and easier to manage.
- Choose the sprayer type:Based on the above factors, select the sprayer that best suits your needs. A small pump sprayer might suffice for a small house with lightly soiled vinyl siding, while a gas-powered sprayer might be necessary for a large house with heavily soiled wood siding.
Sprayer Selection Decision Tree
This decision tree provides a visual guide to assist in choosing the right sprayer.
Start with “House Size”:
Small House (<1500 sq ft) & Light Soiling:Pump Sprayer
Small House (<1500 sq ft) & Heavy Soiling:Electric Sprayer
Large House (>1500 sq ft) & Light Soiling:Electric Sprayer
Large House (>1500 sq ft) & Heavy Soiling:Gas-Powered Sprayer
Delicate Siding (Wood):Electric Sprayer (lower pressure setting)
Using a Siding Cleaner Sprayer Safely and Effectively
Using a siding cleaner sprayer can significantly improve the appearance of your home’s exterior, but safety and proper technique are paramount to achieve effective cleaning and avoid damage. This section details crucial safety precautions and best practices for applying cleaning solutions to various siding materials.
Safety Precautions When Using a Siding Cleaner Sprayer
Prioritizing safety ensures a successful and hazard-free cleaning process. Always wear appropriate personal protective equipment (PPE) and follow safe handling procedures for cleaning solutions. Failure to do so can result in injury or damage to your property.
- Always wear safety glasses or goggles to protect your eyes from splashes of cleaning solution.
- Use chemical-resistant gloves to prevent skin irritation or chemical burns from contact with cleaning agents.
- Wear a respirator or dust mask, especially when working with strong cleaning solutions or if you are sensitive to chemicals.
- Wear long sleeves and long pants to protect your skin from splashes and irritants.
- Ensure adequate ventilation. Work in a well-ventilated area or use a respirator if working in enclosed spaces.
- Never mix different cleaning solutions together unless explicitly instructed to do so by the manufacturer. Mixing incompatible chemicals can create dangerous reactions.
- Keep children and pets away from the work area while using the sprayer and cleaning solutions.
- Read and follow all safety instructions and warnings provided by the manufacturer of both the sprayer and the cleaning solution.
Mixing Ratios for Cleaning Solutions and Siding Materials
The appropriate mixing ratio of cleaning solution to water varies depending on the type of siding and the severity of the dirt or grime. Using incorrect ratios can damage your siding or leave it inadequately cleaned. Always test a small, inconspicuous area first before applying the solution to the entire surface.
| Siding Material | Cleaning Solution Type | Recommended Mixing Ratio (Solution:Water) |
|---|---|---|
| Vinyl | Mild detergent | 1:10 |
| Wood | Oxygen bleach | 1:4 to 1:8 (depending on wood type and condition) |
| Brick | TSP (trisodium phosphate) * | Follow manufacturer’s instructions; generally a weaker solution than for other materials. |
*Note: TSP is a powerful cleaner and requires careful handling. Always follow manufacturer’s safety instructions.
Applying Cleaning Solution to Various Siding Types
The application technique should be adjusted depending on the siding material to prevent damage and ensure effective cleaning. Gentle pressure and even distribution are key to successful cleaning.
For vinyl siding, use a low-pressure nozzle setting on your sprayer. Apply the cleaning solution in a sweeping motion, overlapping each pass to ensure complete coverage. Rinse thoroughly with clean water after a few minutes of dwell time. Avoid high-pressure washing, which can damage the vinyl.
For wood siding, use a gentler approach. Apply the cleaning solution with a pump sprayer or a soft-bristled brush, ensuring even coverage. Allow the solution to dwell for the recommended time (usually 10-15 minutes), then rinse thoroughly with clean water.
For heavily soiled areas, you may need to scrub gently with a soft-bristled brush.
For brick siding, use a pump sprayer or a brush to apply the cleaning solution. Allow the solution to dwell for the recommended time before scrubbing gently with a stiff-bristled brush. Thoroughly rinse the brick with clean water to remove all traces of the cleaning solution.
For heavily stained or mortared brick, consider professional cleaning.
Cleaning Solutions and Maintenance: Siding Cleaner Sprayer
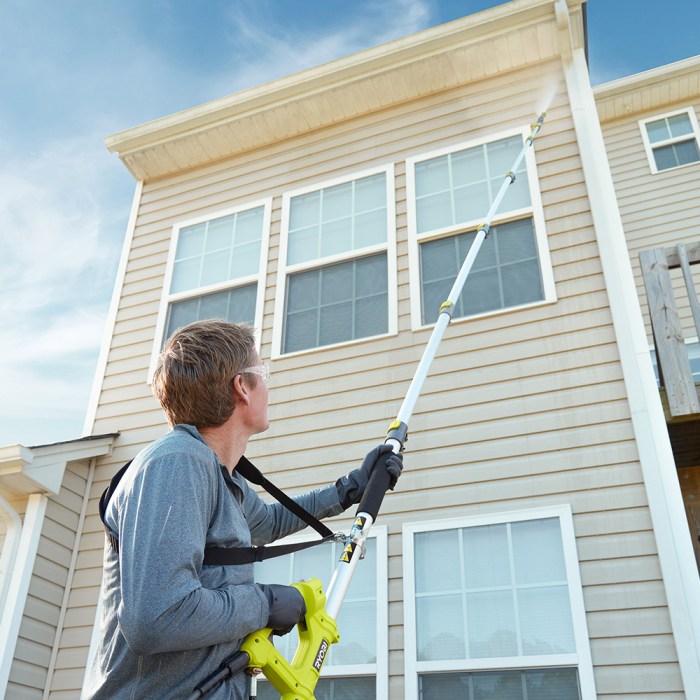
Choosing the right cleaning solution is crucial for effective and safe siding cleaning. The selection depends on the type of siding material, the level of dirt and grime, and your personal preference for commercial versus homemade options. Improper solutions can damage your siding, while proper maintenance of your sprayer ensures its longevity and efficient operation.
Commercial Cleaning Solutions
Commercial siding cleaners are readily available at most home improvement stores. They often contain powerful detergents and sometimes bleaching agents designed to effectively remove dirt, mildew, and algae. These products typically provide instructions for dilution and application, ensuring safe and effective use when followed carefully.
Advantages include convenience and often superior cleaning power for heavily soiled siding. However, disadvantages include higher cost compared to homemade solutions, potential for harsh chemical exposure requiring appropriate safety measures (gloves, eye protection, and respiratory protection), and the possibility of environmental impact due to the chemical composition.
Some commercial products may also contain harsh chemicals that could damage certain types of siding if not used according to the manufacturer’s instructions. Always carefully read and follow the product label.
Homemade Cleaning Solutions, Siding cleaner sprayer
For less severe dirt and grime, a homemade solution can be a cost-effective and environmentally friendly alternative. A common recipe involves mixing a solution of water, oxygen bleach (sodium percarbonate), and a mild dish soap. The oxygen bleach provides bleaching power without the harshness of chlorine bleach, while the dish soap helps to loosen dirt and grime.
The exact ratio will depend on the level of soiling and the type of siding. A typical starting point might be a solution of 1 gallon of water, 1 cup of oxygen bleach, and 1/4 cup of dish soap.
This solution should be mixed thoroughly before use. Always test a small, inconspicuous area of your siding first to ensure the solution doesn’t damage the finish.
Preparing and Using a Homemade Siding Cleaning Solution
To prepare the solution, ensure you are working in a well-ventilated area. Combine the water, oxygen bleach, and dish soap in a large bucket, stirring gently until completely mixed. Avoid splashing the solution onto your skin or eyes.
Using appropriate safety gear, such as gloves and eye protection, is recommended. Apply the solution to the siding using your sprayer, working in small sections at a time. Allow the solution to dwell on the siding for the recommended time (usually 10-15 minutes, but check the specific instructions for your oxygen bleach product), then rinse thoroughly with clean water using the sprayer’s rinsing function or a garden hose.
Sprayer Maintenance
Proper maintenance is essential for extending the lifespan of your siding cleaner sprayer and ensuring its continued effectiveness. After each use, thoroughly rinse the sprayer tank and hose with clean water to remove any residual cleaning solution. This prevents clogging and ensures the sprayer is ready for the next use.
For more stubborn residue, a mild solution of water and vinegar can be used to clean the interior components. Allow the sprayer to air dry completely before storing it in a cool, dry place, away from direct sunlight and extreme temperatures.
Regular inspection for any wear and tear, such as cracks or leaks in the hose or tank, is recommended. Addressing these issues promptly will prevent more significant problems down the line.
Troubleshooting Common Problems
Even with careful preparation and proper technique, you might encounter some issues while using your siding cleaner sprayer. Understanding these common problems and their solutions will help ensure a smooth and efficient cleaning process. This section provides a troubleshooting guide to address the most frequently encountered difficulties.
Addressing these problems promptly can prevent further complications and ensure the longevity of your equipment.
Clogged Nozzles and Low Pressure
Nozzle clogs and low pressure are among the most common problems. Clogged nozzles restrict the flow of cleaning solution, leading to uneven cleaning and reduced effectiveness. Low pressure reduces the cleaning power, making it difficult to remove stubborn dirt and grime.
This table provides solutions for these issues:
| Problem | Solution |
|---|---|
| Clogged Nozzles | Carefully inspect the nozzles for any debris. Use a small pin or needle to gently clear any obstructions. If the clog persists, soak the nozzles in a solution of warm water and vinegar for about 30 minutes. Replace the nozzles if necessary. Regularly flush the nozzles with clean water after each use to prevent future clogs. |
| Low Pressure | Check the water supply connection to ensure it’s secure and there are no leaks. Inspect the pump for any damage or malfunctions. If the pressure remains low, consider checking the pressure regulator settings. In some cases, a faulty pump may need replacement. |
Uneven Cleaning
Uneven cleaning often results from inconsistent sprayer operation or inadequate pressure. This can leave streaks or patches of dirt on the siding.Maintaining consistent distance and angle between the sprayer and the siding surface is crucial for even coverage. Ensure the pressure is sufficient to effectively remove dirt and grime without damaging the siding material.
Overlapping spray patterns slightly during each pass helps ensure thorough cleaning. If unevenness persists after adjusting technique and pressure, consider a different cleaning solution or a more thorough pre-cleaning of the siding.
Siding Damage
Using excessive pressure or inappropriate cleaning solutions can cause damage to the siding. This might manifest as scratches, discoloration, or even material degradation.Always test the cleaning solution on an inconspicuous area of the siding first to check for any adverse reactions.
Avoid using abrasive cleaning solutions or excessive pressure, especially on delicate siding materials. Maintain a safe distance from the siding to prevent accidental damage. If damage occurs, consult a professional siding repair specialist.
Illustrative Examples
Seeing the difference between properly and improperly cleaned siding is crucial for understanding the effectiveness of your cleaning efforts. The following examples illustrate the visual changes you can expect with various siding materials after cleaning. Proper cleaning enhances the appearance and longevity of your home’s exterior.Properly cleaned siding exhibits a uniform color and texture, free from visible dirt, mildew, or other residues.
Improperly cleaned siding, conversely, may retain discoloration, show uneven cleaning, or even suffer damage from harsh cleaning methods.
Vinyl Siding Cleaning Results
Clean vinyl siding presents a bright, consistent color, reflecting light evenly across its surface. The smooth texture is unimpeded, and there’s an absence of streaks, stains, or lingering mildew. In contrast, improperly cleaned vinyl siding might display patchy discoloration, perhaps with dark streaks of mildew remaining in shadowed areas.
The surface may also show scratches or discoloration from abrasive cleaning methods. A dull, chalky appearance might also indicate the use of overly harsh chemicals.
Wood Siding Cleaning Results
Clean wood siding shows the natural grain and color of the wood, enhanced by the removal of dirt and grime. The texture remains smooth, with no visible buildup of algae or mildew. The color is even and consistent, reflecting the natural tone of the wood.
Improperly cleaned wood siding, on the other hand, may show uneven discoloration, with some areas remaining darker than others. The wood’s texture might be roughened by harsh scrubbing, and there could be lingering stains or mildew. In severe cases, improper cleaning could lead to damage to the wood’s finish or even the wood itself.
Brick Siding Cleaning Results
Clean brick siding presents a vibrant, consistent color, with the individual bricks clearly defined. The mortar lines are clean and distinct, and the overall texture is smooth. Any efflorescence (salt deposits) will have been removed, leaving a clean and even surface.
Improperly cleaned brick siding may retain stains or discoloration, particularly in the mortar. The brick’s color might appear uneven, and the texture could be roughened by harsh cleaning. Aggressive cleaning could also damage the mortar, leading to crumbling or weakening.
Cleaning Process Narrative: Vinyl Siding
Let’s consider cleaning a 10-foot section of vinyl siding. First, a thorough pre-rinse is performed using the sprayer to remove loose dirt and debris. This step is crucial for preventing the re-deposition of dirt during the cleaning process. Next, a siding cleaner solution is applied evenly to the section using the sprayer.
The solution is left to dwell for the recommended time (typically 5-10 minutes), allowing the cleaning agents to break down the dirt and mildew. Finally, a thorough rinsing is performed using the sprayer, ensuring all the cleaning solution and loosened debris are removed.
The immediate visual change is a noticeable lightening of the siding’s color as the dirt and grime are washed away. The final result is a clean, bright, and even-colored section of siding, ready for the next section to be cleaned.
Closing Notes
Cleaning your home’s siding can significantly enhance its curb appeal and protect its longevity. By understanding the various types of siding cleaner sprayers, selecting the appropriate model for your needs, and employing safe and effective cleaning techniques, you can achieve professional-looking results.
This guide has provided a comprehensive overview of the process, from choosing the right sprayer and cleaning solutions to troubleshooting common problems. Remember, proper maintenance and safe practices are key to maximizing the lifespan of your sprayer and preserving the beauty of your home’s exterior.
With the right knowledge and tools, achieving a pristine finish is well within your reach.
