Bostitch Coil Siding Nails: A Comprehensive Guide
Product Overview
Bostitch coil siding nails are a staple in the construction and renovation industries, offering a reliable and efficient fastening solution for various siding applications. These nails are designed for professional use and provide a balance of strength, durability, and ease of application.
Their coil design allows for rapid installation, significantly increasing productivity on the job site.Bostitch coil siding nails are manufactured to exacting standards, ensuring consistent performance and minimizing the risk of bending or breaking during installation. This consistency contributes to a professional finish and reduces material waste.
Nail Specifications and Features
Bostitch offers a range of coil siding nails to suit different siding materials and project requirements. Gauge refers to the thickness of the nail wire; common gauges include 8d, 9d, and 11d, each corresponding to a specific diameter and strength.
Length options typically vary, accommodating different siding thicknesses and installation methods. Head styles are designed for specific siding types, with common styles including smooth, annular, and countersunk heads. The choice of gauge, length, and head style depends on the specific siding material and desired aesthetic outcome.
For example, thicker siding would necessitate longer nails, while a countersunk head might be preferred for a flush finish.
Materials and Manufacturing
Bostitch coil siding nails are typically manufactured from high-carbon steel, a material chosen for its strength, hardness, and resistance to bending and breaking. This ensures reliable performance even under pressure. The manufacturing process involves precise cutting, shaping, and heat treatment to achieve the desired nail dimensions and properties.
A coating, often zinc, is applied to enhance corrosion resistance and extend the lifespan of the nails, particularly important in exterior applications exposed to the elements. This coating also improves the nail’s driving characteristics.
Comparison with Competitor Products
While several manufacturers produce coil siding nails, Bostitch products are often recognized for their consistent quality and reliable performance. Key differences compared to competitor products may include variations in steel grade, coating type, and head design. Some competitors might offer nails with slightly different gauge options or length ranges.
However, Bostitch consistently emphasizes quality control, resulting in nails with fewer defects and a higher degree of consistent performance. This contributes to a more efficient installation process and a superior finished product. Direct comparisons would require analyzing specific competitor models and their respective specifications, but the emphasis on consistent quality and performance remains a key differentiator for Bostitch.
Applications and Uses
Bostitch coil siding nails offer a versatile and efficient solution for a wide range of exterior siding projects. Their consistent performance and ease of use make them a preferred choice for both professional contractors and DIY enthusiasts. This section details the applications, proper techniques, and advantages of using Bostitch coil siding nails.
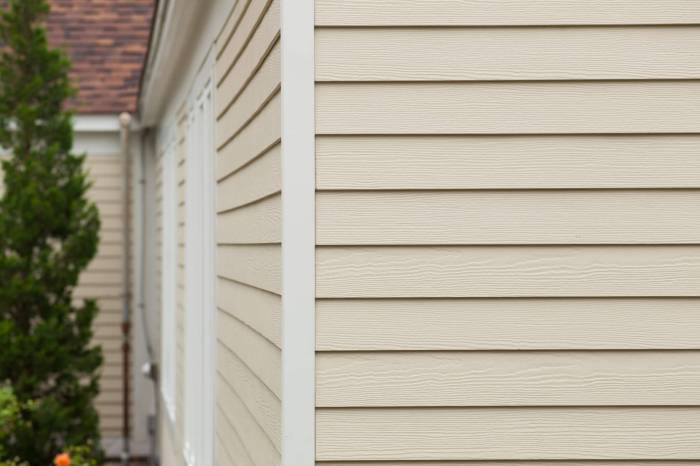
Siding Material Compatibility
Bostitch coil siding nails are suitable for use with various siding materials, ensuring a secure and long-lasting installation. Common applications include vinyl siding, wood siding (including clapboard and shiplap), fiber cement siding, and engineered wood siding. The choice of nail size and type should always be matched to the specific siding material and thickness for optimal performance.
Using an inappropriately sized nail can lead to damage or compromised installation.
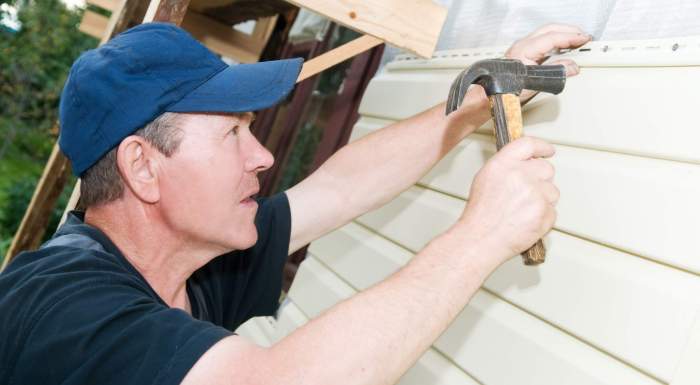
Techniques for Siding Nail Installation
Proper installation techniques are crucial for achieving a durable and aesthetically pleasing siding installation. When using Bostitch coil siding nails, it’s essential to use a compatible nail gun that is properly adjusted for the specific nail size and siding material.
The nail gun should be held at a consistent angle to ensure proper penetration and prevent damage to the siding. Consistent spacing between nails is also vital for a strong and even installation. Pre-drilling pilot holes may be necessary for harder siding materials like fiber cement to prevent splitting.
Always follow the manufacturer’s instructions for both the nail gun and the siding material for best results. Overdriving nails should be avoided as this can lead to damage to the siding.
Advantages of Coil Nails over Individual Nails
The use of coil nails offers several significant advantages over using individual nails for siding installation. Coil nails significantly increase the speed and efficiency of the installation process, reducing labor costs and project completion time. The continuous feed system of a coil nail gun eliminates the time-consuming task of reloading individual nails, allowing for uninterrupted work.
Furthermore, coil nails typically offer superior consistency in terms of nail length and driving power, leading to a more uniform and reliable installation. This consistency minimizes the risk of inconsistencies that can lead to issues with siding alignment and overall appearance.
Nail Size and Siding Thickness Compatibility
| Nail Size | Siding Thickness (inches) | Recommended Application | Potential Issues |
|---|---|---|---|
| 8d (2.5 inches) | 0.25
|
Thin vinyl siding, some wood siding | Insufficient penetration for thicker siding; potential for popping out |
| 10d (3 inches) | 0.375
|
Medium thickness vinyl, wood siding, engineered wood | May be too long for thinner siding; potential for splitting thicker siding if not pre-drilled |
| 12d (3.25 inches) | 0.5
|
Thicker wood siding, fiber cement siding | Requires pre-drilling for many applications; may cause splitting if not used correctly |
| 16d (3.5 inches) | 0.75+ | Very thick wood siding, specialized applications | Almost always requires pre-drilling; increased risk of splitting |
Installation Process and Best Practices
Installing siding with Bostitch coil siding nails is a straightforward process when proper techniques and safety measures are followed. This section details the steps involved, emphasizing safety and efficiency to ensure a professional-looking and durable finish.
Remember to always consult the manufacturer’s instructions for your specific siding material and nail gun model.
Step-by-Step Siding Installation Guide, Bostitch coil siding nails
This guide Artikels the typical installation procedure. Variations may exist depending on the specific siding type and building design. Always refer to the manufacturer’s instructions for your chosen siding material.
- Preparation:Begin by ensuring the underlying sheathing is properly prepared, clean, and level. Any damaged or warped sheathing should be repaired or replaced before installation.
- Starting Row:Install the first row of siding according to the manufacturer’s instructions, ensuring proper alignment and spacing. Securely fasten using the Bostitch coil siding nails.
- Subsequent Rows:Install subsequent rows, overlapping the previous row according to the manufacturer’s specifications. Maintain consistent spacing and alignment throughout the installation process. Use the nail gun to drive nails into the designated locations on each siding piece.
- Nail Placement and Depth:Drive nails at the recommended depth and spacing to ensure secure fastening without damaging the siding. Overdriving nails can cause splitting, while underdriving can compromise the hold.
- Finishing:Once all siding is installed, inspect for any gaps or misalignments and make necessary corrections. Caulk any gaps or seams as needed for weatherproofing.
Safety Precautions
Using a nail gun requires careful attention to safety. Ignoring safety procedures can lead to serious injury.
- Eye Protection:Always wear safety glasses or a face shield to protect your eyes from flying debris.
- Hearing Protection:Nail guns can be loud. Wear hearing protection to prevent hearing damage.
- Proper Nail Gun Handling:Never point the nail gun at yourself or others. Keep your fingers clear of the firing mechanism. Ensure the nail gun is properly maintained and in good working order.
- Work Area Safety:Maintain a clean and organized work area. Remove any obstructions that could cause tripping or accidents.
- Disconnect Air Supply:Always disconnect the air supply from the nail gun before cleaning, maintenance, or changing nails.
Tips and Tricks for Efficient Installation
Several techniques can improve efficiency and accuracy.
- Pre-drilling Pilot Holes:For harder siding materials, pre-drilling pilot holes can prevent splitting and ensure accurate nail placement.
- Using a Level:Regularly check the levelness of the siding to ensure a straight and even installation.
- Using a Measuring Tape:Accurately measure and mark the siding for cuts and ensure consistent spacing between nails.
- Working with a Partner:Working with a partner can significantly improve efficiency, especially when handling longer siding pieces.
- Proper Nail Gun Maintenance:Regular maintenance of your nail gun, including cleaning and lubrication, ensures optimal performance and reduces the risk of malfunctions.
Proper Nail Placement and Spacing
Visual Representation: Imagine a diagram showing various siding types (e.g., clapboard, shiplap). Each siding type would have a corresponding illustration depicting the ideal nail placement. For example, clapboard siding would show nails driven near the top edge of each overlapping piece, while shiplap siding would illustrate nails driven near the overlapping seam.
The diagrams would clearly show the recommended spacing between nails for each siding type, ensuring a secure and aesthetically pleasing finish. Consistent spacing and proper depth are crucial for preventing splitting and ensuring a strong hold. The diagrams would also illustrate the importance of avoiding nailing too close to the edges of the siding.
Troubleshooting and Maintenance: Bostitch Coil Siding Nails
Proper installation and regular maintenance of your Bostitch coil nailer are crucial for efficient siding installation and to prevent costly mistakes. Addressing common problems promptly will ensure a smooth workflow and a high-quality finish. This section Artikels troubleshooting steps and maintenance practices to help you maximize the performance of your Bostitch coil nailer and achieve optimal results.
Common Problems and Solutions During Siding Installation
Several issues can arise during siding installation using Bostitch coil nails. Understanding these problems and their solutions is essential for efficient and successful project completion. Addressing these issues promptly minimizes delays and ensures a professional-looking final product.
- Problem:Nails are not driving fully into the siding.
- Solution:Check the air pressure. Insufficient air pressure is a common cause. Ensure the pressure is within the recommended range specified in your nailer’s manual. Also inspect the nail gun for clogs or debris that may be obstructing the nail path.
Finally, ensure the nails are the correct size and type for your siding material.
- Problem:Nails are bending or jamming.
- Solution:This often indicates either improper nailing technique (such as hitting knots or hard spots in the wood) or a problem with the nail gun itself. Inspect the nail gun for obstructions and ensure it’s properly lubricated. Using the wrong nail type for the material can also cause bending.
Consider adjusting your nailing angle or using a different nail type if necessary.
- Problem:Siding is splitting or cracking.
- Solution:This may be due to using nails that are too long or driving them too forcefully. Use the correct nail length for your siding thickness and avoid excessive force when nailing. Pre-drilling pilot holes in particularly hard or dense wood can also prevent splitting.
- Problem:The nail gun is not firing consistently.
- Solution:This could be due to low air pressure, a clogged air hose, or a malfunctioning nail gun. Check the air pressure, inspect the air hose for kinks or blockages, and ensure the nail gun is properly lubricated. If the problem persists, contact Bostitch customer support.
Causes and Prevention of Bent or Damaged Nails
Bent or damaged nails compromise the structural integrity of the siding installation and detract from the overall appearance. Understanding the causes allows for proactive prevention measures.
- Cause:Hitting hard objects within the siding material (e.g., knots, embedded debris).
- Prevention:Carefully inspect the siding material before nailing, pre-drilling pilot holes in particularly hard areas, and using appropriate nailing techniques.
- Cause:Using nails that are too long or too short for the siding material.
- Prevention:Always use the correct nail length recommended for your specific siding type and thickness.
- Cause:Insufficient air pressure in the nail gun.
- Prevention:Maintain proper air pressure within the manufacturer’s recommended range.
- Cause:Improper maintenance of the nail gun.
- Prevention:Regularly clean and lubricate the nail gun according to the manufacturer’s instructions.
Nail Gun Maintenance
Regular maintenance is essential to ensure the longevity and optimal performance of your Bostitch coil nailer. This involves several key steps that are critical for preventing malfunctions and ensuring consistent nailing.
- Regular Cleaning:After each use, remove any debris or dust from the nail gun using compressed air or a soft brush. Pay close attention to the areas around the nose and driving mechanism.
- Lubrication:Periodically lubricate moving parts of the nail gun with a suitable lubricant recommended by Bostitch. This helps prevent wear and tear and ensures smooth operation.
- Inspection:Regularly inspect the nail gun for any signs of damage, wear, or loose parts. Address any issues promptly to prevent more serious problems.
- Professional Service:If you encounter persistent problems or suspect a more serious malfunction, contact Bostitch customer support or a qualified repair technician for professional service.
Cost and Value Analysis
Choosing the right fastening method for siding projects significantly impacts both the initial investment and long-term costs. This section analyzes the cost-effectiveness of Bostitch coil siding nails compared to alternative methods, highlighting their impact on project timelines and overall value.Bostitch coil siding nails offer a compelling combination of efficiency and durability, leading to potential cost savings in several areas.
While the initial purchase price might seem slightly higher than some alternatives like individual nails or staples, the significant time savings and reduced labor costs often outweigh this difference. The streamlined application process inherent in coil nail systems reduces material waste and increases overall productivity.
Cost Comparison with Alternative Fastening Methods
The cost of fastening siding varies depending on the chosen method, material quantities, and labor rates. A direct comparison requires considering factors like material cost per unit, installation time, waste generation, and potential rework due to faulty fastening. For example, using individual nails requires significantly more time for loading and hammering, increasing labor costs.
Staples, while faster than individual nails, may not offer the same holding power or durability as Bostitch coil siding nails, potentially leading to future repair expenses. The reduced installation time with coil nails translates to lower labor costs, a key factor in overall project budgeting.
A hypothetical scenario comparing a 1000 sq ft siding project using individual nails versus Bostitch coil siding nails would reveal a considerable difference in labor hours and, consequently, labor costs. While precise figures depend on specific labor rates and project complexities, a significant reduction in labor time— potentially 30-50% — is realistic with the coil nailing system.
Impact on Overall Project Costs and Time
The use of Bostitch coil siding nails directly impacts project costs and schedules. The high-speed application of coil nails dramatically reduces installation time compared to manual nailing or stapling. This time savings translates to lower labor costs and a faster project completion, potentially allowing for quicker project turnover and increased profitability for contractors.
Furthermore, the reduced risk of misfires and jams, common with other fastening methods, minimizes material waste and avoids costly rework. Consider a scenario where a contractor completes a siding project two days faster due to the efficiency of coil nails; this translates to substantial savings in labor costs and allows the contractor to take on another job sooner.
Long-Term Value and Durability
Investing in high-quality fastening solutions like Bostitch coil siding nails offers long-term value and reduces the likelihood of future maintenance or repairs. The superior holding power and corrosion resistance of these nails ensure the siding remains securely fastened for years, protecting the building’s exterior and maintaining its aesthetic appeal.
The reduced risk of nail pops or siding detachment minimizes costly repairs and potential water damage, resulting in significant long-term savings. Compared to cheaper alternatives that might compromise on durability, the longevity of Bostitch coil siding nails justifies their slightly higher initial cost.
The long-term cost savings associated with reduced maintenance and repairs far outweigh any initial price difference. This ensures a greater return on investment over the lifespan of the building.
Final Conclusion

Successfully installing siding relies heavily on choosing the right fasteners and employing proper techniques. Bostitch coil siding nails, with their efficiency and reliability, offer a compelling solution for a wide range of siding materials and project scales. By understanding the features, applications, and best practices Artikeld in this guide, you can confidently undertake your next siding project, achieving professional-level results with minimal effort.
Remember to prioritize safety, utilize the appropriate nail gun, and follow the recommended procedures for optimal performance and a long-lasting, aesthetically pleasing finish. The time and cost savings associated with coil nails, coupled with the durability they provide, make them a smart investment for any siding project.