Can I Replace Vinyl Siding Myself?
Assessing Your DIY Skills
Can i replace vinyl siding myself – Replacing vinyl siding is a significant home improvement project requiring a blend of physical dexterity, planning skills, and familiarity with basic construction techniques. Successfully completing this task without professional assistance depends heavily on your existing DIY capabilities and comfort level with working at heights.
An honest self-assessment is crucial before embarking on this endeavor.Successfully completing a vinyl siding replacement project hinges on possessing a specific set of DIY skills. Underestimating these requirements can lead to costly mistakes, project delays, or even personal injury.
A thorough evaluation of your abilities will determine if a DIY approach is suitable or if professional help is warranted.
Essential DIY Skills for Vinyl Siding Replacement
A range of skills is needed for this project. Possessing these skills will significantly increase your chances of success. Lacking several of these skills strongly suggests seeking professional assistance.
- Measuring and Cutting:Accurate measurements are paramount to avoid material waste and ensure a proper fit. Experience with using measuring tapes, levels, and cutting tools (like a circular saw or utility knife) is essential.
- Working at Heights:Vinyl siding installation often requires working on ladders or scaffolding. Comfort and safety when working at heights are crucial.
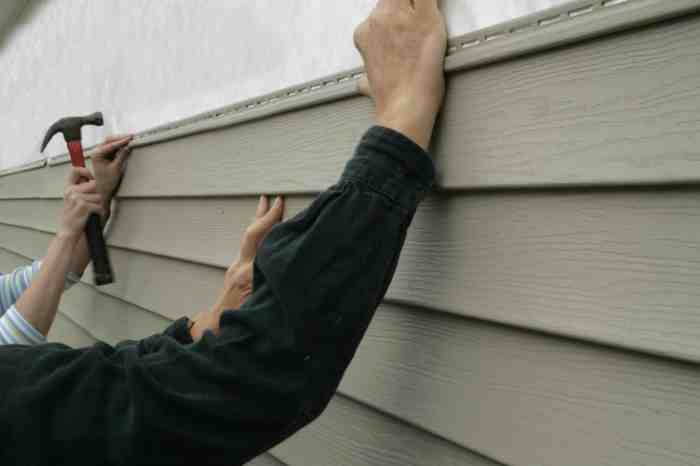
- Basic Carpentry Skills:Understanding how to use tools like hammers, drills, and nail guns is necessary for securing the siding and trim.
- Understanding of Building Codes:Familiarity with local building codes and regulations regarding siding installation is essential for ensuring the project’s legality and safety.
- Problem-Solving Skills:Unexpected issues can arise during installation. The ability to identify and solve problems creatively and effectively is a valuable asset.
Difficulty Comparison to Other Home Improvement Projects
The difficulty of vinyl siding replacement can be compared to other common home improvement projects to provide a clearer perspective. It is more complex than painting a room or assembling flat-pack furniture, but less demanding than a complete roof replacement or major structural remodeling.
It requires more precision and attention to detail than simple tasks like installing a ceiling fan.
Similar Skill Level Projects
Several projects demonstrate a similar skill level to vinyl siding replacement. Successfully completing these projects suggests a reasonable aptitude for tackling vinyl siding installation. Conversely, difficulties experienced in these areas should signal caution when considering a DIY siding replacement.
- Installing Exterior Trim:This involves precise cutting and installation of wood or composite materials, similar to the precision needed for vinyl siding.
- Building a Deck or Fence:These projects require working with lumber, measuring accurately, and using various tools, mirroring the skills needed for siding installation.
- Installing Window or Door Trim:This demands attention to detail and precision in cutting and fitting, reflecting the meticulous nature of vinyl siding work.
DIY Feasibility Flowchart
This flowchart Artikels a decision-making process to assess the feasibility of a DIY vinyl siding replacement.
Start:Do you possess the essential DIY skills listed above?
Yes:Have you completed similar projects successfully in the past?
Yes:Are you comfortable working at heights and using power tools safely?
Yes:DIY approach is likely feasible. Proceed with careful planning and preparation.
No (at any point):Consider seeking professional assistance for vinyl siding replacement. A professional will ensure quality, safety, and compliance with building codes.
End
Cost Comparison
Replacing vinyl siding, whether you do it yourself or hire a professional, involves significant costs. Understanding these costs, both upfront and long-term, is crucial for making an informed decision. This section compares the expenses associated with each approach, highlighting potential hidden costs and financial risks.
Cost Breakdown: DIY vs. Professional
The following table provides a general cost comparison. Actual prices will vary depending on factors such as the size of your home, the complexity of the project, your location, and the quality of materials chosen. These figures are estimates based on average project costs.
| Item | DIY Cost | Professional Cost | Cost Difference |
|---|---|---|---|
| Materials (Siding, Trim, Fasteners) | $2,000
|
$2,500
|
$500
|
| Labor | $0 | $5,000
|
$5,000
|
| Tools (Rental or Purchase) | $100
|
Included in labor cost | $100
|
| Waste Disposal | $50
|
Included in labor cost | $50
|
| Permits (if required) | $100
|
$100
|
$0 (Equal cost for both) |
| Total Estimated Cost | $2,250
|
$7,600
|
$5,350
|
Hidden Costs: DIY
Hidden costs associated with a DIY vinyl siding replacement can include unexpected material needs (damage during removal, unforeseen repairs), tool repairs or replacements, and the cost of time and potential injury. For instance, discovering rotted sheathing beneath the old siding could add significantly to the material costs and labor time.
Hidden Costs: Professional
Professionals may add unexpected costs through unforeseen repairs (rotted wood, insect damage), changes in scope of work, or additional charges for waste removal beyond the initial estimate. A lack of transparency in pricing can also lead to surprises. For example, an initial estimate might not include the cost of removing and disposing of old siding, adding a substantial amount to the final bill.
Financial Risks of DIY Vinyl Siding Replacement
Attempting a DIY vinyl siding replacement carries several financial risks. Poor workmanship can lead to damage to the underlying structure, water infiltration causing mold and rot, and ultimately, far more expensive repairs in the future. These repairs could easily exceed the initial savings from a DIY approach.
Additionally, incorrect installation can void warranties on the siding materials.
Long-Term Cost Implications
A professionally installed vinyl siding job, while more expensive upfront, often offers a longer lifespan and requires less maintenance, resulting in lower long-term costs. Conversely, a poorly installed DIY job might require premature repairs or replacement, leading to significantly higher costs over time.
For example, a DIY job that leads to water damage could result in costly repairs to the underlying structure, far exceeding the initial cost savings.
Tools and Materials
Replacing vinyl siding is a labor-intensive project requiring the right tools and high-quality materials for a successful and long-lasting outcome. Proper preparation and the selection of appropriate materials are crucial for achieving a professional finish. This section details the necessary tools and materials, along with considerations for material selection and sourcing.
Necessary Tools and Materials
Choosing the right tools and materials is essential for a smooth and efficient vinyl siding installation. The following list categorizes the necessary items by their function in the process. Remember to always prioritize safety and use appropriate personal protective equipment (PPE) throughout the project.
- Measuring and Marking:Measuring tape, pencil, chalk line, level.
- Cutting and Shaping:Circular saw with fine-tooth blade (for cutting vinyl siding), utility knife, tin snips (for metal flashing), hand saw.
- Installation and Fastening:Hammer, nail gun (optional but recommended for efficiency), siding staples, various sizes of nails, screwdriver (for J-channel and other trim).
- Safety Equipment:Safety glasses, work gloves, dust mask.
- Other Essential Tools:Pry bar (for removing old siding), ladder (appropriate height and stability for your home), caulk gun, puttied knife.
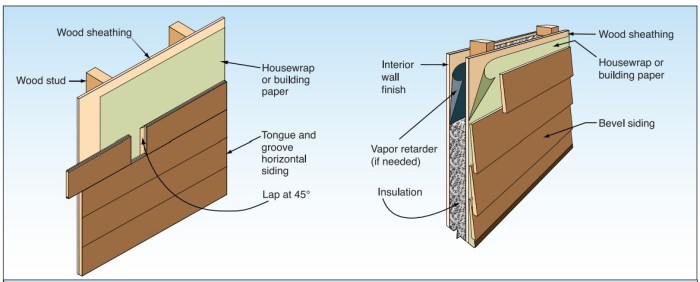
Types of Vinyl Siding and Suitability for DIY Installation
Several types of vinyl siding exist, each with varying characteristics and suitability for DIY installation. The choice depends on your budget, aesthetic preferences, and DIY skill level.
- Standard Vinyl Siding:This is the most common and generally the easiest to install, making it suitable for DIY projects. It offers a wide range of colors and styles at a relatively affordable price.
- Double 4-Inch Vinyl Siding:This type offers increased durability and insulation compared to standard siding, but it can be slightly more challenging to install due to its thicker profile.
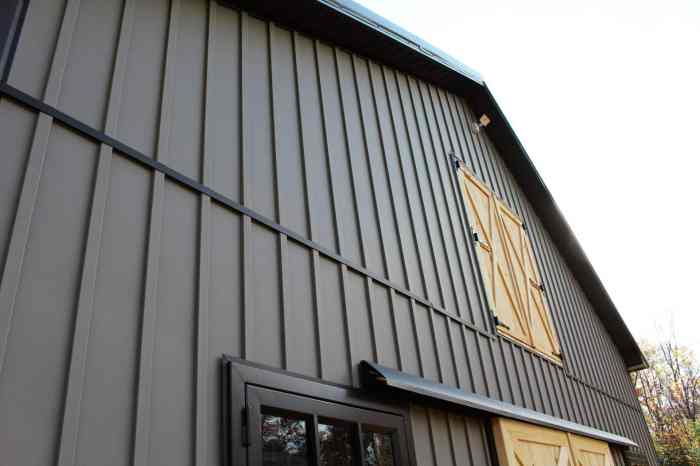
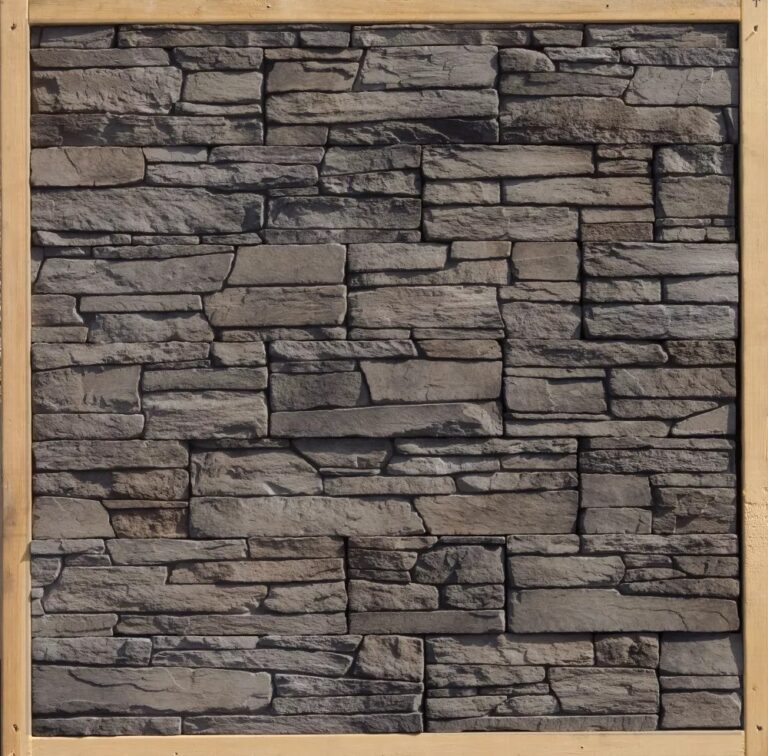
- Dutch Lap Vinyl Siding:This style mimics the appearance of traditional wood lap siding, adding a more rustic or classic look. Installation is similar to standard siding but may require more attention to detail.
- Insulated Vinyl Siding:This option combines vinyl siding with foam insulation, improving energy efficiency. While more expensive, it can be a worthwhile investment in the long run, although the added insulation may slightly increase installation complexity.
Importance of High-Quality Materials
Using high-quality vinyl siding and related materials is crucial for the longevity and aesthetic appeal of your project. Lower-quality materials are more prone to damage, fading, warping, and cracking, potentially requiring premature replacement and increasing overall costs. Investing in reputable brands ensures durability, color consistency, and a warranty that protects your investment.
For example, siding from a reputable manufacturer might offer a 30-year warranty against fading and cracking, whereas a lesser-known brand may offer only a 10-year warranty.
Sourcing Materials at the Best Possible Price
Several strategies can help you find the best prices on vinyl siding and related materials.
- Compare Prices from Multiple Suppliers:Check local home improvement stores, lumber yards, and online retailers to compare prices and availability.
- Look for Sales and Discounts:Many suppliers offer seasonal sales or discounts on bulk purchases. Planning your project around these sales can save you a significant amount of money.
- Consider Buying in Bulk:Purchasing larger quantities can often result in lower per-unit costs, especially if you have a large area to cover.
- Check for Manufacturer Rebates or Promotions:Some manufacturers offer rebates or promotional offers on their products, which can further reduce your overall cost.
Step-by-Step Installation Process: Can I Replace Vinyl Siding Myself
Replacing vinyl siding is a multi-step process requiring careful planning and execution. This section provides a detailed guide to ensure a successful and safe installation. Remember to always prioritize safety and consult with a professional if you encounter any significant challenges.
Removing Old Siding, Can i replace vinyl siding myself
Removing existing siding is the crucial first step. Begin by disconnecting any electrical or plumbing fixtures attached to the siding. Then, carefully pry off the bottom row of siding, starting from a corner. Work your way up, removing each row individually.
Use a pry bar and a hammer to gently loosen and remove the siding, taking care not to damage the underlying sheathing. Dispose of the old siding responsibly, following local regulations. Safety glasses and work gloves are essential throughout this process to protect against splinters and debris.
For larger sections, consider using a demolition bar for more efficient removal. Always support yourself properly when working at heights; using a ladder safely is crucial.
Installing New Vinyl Siding
Once the old siding is removed, inspect the underlying sheathing for any damage. Repair any rotted or damaged areas before proceeding. Start by installing the starter strip along the bottom of the wall, ensuring it’s level and plumb. This provides a foundation for the rest of the siding.
The next step involves installing the first course of siding, overlapping the starter strip and securing it with nails or screws according to the manufacturer’s instructions. Ensure proper spacing between panels and maintain consistent alignment. Subsequent rows are installed in the same manner, overlapping the previous row by the specified amount.
Remember to always use the appropriate fasteners and to avoid overdriving them.
Handling Corners, Windows, and Doors
Vinyl siding installation requires special attention around corners, windows, and doors. Corner pieces are designed to fit snugly at exterior angles, creating a clean and weather-resistant finish. These are typically installed before the main siding panels. Around windows and doors, you’ll use J-channels, trim pieces, and other specialized components to ensure a neat and professional appearance.
Accurate measurements are vital to ensure proper fit and prevent gaps. These specialized pieces require precise cutting and fitting. Use a sharp utility knife or a miter saw for accurate cuts.
Key Steps for Successful Installation
This numbered list summarizes the essential steps for a successful vinyl siding installation:
- Prepare the Surface:Inspect and repair any underlying damage to the wall sheathing.
- Install the Starter Strip:Begin by installing a level starter strip along the bottom of the wall.
- Install the First Course of Siding:Secure the first row of siding, ensuring proper overlap and alignment.
- Install Subsequent Rows:Continue installing rows, maintaining consistent overlap and alignment.
- Install Corner Pieces:Use corner pieces to create a clean finish at exterior angles.
- Install Window and Door Trim:Use J-channels and trim pieces to create a neat finish around openings.
- Caulk and Seal:Caulk any gaps or seams to prevent water intrusion.
- Final Inspection:Conduct a thorough inspection to ensure proper installation and alignment.
Troubleshooting Common Issues
Installing vinyl siding yourself can present challenges. This section addresses common problems and their solutions, ensuring a successful and long-lasting installation. Understanding these potential issues beforehand can save time, money, and frustration.
Improper Cutting and Fastening
Incorrectly cut siding pieces or improperly fastened panels are frequent problems. Improper cutting can lead to gaps, misaligned seams, and an unprofessional finish. Fastening issues, such as using too many or too few nails, or driving nails too deeply or shallowly, can cause warping, buckling, and damage to the siding.
To remedy cutting errors, carefully re-measure and cut the pieces using sharp tools, ensuring clean, precise cuts. For fastening, use the manufacturer’s recommended nail pattern and depth, ensuring the nails are adequately secured without damaging the siding. Over-driving nails can cause the vinyl to bulge, while under-driving can lead to loose panels.
Addressing Damaged or Warped Siding
Damaged or warped siding can result from various factors, including improper handling, exposure to extreme temperatures, or impacts. Inspect each panel carefully before installation to identify any pre-existing damage. Warped panels are usually noticeable and should be replaced.
Damaged panels might require patching or replacement depending on the severity of the damage. Minor scratches can often be buffed out, but significant damage necessitates replacement. When replacing damaged or warped panels, ensure proper alignment with surrounding panels to maintain a consistent look.
Ventilation and Moisture Control
Proper ventilation is crucial for preventing moisture buildup behind the siding, which can lead to mold, mildew, and rot. Ensure adequate ventilation in the wall cavity by using appropriate flashing and ensuring that vents are not blocked. Moisture control is equally important.
Proper flashing around windows and doors is essential to prevent water intrusion. Inspect all seams and joints to ensure they are properly sealed to prevent water penetration. Regularly check the siding for signs of moisture damage, such as discoloration or bubbling.
Addressing moisture problems promptly can prevent more extensive and costly repairs.
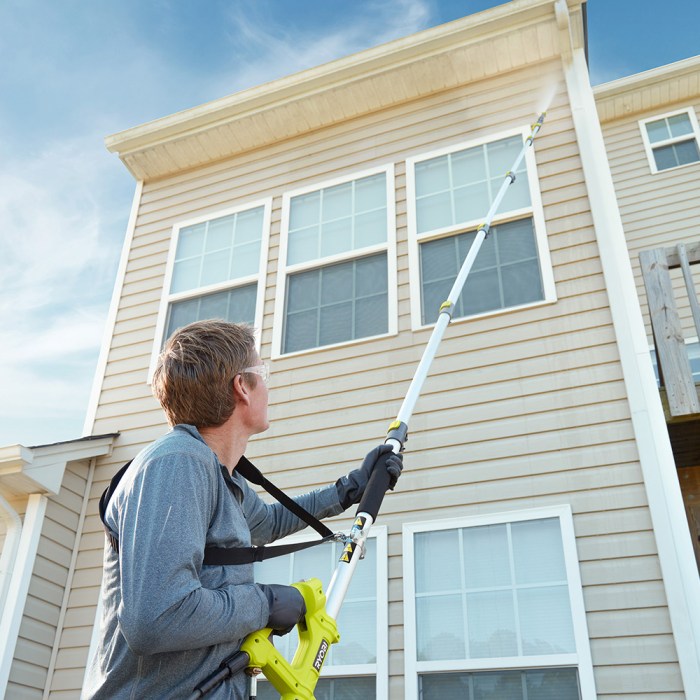
Safety Precautions

Replacing vinyl siding is a physically demanding project involving working at heights and handling potentially hazardous materials. Prioritizing safety throughout the entire process is crucial to prevent accidents and injuries. This section details essential safety measures to ensure a successful and safe renovation.
Personal Protective Equipment (PPE)
Appropriate personal protective equipment is essential for minimizing risks associated with various tasks involved in vinyl siding replacement. This includes, but is not limited to, safety glasses to protect your eyes from flying debris, work gloves to protect your hands from cuts and splinters, hearing protection to reduce noise exposure from power tools, and a dust mask to prevent inhalation of particles generated during cutting and removal of old siding.
A hard hat is strongly recommended, especially when working at heights. For extended periods of work in direct sunlight, consider wearing sunscreen and appropriate clothing to protect against sunburn and heatstroke.
Working at Heights
Working at heights presents significant risks, including falls. To mitigate these risks, always use a sturdy and properly secured ladder that extends at least three feet above the roofline. Ensure the ladder is placed on a stable and level surface.
Never overreach while on a ladder; always reposition the ladder to maintain a secure footing. Consider using a safety harness and lanyard attached to a secure anchor point if working at significant heights for extended periods. If the project requires extensive work at heights, professional assistance from a qualified contractor may be a safer and more efficient option.
For example, if you need to replace siding on a two-story building, scaffolding might be a necessary safety measure to avoid the risks associated with ladder use at significant heights.
Waste Disposal
Proper disposal of old siding and other waste materials is crucial for environmental protection and compliance with local regulations. Old vinyl siding often contains materials that may be harmful if improperly disposed of. Check with your local waste management authority for guidelines on recycling or proper disposal methods for vinyl siding and other construction debris.
Many municipalities offer separate collection services for construction waste, or you may need to transport the waste to a designated recycling center or landfill. Separating different types of waste (wood, metal, plastic) before disposal facilitates easier and more efficient recycling or proper landfill disposal.
Failing to properly dispose of waste can result in fines or other penalties.
Emergency Procedures
Having a plan in place for emergencies is crucial. Before starting the project, identify the location of the nearest emergency phone and first-aid kit. Inform someone of your plans and expected completion time. If an injury occurs, immediately seek medical attention.
In case of a fall, do not move the injured person unless absolutely necessary. Call emergency services immediately and provide them with your location and a description of the accident. For less serious injuries, apply first aid as needed and monitor the injured person for any worsening symptoms.
Having a designated emergency contact person informed about the project is a crucial safety measure.
Visual Guide
This section provides a visual comparison of properly and improperly installed vinyl siding, highlighting key features to help you assess the quality of your own work or that of a professional. Understanding these visual cues will aid in identifying potential problems and ensuring a long-lasting, aesthetically pleasing result.Properly installed vinyl siding presents a uniform and clean appearance, showcasing the manufacturer’s intended design.
Poorly installed siding, however, can significantly detract from a home’s curb appeal and even compromise its structural integrity.
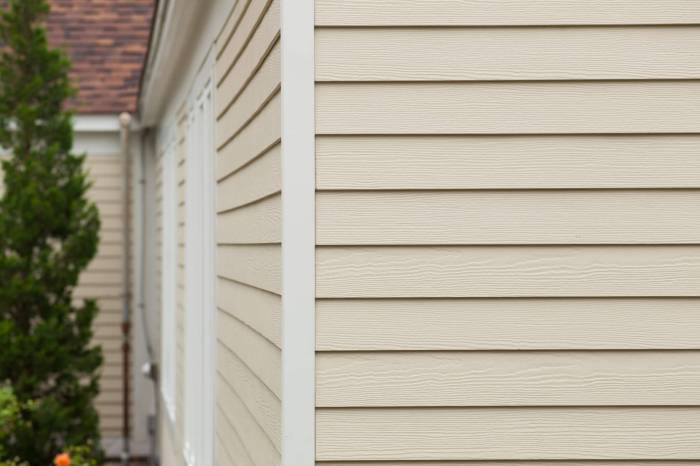
Properly Installed Vinyl Siding
Properly installed vinyl siding exhibits several key characteristics. The panels should be neatly aligned, with consistent spacing between them. The seams should be tight and straight, without gaps or overlaps. The edges of the panels should fit snugly against the underlying structure, and there should be no visible buckling or warping.
The color and texture should be uniform across all panels, reflecting the chosen style and manufacturer’s specifications. Flashing around windows and doors should be neatly installed and fully sealed, preventing water penetration. Finally, the overall impression should be one of a professional, seamless finish that enhances the home’s appearance.
Imagine a newly sided home, where the panels lay flat and smooth against the wall, the colors are vibrant and consistent, and the trim work is crisp and clean, enhancing the overall architectural lines of the house.
Poorly Installed Vinyl Siding
Conversely, poorly installed vinyl siding reveals several common flaws. Uneven spacing between panels creates an unprofessional and visually unappealing look. Gaps or overlaps between panels allow water to penetrate, leading to potential damage to the underlying structure and the growth of mold or mildew.
Buckling or warping of the panels indicates improper installation or exposure to excessive heat. Uneven cuts and misaligned edges disrupt the clean lines and symmetry of the siding. Furthermore, improperly installed flashing can lead to water damage around windows and doors, resulting in rotting wood and costly repairs.
Imagine a house with wavy, misaligned siding, where panels bulge outward or gaps are visible between them. The color may appear faded or uneven, and the overall impression is one of shoddy workmanship.
Before and After Vinyl Siding Replacement
Consider a house before siding replacement. The old siding might be cracked, faded, and uneven in color. Peeling paint might be visible, and there might be evidence of water damage around windows and doors. The overall appearance is likely dated and detracts from the home’s curb appeal.
The house might look tired and in need of repair.After the replacement, the same house is transformed. The new vinyl siding presents a clean, uniform appearance. The color is vibrant and consistent, and the panels are neatly aligned.
The previously visible damage is concealed, and the overall impression is one of a well-maintained and attractive home. The house now projects a sense of modernity and improved value. The contrast between the before and after images showcases the significant impact that proper vinyl siding installation can have on a home’s aesthetic appeal and perceived value.
The improved appearance often increases the property’s market value considerably.
Last Recap
Ultimately, the decision of whether to replace your vinyl siding yourself hinges on a careful assessment of your skills, budget, and risk tolerance. While DIY installation offers the potential for significant cost savings, it requires a commitment to meticulous planning, careful execution, and a willingness to learn.
This guide has provided a framework for making that decision, equipping you with the knowledge to approach this project confidently, whether you choose the DIY route or opt for professional assistance. Remember, a successful outcome, regardless of your chosen method, will result in a visually appealing and durable exterior for your home.