Home Depot Vinyl Siding Corner Trim Guide
Product Overview: Home Depot Vinyl Siding Corner Trim
Home depot vinyl siding corner trim – Home Depot offers a wide variety of vinyl siding corner trim options to suit different budgets and aesthetic preferences. Choosing the right trim can significantly impact the overall look and longevity of your siding installation. This overview will explore the different types available, highlighting their features, benefits, and price points to aid in your selection process.
Types of Vinyl Siding Corner Trim at Home Depot
Home Depot stocks several types of vinyl siding corner trim, each designed for specific applications and stylistic choices. These typically include J-channel, outside corner trim, and inside corner trim, often varying in material thickness, color options, and manufacturer. The differences affect both the installation process and the final appearance.
Features and Benefits of Different Trim Types
J-channel is a versatile trim used to finish the edges of siding panels, often at the corners of a house, but also along the roofline or around windows and doors. It provides a clean, finished look and protects the edges of the siding from damage.
Outside corner trim is specifically designed to create a neat, sharp corner, while inside corner trim achieves the same effect for interior corners. Some trims offer enhanced durability through UV resistance, preventing fading and cracking over time. Certain manufacturers offer textured finishes that mimic the appearance of wood or other materials, adding to the overall aesthetic appeal.
Price Comparison of Vinyl Siding Corner Trim Options
The price of vinyl siding corner trim at Home Depot varies considerably depending on the material, manufacturer, and features. Generally, basic J-channel and standard corner trim are the most affordable options. Higher-priced trims often feature enhanced durability, improved UV resistance, or more sophisticated textures and colors.
Prices also fluctuate based on current market conditions and promotions. It is advisable to check the Home Depot website or your local store for the most up-to-date pricing information.
Comparison Table of Vinyl Siding Corner Trim Options
The following table compares four common vinyl siding corner trim options available at Home Depot (Note: Prices are estimates and can vary by location and time of purchase):
| Trim Type | Material | Approximate Price (per linear foot) | Features |
|---|---|---|---|
| Standard J-Channel | Vinyl | $0.50
|
Basic, functional, affordable |
| Standard Outside Corner | Vinyl | $0.75
|
Creates a clean, sharp exterior corner |
| Premium Outside Corner (UV Resistant) | Vinyl (UV-resistant formulation) | $1.25
|
Enhanced durability, resists fading and cracking |
| Textured Inside Corner | Vinyl (textured finish) | $1.00
|
Mimics wood grain or other textures, improved aesthetics |
Installation Methods and Procedures
Installing vinyl siding corner trim from Home Depot is a straightforward process that can significantly enhance the aesthetic appeal and durability of your home’s exterior. Proper installation ensures a clean, professional finish that protects your home from the elements.
This section details the necessary steps, tools, and best practices for a successful installation.
Successful installation hinges on careful preparation and adherence to specific procedures. Understanding the material properties and using the right tools are crucial for achieving a seamless and long-lasting result.
Necessary Tools and Materials
Proper tools and materials are essential for a successful installation. Having everything prepared beforehand streamlines the process and minimizes interruptions.
- Measuring tape: Accurate measurements are critical for cutting the trim to the correct length.
- Pencil: Use a pencil to mark cutting lines on the vinyl siding trim.
- Utility knife or tin snips: These tools are used for cutting the vinyl siding trim to size. Tin snips are particularly useful for clean cuts.
- Level: Ensuring the trim is level prevents an uneven and unprofessional appearance.
- Caulk gun: Caulk is used to seal gaps and ensure water tightness around the trim.
- Exterior-grade caulk: Choose a caulk that is specifically designed for exterior use and is compatible with vinyl siding.
- Safety glasses: Always protect your eyes when using cutting tools.
- Work gloves: Protect your hands from cuts and abrasions.
- Home Depot Vinyl Siding Corner Trim: Ensure you have purchased sufficient trim to complete the project.
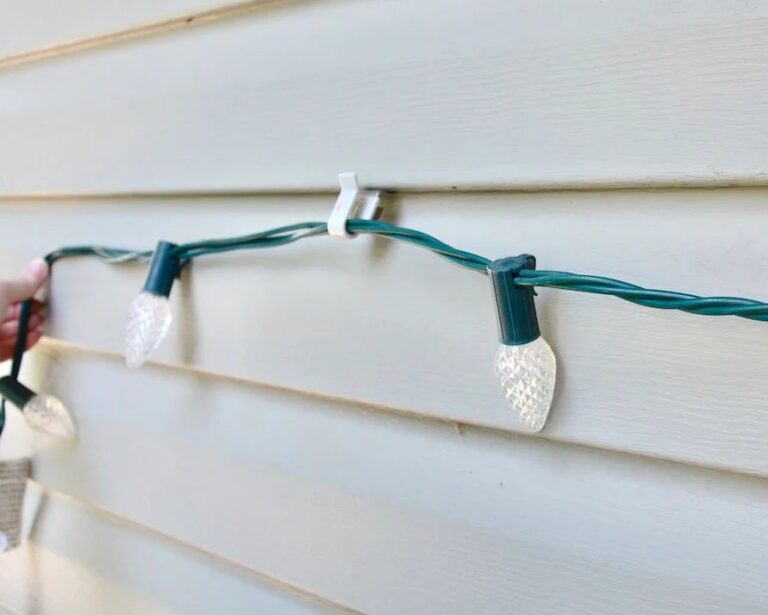
Step-by-Step Installation Guide
This step-by-step guide, accompanied by descriptive visuals, Artikels the process. Following these instructions carefully will yield a professional-looking installation.
- Preparation:Begin by measuring the length of each corner requiring trim. Add a few extra inches to account for cuts and adjustments. Ensure the existing siding is clean and free of debris.
- Cutting the Trim:Using your measuring tape and pencil, mark the desired length on the vinyl siding corner trim. Carefully cut the trim to size using a utility knife or tin snips. Ensure the cut is clean and straight to avoid irregularities.
- Positioning the Trim:Hold the cut trim piece in place against the corner of the house. Use a level to ensure it’s perfectly vertical and aligned. Adjust as needed for a precise fit.
- Securing the Trim:Vinyl siding corner trim typically uses interlocking mechanisms. Carefully slide the trim into place, ensuring a tight and secure fit. Avoid forcing the trim, as this can damage it.
- Caulking:Apply a bead of exterior-grade caulk along the seams where the trim meets the existing siding. This seals gaps and prevents water penetration.
- Inspection:After installation, carefully inspect the trim for any gaps or misalignments. Make any necessary adjustments before moving on to the next section.
Best Practices for a Professional Finish
Achieving a professional finish requires attention to detail and the use of best practices. These steps ensure a long-lasting, attractive installation.
Consistent and precise measurements are crucial. Using a level throughout the installation process is essential for a straight and visually appealing finish. Proper caulking prevents water damage and enhances the longevity of the installation. Finally, taking your time and working methodically will yield superior results.
Maintenance and Care
Proper maintenance of your Home Depot vinyl siding corner trim will significantly extend its lifespan and maintain its attractive appearance. Regular cleaning and attention to potential damage will prevent costly repairs down the line and ensure your home continues to look its best.
Cleaning Procedures
Cleaning your vinyl siding corner trim is a straightforward process that should be performed at least twice a year, in spring and autumn. Begin by rinsing the trim with a garden hose to remove loose dirt and debris. For tougher stains, mix a solution of mild dish soap and water.
Apply this solution using a soft-bristled brush or sponge, scrubbing gently to avoid scratching the surface. Rinse thoroughly with clean water afterward. Avoid using abrasive cleaners, harsh chemicals, or high-pressure washers, as these can damage the vinyl. For stubborn mildew or mold, a solution of bleach and water (one part bleach to three parts water) can be effective, but always test this solution in an inconspicuous area first to ensure it doesn’t discolor the vinyl.
Remember to wear protective gloves and eyewear when using bleach.
Protecting Against Damage
Protecting your vinyl siding corner trim from damage involves proactive measures and careful attention to potential hazards. Avoid scraping or hitting the trim with sharp objects. Regularly inspect the trim for any signs of damage, such as cracks, chips, or loose pieces.
Address these issues promptly to prevent further damage. Consider installing protective covers or barriers around the trim during exterior home improvement projects to prevent accidental damage. Tree branches that could potentially scrape against the siding should be trimmed back.
For areas prone to impact from lawnmowers or other equipment, consider adding additional protection such as landscaping edging or a small barrier.
Common Problems and Solutions
Several common problems can affect vinyl siding corner trim. Cracks or chips can often be repaired with a vinyl caulk designed for exterior use. Apply the caulk neatly, ensuring a smooth finish. Allow sufficient drying time before painting, if necessary, to match existing siding color.
Loose or damaged sections may require replacement. This is typically a straightforward process involving removing the damaged section and installing a new piece using the original installation method. Discoloration can often be addressed with a thorough cleaning using the methods described above.
Persistent discoloration may indicate a more significant issue, such as sun damage or chemical exposure. In such cases, consider consulting a professional for advice and repair options.
Regular Maintenance Checklist, Home depot vinyl siding corner trim
A regular maintenance schedule will help keep your vinyl siding corner trim in optimal condition. The following checklist provides a guide for regular tasks:
- Twice-yearly cleaning with mild soap and water.
- Annual inspection for cracks, chips, or loose pieces.
- Immediate repair of any identified damage.
- Regular trimming of overhanging branches.
- Protection of trim during exterior home improvement projects.
Following this checklist will help ensure your vinyl siding corner trim remains attractive and durable for years to come.
Design and Aesthetics: Home Depot Vinyl Siding Corner Trim
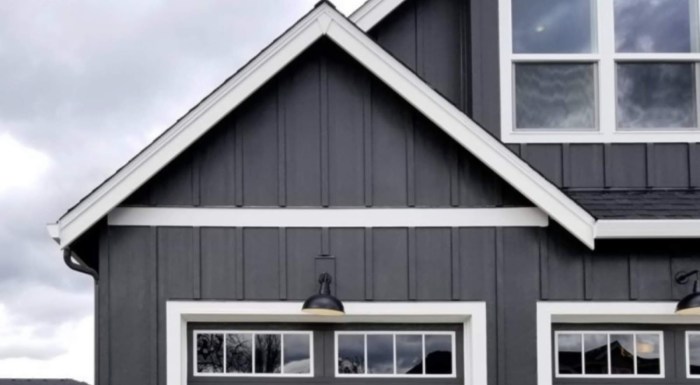
Home exterior aesthetics are significantly impacted by the choice and installation of vinyl siding corner trim. The right trim can elevate the overall curb appeal, complementing the home’s style and enhancing its visual appeal. Careful consideration of trim style, color, and installation technique is crucial for achieving a polished and professional finish.The selection of vinyl siding corner trim offers a surprising range of aesthetic possibilities.
Different styles can dramatically alter the perceived architectural details and overall impression of a home. For instance, a simple, clean-lined trim will create a modern and minimalist look, while more ornate styles with elaborate detailing can add a touch of classic elegance or even a Victorian flair.
The color and texture of the trim also play a significant role, offering opportunities to create visual contrast or harmony with the main siding.
Trim Styles and Their Impact on Home Appearance
Various trim styles contribute to different architectural impressions. A sharp, angular trim style, for example, might be ideal for a contemporary home with clean lines and a geometric design. Imagine a sleek, white vinyl siding punctuated by crisp, black corner trim; this contrast creates a striking, modern aesthetic.
Conversely, a more rounded, embellished trim would suit a traditional home with softer lines and more intricate detailing. Picture a craftsman-style home with warm brown siding and matching, slightly curved corner trim with subtle, embossed patterns; this creates a cohesive and charming appearance.
The choice of trim style directly influences the perceived architectural period and overall style of the house.
Color and Style Coordination
The color of the corner trim can either blend seamlessly with the siding or provide a bold contrast. A matching color creates a unified look, emphasizing the home’s clean lines and simplicity. For instance, a home with beige siding might utilize a similar shade of beige or a slightly darker tone for the corner trim to create a subtle yet elegant effect.
Conversely, a contrasting color can draw attention to architectural details and add a pop of visual interest. A vibrant blue trim against white siding, for example, could create a striking and memorable appearance. The successful coordination of trim color and siding style is crucial for achieving a visually pleasing and cohesive exterior.
The Impact of Proper Installation on Aesthetics
Proper installation is paramount to achieving the desired aesthetic outcome. Meticulous installation ensures crisp lines, consistent spacing, and a professional finish. Improperly installed trim can lead to uneven gaps, misaligned pieces, and an overall sloppy appearance, detracting significantly from the home’s curb appeal.
A perfectly installed trim, on the other hand, creates a clean, polished look that elevates the entire exterior design. The difference between a well-installed and poorly installed trim is striking; the former contributes to a refined and sophisticated appearance, while the latter can make the entire siding look unprofessional and detract from the overall visual impact.
Visual Representation of Trim Styles and Home Styles
Imagine a ranch-style home with horizontal siding. A simple, flat, and similarly colored corner trim would enhance the clean lines of the architecture, maintaining a consistent and understated aesthetic. Now, picture a Victorian-style home with intricate detailing on the gables and eaves.
A more ornate, possibly slightly wider, and potentially darker-colored trim, with perhaps a slightly raised profile, would complement the elaborate architectural features, adding a touch of sophistication without overwhelming the design. Finally, consider a contemporary home with vertical siding.
A sleek, modern trim, perhaps in a contrasting color, would highlight the vertical lines, creating a bold and stylish statement. These examples demonstrate how different trim styles can be carefully selected to complement various architectural styles and create a cohesive and visually appealing home exterior.
Material Properties and Durability

Home Depot’s vinyl siding corner trim boasts several material properties that contribute significantly to its durability and longevity, making it a popular choice for homeowners. Understanding these properties helps in assessing its performance compared to alternative materials and in predicting its lifespan under various conditions.
Vinyl siding corner trim is primarily composed of polyvinyl chloride (PVC), a thermoplastic polymer known for its strength, flexibility, and resistance to weathering. The specific formulation of the PVC used, along with the addition of UV stabilizers and other additives, significantly impacts the final product’s durability.
These additives protect the vinyl from degradation caused by prolonged sun exposure and extreme temperature fluctuations.
Vinyl Siding’s Longevity Compared to Other Materials
Vinyl siding corner trim generally exhibits a longer lifespan than wood trim, often lasting 20-30 years or more with proper maintenance. Wood, while aesthetically pleasing, is susceptible to rot, insect infestation, and warping, necessitating frequent repairs and repainting. Aluminum siding, while durable and resistant to many forms of damage, can be prone to denting and scratching, affecting its appearance over time.
While aluminum’s lifespan might be comparable to vinyl, the potential for cosmetic damage might make vinyl a more preferable choice for many. The longevity of each material is also affected by climate and maintenance practices.
Weather Conditions and Trim Lifespan
Extreme weather conditions significantly impact the lifespan of any exterior trim, including vinyl. Prolonged exposure to intense UV radiation can cause the vinyl to fade or become brittle over time. Similarly, frequent cycles of freezing and thawing can lead to expansion and contraction of the material, potentially causing cracks or warping, especially if the installation is not properly done.
Coastal areas with high salinity can also accelerate degradation due to salt spray. Areas with heavy snowfall might see more stress on the trim from the weight of accumulated snow. Regular cleaning and maintenance can help mitigate these effects and extend the trim’s lifespan.
Advantages and Disadvantages Compared to Other Materials
| Feature | Vinyl | Aluminum | Wood |
|---|---|---|---|
| Lifespan | 20-30+ years | 20-30 years | 10-15 years (with maintenance) |
| Maintenance | Low | Low | High |
| Cost | Moderate | Moderate to High | Moderate to High |
| Weather Resistance | Excellent (with UV inhibitors) | Excellent | Poor (susceptible to rot and warping) |
| Appearance | Variety of styles and colors | Limited color options | Natural aesthetic, requires regular painting/staining |
| Installation | Relatively easy | Relatively easy | More complex |
| Sustainability | Recyclable | Recyclable | Variable depending on sourcing and treatment |
Troubleshooting Common Issues
Installing and maintaining vinyl siding, including corner trim, can present some challenges. Understanding common problems and their solutions will help ensure a successful and long-lasting installation. This section details typical issues, their causes, and effective solutions. Preventing problems is always easier than fixing them, so preventative measures are also discussed.
Gaps Between Siding and Trim
Gaps between the vinyl siding and corner trim are often caused by improper installation. Insufficient overlap, incorrect nailing, or expansion and contraction of the material due to temperature changes can all contribute. Addressing these gaps requires careful attention to detail.
If the gap is small, you may be able to use caulk designed for exterior use to fill the space, ensuring a weathertight seal. However, larger gaps may necessitate removing and reinstalling the affected sections, paying close attention to proper overlap and nailing techniques.
Preventing gaps involves meticulous measurement and cutting, ensuring proper alignment before nailing, and using the correct number and placement of fasteners.
Cracks in the Vinyl Siding or Trim
Cracks can result from impacts, improper handling during installation, or exposure to extreme temperatures. Small cracks might be repaired using a vinyl siding repair kit, often available at Home Depot. These kits typically include adhesive and patching material designed to blend seamlessly with the existing siding.
Larger cracks, however, may require replacing the damaged piece. Preventing cracks involves careful handling of the material during installation, avoiding forceful impacts, and choosing high-quality siding that is less prone to cracking under stress.
Discoloration of Vinyl Siding
Discoloration can be caused by several factors, including prolonged sun exposure, mildew growth, or the accumulation of dirt and grime. Regular cleaning with a mild detergent and water solution can usually remove dirt and grime. Mildew can be treated with a bleach solution (mixed according to manufacturer’s instructions) followed by a thorough rinsing.
However, severe discoloration might indicate damage to the vinyl itself, requiring replacement of the affected sections. Preventative measures include regular cleaning, and considering the use of siding with UV inhibitors to minimize sun damage.
Troubleshooting Guide
Addressing issues effectively relies on a systematic approach. The following guide summarizes common problems and their solutions:
- Problem:Gaps between siding and trim. Solution:Use exterior caulk for small gaps; replace sections for larger gaps. Prevention:Precise measurement, proper overlap, and correct nailing.
- Problem:Cracks in siding or trim. Solution:Repair small cracks with a vinyl repair kit; replace damaged pieces for larger cracks. Prevention:Careful handling, avoiding impacts, and using high-quality siding.
- Problem:Discoloration. Solution:Clean with mild detergent and water; treat mildew with bleach solution; replace severely discolored sections. Prevention:Regular cleaning and use of UV-resistant siding.
- Problem:Loose or improperly fastened siding. Solution:Re-nail or replace loose pieces, ensuring proper fastener placement. Prevention:Use the recommended number and type of fasteners during initial installation.
Closing Summary
Ultimately, selecting and installing Home Depot vinyl siding corner trim is a straightforward process that significantly impacts your home’s curb appeal and longevity. By carefully considering the various options, understanding the installation techniques, and adhering to proper maintenance practices, you can ensure a beautiful and long-lasting finish.
This guide provides a solid foundation for a successful project, transforming your home’s exterior with professional-looking results.