How to Install Clapboard Siding on a House
Planning and Preparation
How to install clapboard siding on a house – Proper planning and preparation are crucial for a successful clapboard siding installation. Careful measurements, material selection, and surface preparation will save time, reduce waste, and ensure a professional-looking finish. Failing to adequately prepare can lead to costly mistakes and unsightly results.
Necessary Tools and Materials
A comprehensive list of tools and materials is essential to ensure a smooth installation process. Having everything readily available will prevent delays and interruptions.
- Measuring tape
- Level
- Chalk line
- Circular saw or miter saw
- Hammer
- Nail gun (recommended)
- Safety glasses
- Work gloves
- Ladder
- Scaffolding (for taller houses)
- Clapboard siding (calculate quantity as described below)
- Starter strip
- J-channel (for corners and around windows/doors)
- Flashing (for windows and doors)
- Caulk
- Underlayment (e.g., house wrap)
- Nails (galvanized siding nails are recommended)
- Siding sealant
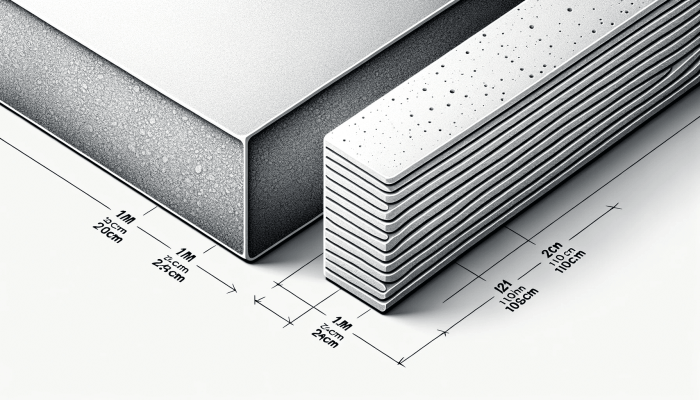
Accurate Measurements and Material Calculation
Accurate measurements are paramount to avoid material shortages or excess. Incorrect calculations can lead to significant waste and added expenses. The following steps Artikel a method for determining the necessary amount of siding.
1. Measure the total wall area
Measure the length and height of each wall section to be sided. Remember to account for windows, doors, and other openings by subtracting their areas from the total wall area.
2. Calculate the area of each wall section
Multiply the length and height of each section to obtain its area.
3. Calculate the total wall area
Add the areas of all wall sections together.
4. Determine the siding coverage
Check the siding manufacturer’s specifications for coverage per board. This information is usually provided in square feet per board.
5. Calculate the number of boards needed
Divide the total wall area by the siding coverage per board. Always round up to the nearest whole number to account for waste and potential errors.
6. Add extra for waste
Add 10-15% to the calculated amount to account for cuts, mistakes, and damaged boards.
Sample Clapboard Siding Layout Plan
A well-planned layout ensures a visually appealing and efficient installation. The following table illustrates a sample layout plan. This plan should be adapted to your specific house dimensions and features.
| Area | Siding Type | Orientation | Notes |
|---|---|---|---|
| Main Walls | Standard Clapboard | Vertical | Maintain consistent overlap |
| Corners | J-Channel | – | Ensure proper sealing |
| Windows | J-Channel & Flashing | – | Proper flashing prevents water intrusion |
| Doors | J-Channel & Flashing | – | Ensure a weathertight seal around the door frame |
Exterior Wall Preparation
Preparing the exterior walls is critical for a long-lasting and attractive siding installation. This involves cleaning, repairing, and applying underlayment.
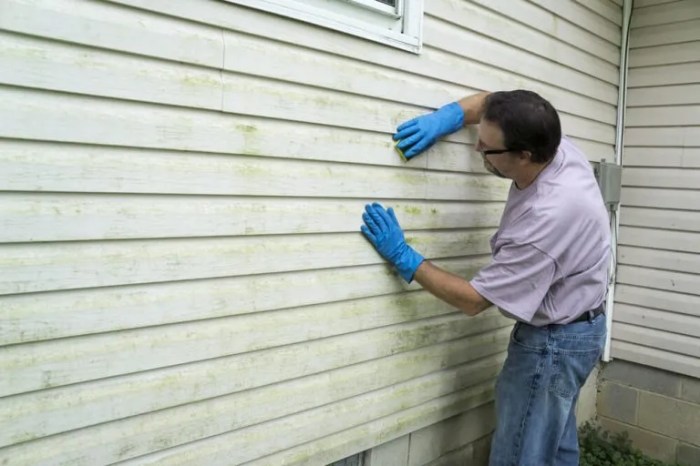
1. Cleaning
Thoroughly clean the exterior walls to remove dirt, loose paint, debris, and any other contaminants. Pressure washing is often effective but should be used cautiously to avoid damaging the underlying structure.
2. Repairing Damage
Repair any damage to the existing wall sheathing, such as cracks, holes, or rotted areas. Replace damaged sections with new lumber, ensuring proper fastening and sealing.
3. Applying Underlayment
Install house wrap or another suitable underlayment material. This acts as a water barrier, protecting the wall from moisture and improving the overall performance of the siding. Overlapping seams are crucial to prevent water penetration. Secure the underlayment using staples or nails, following the manufacturer’s instructions.
Installing the First Course of Clapboard
Installing the first course of clapboard siding is crucial for establishing a straight and level foundation for the entire project. A properly installed first course ensures consistent spacing and prevents future alignment issues. Accuracy in this initial step significantly impacts the overall aesthetic appeal and structural integrity of the finished siding.
The first course sets the tone for the entire siding installation. Precise measurement, careful cutting, and secure fastening are paramount. Remember to always consult the manufacturer’s instructions for your specific clapboard type, as variations in material and design may influence installation techniques.
Installing the First Course
The following steps Artikel the proper procedure for installing the first course of clapboard siding. Careful attention to detail in each step will contribute to a successful installation.
- Establish a Level Baseline:Begin by establishing a perfectly level baseline along the bottom of the wall using a level and chalk line. This baseline will serve as your guide for the entire first course installation. Any deviation here will be amplified throughout the project.
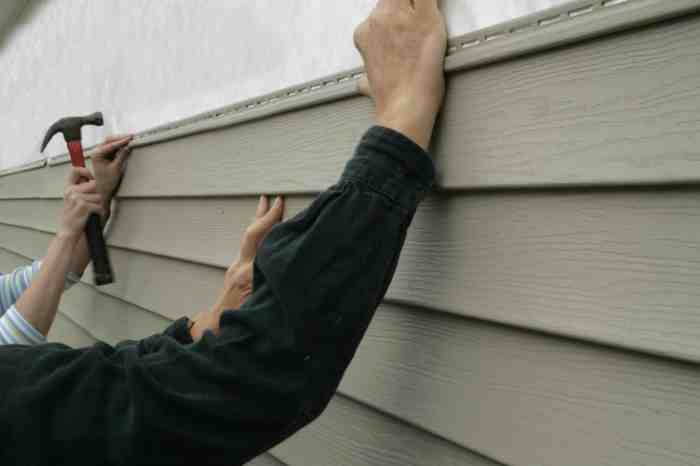
- Fastening the First Clapboard:Place the first clapboard against the baseline, ensuring it’s level and plumb. Use exterior-grade galvanized nails or stainless steel screws, driven slightly below the surface of the clapboard to avoid damage. Spacing should be consistent with manufacturer recommendations, usually around 6 inches apart.
Start near the corners to ensure a proper fit.
- Maintaining Consistent Spacing:Maintain a uniform gap between the bottom edge of the clapboard and the foundation or flashing. Use spacers if necessary to achieve consistent spacing. This gap allows for proper ventilation and prevents moisture buildup.
- Securing the Clapboard:Secure the clapboard using the appropriate fasteners, driven at an angle to ensure a tight fit. Avoid overdriving fasteners, which can cause splitting. For longer clapboards, consider adding additional fasteners near the middle for increased support.
Managing Clapboards Around Corners and Obstacles
Corners and other obstacles require careful planning and precise cutting to maintain a clean, professional finish. Accurate measurements and the use of appropriate tools are essential for achieving a seamless transition around these features.
- Measuring and Cutting:Carefully measure the distance around corners and other obstacles, ensuring accurate cuts. Use a sharp utility knife or a power miter saw for clean, precise cuts. Pre-drilling pilot holes is recommended to prevent splitting.
- Fitting Clapboards:Test-fit the cut clapboards before securing them to ensure a proper fit. Adjustments may be needed to achieve a seamless transition. Use caulk to seal any gaps or joints for weatherproofing.
- Using Corner Trim:For a more professional finish, consider using pre-fabricated corner trim pieces. These pieces provide a clean and consistent look, simplifying the installation process around corners.
Fastener Selection and Application, How to install clapboard siding on a house
The choice of fasteners significantly impacts the longevity and durability of the clapboard siding. Selecting the appropriate fasteners and using proper techniques ensures a secure and long-lasting installation.
- Galvanized Nails:Galvanized nails are a common choice for clapboard siding, offering good corrosion resistance. They should be driven at an angle to prevent lifting and ensure a tight fit. Nail size should match the thickness of the clapboard.
- Stainless Steel Screws:Stainless steel screws offer superior corrosion resistance and hold strength compared to nails. They are particularly useful in areas exposed to harsh weather conditions. Pre-drilling pilot holes is essential to prevent splitting.
- Fastener Placement:Fasteners should be placed consistently throughout the installation, typically every 6-8 inches, depending on the manufacturer’s recommendations and the clapboard’s length. Avoid placing fasteners too close to the edges, which can cause splitting.
Installing Subsequent Courses of Clapboard

Installing subsequent courses of clapboard siding builds upon the foundation established with the first course. Consistent overlap and precise alignment are crucial for a professional-looking and weathertight finish. This section details the techniques for efficient and accurate installation, addressing challenges presented by various architectural features.
Each subsequent course of clapboard is installed using the same overlapping technique as the first course. The bottom edge of each new clapboard should overlap the top edge of the previously installed clapboard by a consistent amount, typically specified by the manufacturer’s instructions (often 1/2″ to 1″).
This overlap provides crucial weather protection. Maintain a straight, vertical alignment by using a level and plumb bob frequently. Using a chalk line snapped across the wall between previously installed boards can also significantly aid in this process.
Clapboard Installation Around Corners
Installing clapboard around corners requires careful planning and precise cuts. The most common method involves using a miter saw to cut the clapboards at a 45-degree angle. These angled cuts create a neat and tight fit at the corner.
For exterior corners, the clapboards on one side of the corner are typically installed first, followed by the clapboards on the adjacent side, fitting tightly against the previously installed pieces. This method ensures a watertight seal. Inside corners require a slightly different approach, often using a combination of mitered cuts and small pieces of clapboard to fill gaps.
Clapboard Installation Around Windows and Doors
Windows and doors present challenges because of their varied shapes and sizes. Precise measurements and careful cutting are essential. The general approach involves measuring the distance between the window or door frame and the previously installed clapboard, then cutting the clapboard to fit this space.
Often, a combination of full-length clapboards and shorter pieces will be required to create a neat and complete frame around the opening. J-channel or similar trim can be used to further streamline the installation and create a clean, finished look around these openings.
Cutting and Fitting Clapboards Around Complex Architectural Details
Complex architectural details, such as bay windows or dormers, require more advanced cutting techniques. This often involves using a combination of miter cuts, coping cuts, and custom-sized pieces to achieve a precise fit. It’s advisable to create a detailed template of the area to be covered before making any cuts.
This ensures an accurate fit and minimizes waste. Pre-cutting clapboards to the precise angles required can be done using a miter saw, and then adjustments can be made as needed on-site for a truly custom fit.
Installing Clapboards on Sloped or Uneven Surfaces
Installing clapboard on sloped or uneven surfaces requires careful attention to detail to ensure proper alignment and overlap. A common approach involves using shims to create a level surface for the clapboards to rest on. The shims are placed between the wall and the clapboard, allowing for adjustment to compensate for unevenness.
It is crucial to check the level and alignment frequently throughout the process. For significantly uneven surfaces, consider using furring strips to create a more even base for the siding before installing the clapboards. This ensures consistent spacing and overlap, leading to a professional and weather-resistant finish.
Each clapboard should be individually leveled and secured before proceeding to the next.
Finishing Touches and Caulking
With the main body of clapboard siding installed, the project nears completion. The final stages involve adding trim and meticulously caulking all seams and joints to ensure a weathertight and aesthetically pleasing finish. Proper attention to these details is crucial for the longevity and performance of your siding.
Installing Trim Pieces
Installing trim pieces around windows, doors, and corners provides a neat and finished look, protecting the edges of the siding and enhancing the overall curb appeal. Various trim pieces, such as corner boards, J-channel, and window/door casings, are available to accommodate different situations.
These pieces are typically nailed in place, ensuring proper alignment and overlap with the siding. Accurate measurements and precise cuts are essential for a professional appearance. For example, corner boards are mitered at a 45-degree angle to create a clean, seamless corner.
Window and door casings should be carefully fitted to ensure a snug fit around the openings, preventing water infiltration. The choice of trim material should ideally match or complement the siding for a cohesive look.
Caulking Techniques and Material Selection
Caulking is critical for preventing water damage and air infiltration. It seals gaps and cracks, creating a weathertight barrier. The selection of caulk is important; exterior-grade acrylic latex caulk is a popular choice for its flexibility, durability, and ease of application.
Silicone caulk offers superior water resistance but can be more challenging to work with. Butyl rubber caulk provides excellent adhesion and durability, making it suitable for high-movement areas.Proper caulking technique involves applying a continuous, smooth bead of caulk into the joint, ensuring complete coverage.
The bead should be slightly overfilled to allow for shrinkage during curing. A caulking tool can be used to smooth and shape the bead for a professional finish. It’s important to allow the caulk to cure completely before painting or exposing it to moisture.
Failure to properly cure the caulk can lead to cracking and loss of effectiveness.
Caulked Joint Visual Representation
Imagine a close-up view of a corner where two clapboard pieces meet. A smooth, consistently sized bead of exterior-grade acrylic latex caulk fills the gap between the clapboards, extending slightly beyond the joint on both sides. The caulk is neatly tooled, creating a slightly concave profile.
The surface of the caulk is smooth and even, free of air bubbles or gaps. The color of the caulk is a close match to the siding, ensuring a visually appealing and inconspicuous seal. This is in contrast to an incorrectly caulked joint which might have gaps, uneven application, or a bead that is too thin or too thick, leading to potential water infiltration and an unsightly appearance.
The correctly caulked joint demonstrates proper technique and material selection, contributing to the long-term durability and weather resistance of the siding installation.
Safety Precautions
Installing clapboard siding involves working at heights and with potentially hazardous materials. Prioritizing safety is crucial to prevent accidents and injuries. This section Artikels essential safety measures to ensure a safe and successful installation.
Safe practices are paramount throughout the entire siding installation process. Failure to adhere to these guidelines could result in serious injury or property damage.
Personal Protective Equipment (PPE)
Personal protective equipment is essential for minimizing risks associated with handling tools, materials, and working at heights. Appropriate PPE includes safety glasses or goggles to protect eyes from flying debris, work gloves to prevent cuts and abrasions, hearing protection to reduce noise exposure from power tools, and a dust mask to prevent inhalation of sawdust and other airborne particles.
For work at heights, a safety harness and fall arrest system are mandatory. A hard hat is also recommended to protect against falling objects.
Safe Handling and Storage of Materials
Clapboard siding, as well as other related materials, should be handled with care to prevent damage and injury. Use appropriate lifting techniques to avoid strains and sprains. Store materials in a dry, secure location, away from potential hazards and protected from the elements.
Stack materials evenly to prevent toppling. Keep the work area clear of debris and obstructions to prevent tripping hazards. Always ensure proper ventilation when working with chemicals, such as paints, primers, or sealants.
Safe Work Practices
Maintaining a safe work environment is crucial throughout the installation. This includes using appropriate tools and equipment in good working order, regularly inspecting ladders and scaffolding for stability, and ensuring a secure footing at all times. Never overload ladders or scaffolding.
When working at heights, use appropriate fall protection equipment and follow all manufacturer’s instructions. Always maintain three points of contact when climbing ladders. Before starting any work, inspect the area for potential hazards and address them accordingly.
Utilize proper lifting techniques to prevent back injuries.
Emergency Procedures
Having a plan in place for emergencies is critical. Ensure that a first-aid kit is readily available and that all workers know its location. Establish clear communication procedures in case of accidents. Know the location of the nearest phone and emergency services.
In the event of a fall, immediately call for emergency medical assistance. If someone is injured, provide first aid as needed and follow established emergency procedures. Report all accidents and injuries to the appropriate authorities.
Safety Table
| Hazard | Risk | Prevention | Mitigation |
|---|---|---|---|
| Falls from heights | Serious injury or death | Use scaffolding or ladders appropriately, wear a safety harness, maintain three points of contact on ladders. | Ensure proper fall protection, immediate medical attention. |
| Flying debris | Eye injuries | Wear safety glasses or goggles. | Immediate eye irrigation and medical attention. |
| Power tool injuries | Cuts, lacerations, broken bones | Use appropriate safety guards, follow manufacturer’s instructions, wear gloves. | First aid, medical attention, report the incident. |
| Chemical exposure | Skin irritation, respiratory problems | Wear appropriate PPE, ensure adequate ventilation, follow manufacturer’s instructions. | Remove contaminated clothing, wash affected areas, seek medical attention if necessary. |
Final Review: How To Install Clapboard Siding On A House
Installing clapboard siding successfully requires careful planning, precision execution, and attention to detail. From the initial measurements and preparation to the final caulking, each step contributes to a beautiful and long-lasting result. By following the guidelines and safety precautions Artikeld in this guide, you can confidently transform your home’s exterior with the classic charm and enduring quality of clapboard siding.
Remember to always prioritize safety and take your time – the rewarding outcome will be well worth the effort. Enjoy the process and the stunning transformation of your home!