LP Lap Siding Coverage Chart: A Comprehensive Guide
Understanding LP Lap Siding
Lp lap siding coverage chart – LP (Louisiana-Pacific) lap siding is a popular exterior cladding choice known for its durability and aesthetic appeal. It offers a variety of options to suit different budgets and design preferences, providing homeowners with a long-lasting and attractive exterior finish.
This section will delve into the specifics of LP lap siding, comparing its features and benefits to other common siding materials.
LP Lap Siding Types
LP offers several types of lap siding, each with its own unique characteristics. Understanding these differences is crucial for selecting the best option for your home. The key variations lie in the composition and treatment of the wood fibers, influencing the siding’s durability, resistance to moisture, and overall lifespan.
LP SmartSide Engineered Wood Siding
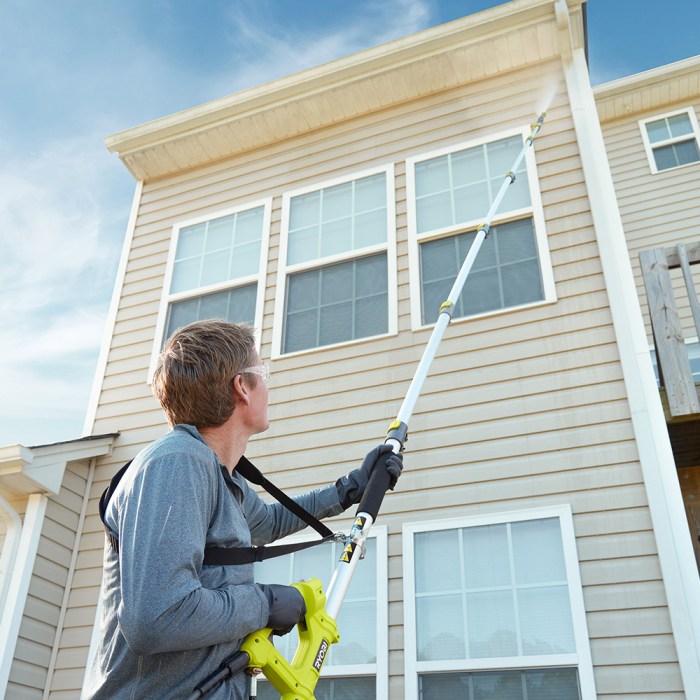
LP SmartSide is a popular choice due to its engineered wood construction. It combines treated wood fibers with a proprietary resin and wax blend, making it highly resistant to rot, fungal decay, and insect infestation. This engineered wood siding boasts superior durability compared to traditional wood siding, requiring less maintenance over its lifespan.
The smooth surface provides a clean, modern look, and it’s available in a variety of colors and profiles. The manufacturing process results in a product that is less prone to warping, shrinking, or expanding compared to solid wood siding.
LP SmartSide Trim & Siding
This product line extends the benefits of LP SmartSide to trim pieces, allowing for a cohesive and consistent look throughout the exterior of the home. The trim pieces are designed to complement the siding, providing a finished and professional appearance.
Matching trim ensures a seamless transition between siding and other exterior elements, enhancing the overall aesthetic appeal.
Comparison of LP SmartSide with Other Siding Materials
LP SmartSide offers a compelling alternative to other siding materials. Compared to traditional wood siding, it provides superior resistance to moisture damage and insect infestation, requiring significantly less maintenance. While more expensive than vinyl siding, LP SmartSide offers a more natural look and feel, along with greater durability and longevity.
Compared to fiber cement siding, LP SmartSide is generally lighter and easier to install, although fiber cement may offer even greater durability in extreme climates. Metal siding, while durable, often lacks the aesthetic appeal of wood-like LP SmartSide.
Cost, Durability, and Maintenance Comparison of LP Lap Siding Options
The following table provides a comparison of different LP lap siding options based on cost, durability, and maintenance requirements. Note that these are general estimates, and actual costs can vary depending on factors such as location, labor costs, and the complexity of the installation.
| Siding Type | Cost (per sq ft, estimated) | Durability (Years, estimated) | Maintenance |
|---|---|---|---|
| LP SmartSide | $3.50
|
30+ | Minimal; occasional cleaning |
| Other LP Engineered Wood Sidings (Variations in treatment may exist) | $3.00
|
25-30 | Low; periodic cleaning and inspection |
| Traditional Wood Siding | $2.00
|
15-20 | High; regular painting, staining, and repair |
Calculating Siding Coverage: Lp Lap Siding Coverage Chart
Accurately calculating the amount of LP lap siding needed for your project is crucial for ensuring you have enough material and minimizing waste. This section will guide you through the process, considering standard dimensions, factors influencing coverage, and how to account for various wall configurations.Standard LP lap siding panel dimensions vary depending on the specific product line, but common sizes include 4ft x 12ft and 4ft x 16ft.
Always refer to the manufacturer’s specifications for the exact dimensions of the siding you are using. These dimensions are crucial for your calculations.
Factors Affecting Siding Coverage
Several factors influence the overall amount of siding required beyond the simple area calculation. These factors must be considered to avoid material shortages. Overestimating is always preferable to underestimating.
- Waste:Cutting siding to fit around windows, doors, and corners inevitably generates waste. A 5-10% waste factor is generally recommended for most projects, but this can increase depending on the complexity of the wall configuration. For instance, a project with numerous small openings or intricate detailing will require a higher waste allowance.
- Overlaps:LP lap siding requires overlapping panels for proper installation and weather protection. The amount of overlap varies depending on the product but is typically specified by the manufacturer. This overlap reduces the effective coverage area of each panel.
- Wall Configuration:The shape and complexity of your walls significantly impact siding needs. Corners, dormers, and other features require additional material and careful cutting. Complex designs generally lead to higher waste percentages.
Step-by-Step Siding Calculation Guide
This guide provides a clear, step-by-step method for calculating siding requirements. Remember to always verify measurements and account for waste.
- Measure the total wall area:Carefully measure the length and height of each wall section. Calculate the area of each section (length x height) and sum the areas to find the total wall area. For example, if you have two walls, one measuring 10ft x 8ft and the other 12ft x 8ft, your total area is (10ft
- 8ft) + (12ft
- 8ft) = 176 square feet.
- Account for openings:Measure the area of all windows and doors and subtract these areas from the total wall area. If you have a window measuring 3ft x 4ft, you would subtract 12 square feet from the total wall area.
- Determine the effective coverage of one panel:Considering the panel dimensions and the overlap, calculate the actual coverage area of a single panel. For example, a 4ft x 12ft panel with a 1-inch overlap might have an effective coverage area slightly less than 48 square feet. Consult the manufacturer’s specifications for precise overlap details.
- Calculate the number of panels:Divide the net wall area (total area minus openings) by the effective coverage area of one panel. This gives you the minimum number of panels required. For example, if the net wall area is 150 square feet and one panel covers 47 square feet, you’ll need approximately 3.2 panels.
Always round up to the nearest whole number.
- Add waste factor:Multiply the number of panels by the chosen waste factor (e.g., 10%). Add this number to the initial panel count to get the final number of panels needed. If you need 3.2 panels, and you add a 10% waste factor, you would need approximately 3.5 panels; always round up to 4 panels.
Accounting for Different Wall Configurations
Complex wall configurations require a more detailed approach. Consider each section individually, calculating its area and accounting for waste associated with cuts and fitting around corners or other features.For example, a corner requires additional siding to cover both sides of the corner.
You’ll need to calculate the length of the corner and add this to your overall siding requirements. Similarly, dormers, gables, and other complex features require careful measurements and additional material to accommodate their unique shapes. Using detailed sketches can be very helpful in accurately calculating material needs for complex designs.
Always refer to the LP siding installation instructions for detailed guidance on specific installation techniques and recommended overlaps. Accurate measurements and careful planning are key to a successful project.
Interpreting Coverage Charts
Understanding LP lap siding coverage charts is crucial for accurate material estimation and efficient project planning. These charts provide a visual and numerical representation of how much siding is needed to cover a specific area, considering factors like siding width, overlap, and waste.
Proper interpretation ensures you purchase the correct amount of siding, minimizing waste and potential project delays.
LP lap siding coverage charts typically present information in a tabular or graphical format. Key elements include the nominal width of the siding, the actual coverage per board (accounting for overlap), the coverage per square (100 square feet), and sometimes, factors for waste allowance.
The charts often present data for different siding profiles and installation methods, allowing for precise calculations based on your specific project requirements.
Using Coverage Charts to Determine Siding Quantity
To determine the required amount of siding, you first need to calculate the total square footage of the area to be sided. This involves measuring the height and width of each wall section and multiplying the dimensions. Then, add up the square footage of all wall sections.
Next, consult the LP lap siding coverage chart for the specific siding profile you’ve chosen. Locate the coverage per square (typically expressed in square feet per board or per bundle) and divide the total square footage of your project by the coverage per square.
This calculation will give you the approximate number of boards or bundles needed. Remember to add a percentage for waste (typically 5-10%, depending on the complexity of the project and your experience level). For example, if your project requires 500 square feet of siding, and the chart indicates 100 square feet of coverage per bundle, you would need 5 bundles (500 sq ft / 100 sq ft/bundle = 5 bundles).
Adding a 10% waste factor would increase your requirement to approximately 5.5 bundles, meaning you should purchase 6 bundles to ensure sufficient material.
Comparison of Different Coverage Chart Types
While most LP lap siding coverage charts follow a similar structure, variations exist depending on the manufacturer and the specific siding product. Some charts may present data in a simple table format, clearly listing coverage per board and per bundle for different siding widths.
Others might incorporate graphical representations, such as a visual diagram showing the overlap and actual coverage area of a single board. Some charts may also include detailed information about waste allowance based on different factors such as the complexity of the project, the experience level of the installer, and the presence of windows and doors.
The key is to carefully read the chart’s legend and understand the units of measurement used (e.g., square feet per board, square feet per bundle). Understanding the nuances of each chart type is essential for obtaining accurate material estimates.
Sample Coverage Chart Information, Lp lap siding coverage chart
The following is an example of information that might be found organized within a typical LP lap siding coverage chart. This illustrative example is not based on a specific manufacturer’s data and should not be used for actual project calculations.
- Siding Profile:LP SmartSide 7-inch lap siding
- Nominal Width:7 inches
- Actual Coverage per Board:6 inches (after overlap)
- Coverage per Square (100 sq ft):Approximately 20 boards
- Boards per Bundle:10 boards
- Bundles per Square:2 bundles
- Recommended Waste Allowance:10%
Practical Applications and Examples
Calculating the precise amount of LP lap siding needed for a project is crucial for efficient budgeting and waste reduction. Accurate calculations require understanding the dimensions of your house and the coverage rate of the siding itself. This section will provide practical examples to guide you through the process.
The following examples demonstrate how to calculate siding coverage for different house sizes and styles. Remember that these calculations are estimates, and you should always add extra material to account for waste and unforeseen circumstances. It’s always better to have slightly more than you need than to run short mid-project.
Siding Coverage Calculations for Various House Scenarios
The following table illustrates the siding needs for different house sizes and styles, assuming a standard LP lap siding coverage rate (check your specific product’s coverage for accuracy). Remember to factor in waste (typically 5-10%, depending on complexity) and always round up to the nearest full bundle or unit.
| House Style | Wall Area (sq ft) | Coverage Rate (sq ft/bundle) | Estimated Bundles Needed |
|---|---|---|---|
| Ranch (1500 sq ft) | 750 | 100 | 8 (plus 1 for waste = 9) |
| Two-Story (2500 sq ft) | 1250 | 100 | 13 (plus 2 for waste = 15) |
| Cape Cod (2000 sq ft) | 1000 | 100 | 11 (plus 1 for waste = 12) |
| Complex Design (3000 sq ft, many angles) | 1500 | 100 | 16 (plus 3 for waste = 19) |
Common Mistakes to Avoid When Calculating Siding Coverage
Several common errors can lead to inaccurate siding calculations. Avoiding these mistakes ensures a smooth project and minimizes material waste.
One frequent mistake is neglecting to account for waste. Cuts, fitting around windows and doors, and other complexities inevitably generate waste. Always add a contingency of at least 5%, and up to 10% for complex designs with many cuts and angles.
Another common error is not properly measuring all surfaces. Remember to include all exterior walls, gables, and other areas requiring siding. Finally, failing to check the coverage rate of the specific siding product selected can lead to significant underestimation.
Ordering the Correct Amount of Siding
To minimize waste and ensure a timely project, a systematic approach to ordering is crucial. This involves careful measurement, accurate calculation, and accounting for potential waste.
Begin by precisely measuring all areas requiring siding. Then, use the manufacturer’s specified coverage rate to calculate the total number of units needed. Add a percentage for waste (5-10%, depending on the project’s complexity). Always round up to the nearest whole unit.
Before placing your order, verify the availability of the chosen siding and allow for potential delays in shipping or manufacturing. Confirming the order details with the supplier before finalizing the purchase is also a vital step.
Visual Aids and Illustrations
Understanding LP lap siding installation visually is crucial for accurate coverage calculations and successful project completion. This section provides detailed descriptions and illustrative examples to clarify the process and potential challenges.
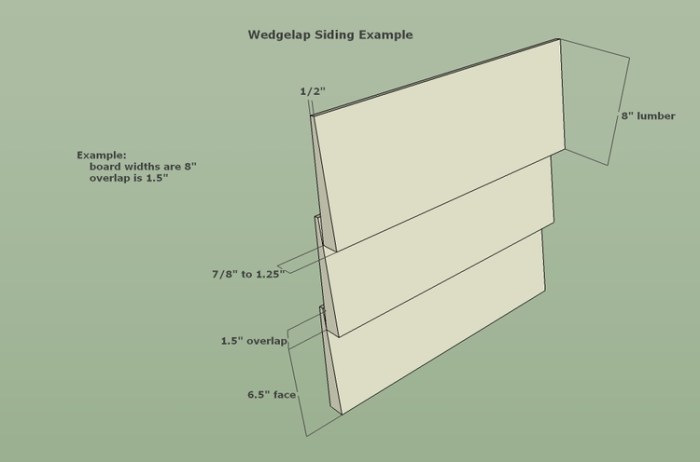
A typical LP lap siding installation involves overlapping panels to create a weather-resistant barrier. Imagine a series of horizontal rectangular panels, each slightly wider than the one beneath it. The top edge of each lower panel is covered by the bottom edge of the panel above it, creating a neat, overlapping seam.
This overlap is typically around 1 inch, providing adequate protection from the elements. The panels are secured to the underlying sheathing using nails, driven at specific points to allow for expansion and contraction due to temperature changes. Proper spacing between nails prevents splitting of the siding.
The result is a clean, continuous surface, free of gaps or inconsistencies.
LP Lap Siding Installation: Overlapping Panels
Visualize a wall clad in LP lap siding. Notice how each panel overlaps the one below it. The amount of overlap is consistent throughout the installation. This overlap is not just aesthetic; it’s critical for weather protection. The top edge of the lower panel is hidden completely beneath the bottom edge of the upper panel, preventing water penetration.
Imagine a raindrop hitting the surface. The water will run down the overlapping edge, preventing it from seeping into the wall’s structure. The consistent overlap ensures that every seam is protected, creating a durable and waterproof barrier. The vertical seams, where the ends of the panels meet, are similarly overlapped, usually with a J-channel or other specialized trim piece to ensure a weathertight seal.
Measuring and Accounting for Waste
Accurate measurement and waste calculation are critical for determining the total amount of LP lap siding needed for a project. This requires careful consideration of several factors, including the wall’s dimensions, the number and size of windows and doors, and the amount of waste inherent in the cutting and fitting process.
Waste is often underestimated, leading to material shortages. Accurate estimation ensures efficient material usage and prevents costly delays.
To measure, start by determining the total square footage of the wall surface. Then, deduct the area of windows and doors. Next, add an additional percentage to account for waste. This percentage depends on several factors including the complexity of the project, the skill of the installer, and the amount of cutting required.
A reasonable estimate for waste is 10-15%, but this can be higher for complex projects with many cuts and unusual angles. For example, if the total wall area is 500 square feet, and 15% is added for waste, the total siding required would be approximately 575 square feet (500 + (500 – 0.15)).
LP Lap Siding Installation Methods
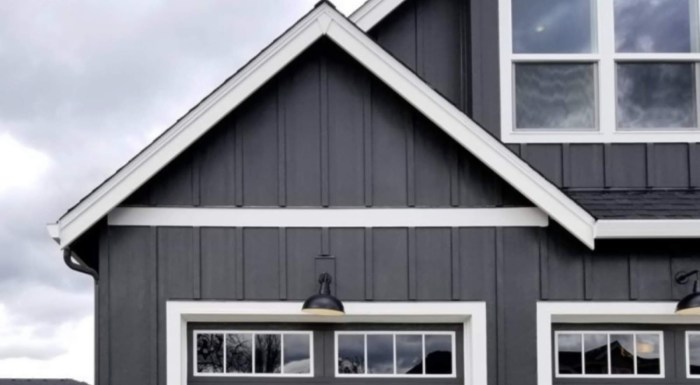
LP lap siding can be installed either horizontally or vertically, significantly affecting the overall appearance of the building. Each method presents unique visual characteristics and considerations for coverage calculation.
Horizontal Installation:This is the most common method, creating a classic, traditional look. The panels run horizontally across the wall, mimicking the typical clapboard style. Imagine the panels laid out like rows of bricks, with each row slightly overlapping the one below.
This method is often preferred for its ease of installation and its ability to effectively shed water.
Vertical Installation:Vertical installation provides a more modern, contemporary aesthetic. The panels are installed vertically, creating strong vertical lines. This method is less common but can be quite striking. The same overlap principle applies, but the direction of the overlap changes.
Water shedding might require more attention to detailing around corners and other features.
Siding Coverage and Corner/Window Configurations
Different corner and window configurations significantly impact siding coverage and material requirements. Accurate calculations require careful consideration of these features.
Corners:Inside and outside corners require additional materials. Inside corners typically use an inside corner trim, while outside corners might use an outside corner trim or J-channel. These trim pieces add to the overall material needs, and their dimensions must be factored into the calculation.
Visualize the added length of trim needed to cover the corner, and remember that this length needs to be added to your total linear footage requirement.
Windows:Windows require careful planning and cutting of siding panels. Typically, trim pieces are used around the windows to create a neat and weather-tight finish. The area covered by the window and its trim must be deducted from the total wall area to determine the net siding coverage.
Imagine the window frame as a hole in the siding, and calculate the area of the hole and the additional trim pieces around it.
Concluding Remarks
Mastering LP lap siding coverage calculations ensures a smooth and efficient project, minimizing waste and maximizing cost-effectiveness. By understanding the intricacies of coverage charts, accounting for various factors, and utilizing the practical examples provided, you’ll be well-equipped to tackle any siding project with confidence.
Remember to always double-check your calculations and consult with professionals when needed for complex projects. With careful planning and the knowledge gained here, your siding project is sure to be a success.