Siding Home Depot Trim: A Complete Guide
Home Depot Siding Options
Siding home depot trim – Choosing the right siding for your home is a significant decision, impacting both its aesthetic appeal and long-term durability. Home Depot offers a wide variety of siding materials to suit diverse budgets and styles. Understanding the differences between these options is crucial for making an informed choice.
Siding Material Comparison: Vinyl, Fiber Cement, and Wood
Home Depot stocks three primary siding materials: vinyl, fiber cement, and wood. Each possesses unique characteristics regarding durability, cost, and maintenance. Vinyl siding is generally the most affordable option, boasting low maintenance requirements and a wide range of colors and styles.
However, it is less durable than fiber cement or wood, and can be susceptible to damage from impact or extreme temperatures. Fiber cement siding offers superior durability and fire resistance, but comes with a higher initial cost and requires more specialized installation.
Wood siding provides a classic, natural look and can be highly durable if properly maintained, but it demands significant upkeep, including regular painting or staining, and is susceptible to rot, insect infestation, and fire.
Home Depot Siding Options: A Detailed Comparison, Siding home depot trim
The following table compares five distinct siding options available at Home Depot, highlighting key features to aid in your selection process. Note that pricing can vary based on location, specific product features, and current promotions. Warranty information should be verified directly with Home Depot or the manufacturer.
| Siding Type | Price per Square Foot (Estimate) | Warranty (Example) | Aesthetic Features |
|---|---|---|---|
| LP SmartSide Engineered Wood Siding | $3.50
|
30-year limited warranty | Classic wood look, durable, paintable |
| CertainTeed Vinyl Siding | $1.50
|
50-year limited warranty | Wide variety of colors and styles, low maintenance |
| James Hardie Fiber Cement Siding | $4.00
|
30-year limited warranty (varies by product) | Durable, fire-resistant, variety of textures and colors |
| Allura Vinyl Siding | $1.00
|
Limited lifetime warranty (check specifics) | Affordable, various styles and colors mimicking wood or stone |
| Mastic Vinyl Siding | $2.00
|
30-year limited warranty | Known for its durability and resistance to fading |
Home Depot Trim Options: Siding Home Depot Trim
Choosing the right trim can significantly enhance the curb appeal and overall aesthetic of your home. Home Depot offers a wide variety of trim options to suit diverse styles and budgets, ensuring you find the perfect complement to your siding.
This section explores the different materials, styles, and compatibility considerations to help you make an informed decision.
Trim Material Options
Home Depot provides trim in several materials, each with its own advantages and disadvantages. Vinyl trim is a popular choice due to its low maintenance, affordability, and resistance to rot and insects. Wood trim, while more expensive and requiring regular maintenance, offers a classic and elegant look.
Aluminum trim is durable and weather-resistant, making it a good option for high-traffic areas or harsh climates. The selection also includes composite materials, offering a blend of durability and aesthetics.
Trim Style Options
The styles available at Home Depot are equally diverse. From simple, clean lines to ornate and elaborate designs, you can find trim to match any architectural style. Popular styles include colonial, craftsman, and modern. Consider the overall style of your home when selecting trim to ensure a cohesive look.
Details such as the width, profile (e.g., flat, rounded, beveled), and color will further contribute to the overall aesthetic. Many profiles mimic the look of traditional wood trim, offering a more sophisticated appearance than basic vinyl.
Trim Material Compatibility with Siding Types
Proper material selection is crucial for long-lasting and aesthetically pleasing results. Vinyl trim generally pairs well with vinyl siding, offering a seamless and low-maintenance combination. Wood trim can complement various siding types, including wood, fiber cement, and even vinyl, though careful consideration of maintenance requirements is necessary.
Aluminum trim is versatile and can be used with most siding types, particularly those in areas prone to high winds or moisture. It’s advisable to consult with a Home Depot associate to ensure compatibility between your chosen siding and trim materials.
Sample Trim Package for a Suburban Home
This sample package provides a realistic estimate for a typical suburban home with approximately 1,500 square feet of exterior wall space. Costs are estimates and can vary based on specific product choices, regional pricing, and labor costs. This package focuses on common trim elements; additional pieces might be needed depending on architectural details.
The following is a suggested trim package for a typical suburban home. Remember to factor in additional costs for installation, which can significantly increase the overall budget. It’s recommended to obtain a professional quote for installation before finalizing your purchase.
- Item:Vinyl J-Channel (for siding termination)
- Quantity:200 linear feet
- Estimated Cost:$200
- Item:Vinyl Corner Trim
- Quantity:100 linear feet
- Estimated Cost:$150
- Item:Vinyl Window & Door Casings
- Quantity:200 linear feet
- Estimated Cost:$400
- Item:Vinyl Soffit Trim
- Quantity:300 square feet
- Estimated Cost:$300
- Item:Vinyl Fascia Trim
- Quantity:200 linear feet
- Estimated Cost:$250
Total Estimated Cost (materials only):$1300
Siding and Trim Installation

Installing siding and trim can significantly enhance your home’s curb appeal and protect it from the elements. This process requires careful planning, attention to detail, and adherence to safety protocols. Proper installation ensures longevity and prevents costly repairs down the line.
Step-by-Step Installation Guide
Successful siding and trim installation involves a series of sequential steps. Each step is crucial for a finished product that is both aesthetically pleasing and structurally sound. Improper execution at any stage can compromise the overall project.
- Preparation:Begin by carefully measuring the area to be sided and trimmed. This precise measurement is crucial for accurate material ordering. Ensure the surface is clean, dry, and free of any debris or loose material. This will provide a stable base for the siding and trim.
Proper surface preparation is critical for optimal adhesion and long-term durability.
- Framing and Sheathing (if necessary):If installing new siding over existing damaged sheathing, replace or repair damaged sections before proceeding. Ensure the framing is structurally sound and properly braced to support the weight of the new siding. This step is essential for preventing future issues like sagging or warping.
- Installing Starter Strips and J-Channel:Install starter strips along the bottom edge of the wall to provide a level base for the first row of siding. J-Channel is then installed at corners and around windows and doors to create a neat, finished edge. Correct installation of these components ensures straight lines and a professional finish.
- Siding Installation:Begin installing siding from the bottom, working your way up. Overlap each piece according to the manufacturer’s instructions, ensuring proper alignment and fastening. Use appropriate fasteners and avoid over-driving them, which could damage the siding. Consistent overlap is key to preventing water penetration and maintaining a uniform appearance.
- Trim Installation:After the siding is installed, install the trim pieces around windows, doors, and corners. Use appropriate caulking to seal gaps and prevent water infiltration. Ensure the trim is properly aligned and secured with appropriate fasteners. Properly installed trim protects the siding edges and enhances the overall aesthetic appeal.
- Finishing Touches:Once all siding and trim are installed, inspect for any gaps or imperfections. Caulk any gaps or cracks to ensure a weathertight seal. Clean up any debris or leftover materials. A final inspection guarantees a high-quality, long-lasting installation.
Potential Challenges and Solutions
Several challenges can arise during siding and trim installation. Understanding these potential problems and their solutions is essential for a smooth project. Preparation and proactive measures can minimize delays and ensure a successful outcome.
- Uneven Walls:Uneven walls can make it difficult to install siding evenly. Solutions include using shims to level the siding or using furring strips to create a level surface. Accurate measurements and careful adjustments are crucial for rectifying this issue.
- Difficult Weather Conditions:Extreme heat, cold, or rain can hinder installation. Solutions include scheduling the project during favorable weather conditions or taking appropriate measures to protect the materials and workers from the elements. Careful planning and weather monitoring are vital for successful completion.
- Improper Material Handling:Damage to siding during handling can lead to installation issues. Solutions include careful handling of materials, using appropriate protective measures, and ensuring proper storage to prevent damage. Preventing damage before installation saves time and materials.
- Fastener Issues:Using incorrect fasteners or over-driving them can damage the siding. Solutions involve using the recommended fasteners and driving them to the proper depth. Following manufacturer specifications ensures durability and prevents damage.
Necessary Tools and Equipment
Having the right tools and equipment significantly improves efficiency and the quality of the installation. A well-equipped workspace allows for a smoother and more successful project.
- Measuring Tape
- Level
- Circular Saw
- Jigsaw
- Hammer
- Nail Gun (optional, but highly recommended)
- Caulk Gun
- Safety Glasses
- Work Gloves
- Ladder (appropriate height)
- Safety Harness (for working at heights)
Cost Estimation and Budgeting
Accurately estimating the cost of a siding and trim replacement project is crucial for successful planning and execution. This involves carefully considering material costs, labor expenses, and any necessary permits. Understanding the factors that influence these costs will allow for a more realistic budget and avoid potential financial surprises during the project.Estimating the total cost requires a breakdown of several key components.
This includes calculating the quantity of materials needed based on the square footage of your home, researching current prices for those materials from Home Depot or other suppliers, and obtaining quotes from contractors for labor. Permitting fees will also need to be factored in, varying by location and project scope.
Material Costs
Material costs represent a significant portion of the overall project expense. These costs depend on the type of siding and trim chosen, their quality, and the quantity required. For instance, vinyl siding is generally less expensive than fiber cement or wood, while higher-quality materials often come with a higher price tag.
The square footage of your home directly impacts the amount of siding and trim needed. It is essential to accurately measure your home’s exterior to determine the precise quantity required, accounting for windows, doors, and other features. Remember to add a buffer for potential waste or unforeseen circumstances.
Labor Costs
Labor costs are typically calculated based on an hourly or per-square-foot rate. Contractor rates vary depending on location, experience, and demand. Obtaining multiple quotes from reputable contractors is recommended to compare pricing and services. The complexity of the project also influences labor costs; a project involving intricate trim work or challenging installation conditions will likely be more expensive than a straightforward replacement.
The duration of the project, which is directly linked to the labor cost, should also be carefully considered.
Permitting Costs
Permitting fees are determined by local building codes and regulations. These fees vary widely depending on your location and the scope of your project. Contact your local building department to inquire about the specific requirements and associated costs for your siding and trim replacement.
It is crucial to obtain the necessary permits before starting the project to avoid potential fines or legal issues.
Sample Budget for a 1500 sq ft Home
The following table provides a sample budget for a 1500 sq ft home siding and trim replacement project. Remember that these are estimates, and actual costs may vary depending on the specific materials, labor rates, and location.
| Category | Item | Quantity/Rate | Cost |
|---|---|---|---|
| Materials | Siding (Vinyl) | 1500 sq ft @ $3/sq ft | $4500 |
| Trim (Vinyl) | 200 linear ft @ $10/linear ft | $2000 | |
| Fasteners, sealant, etc. | $500 | ||
| Labor | Siding and Trim Installation | $5/sq ft | $7500 |
| Permits | Building Permits | $500 | |
| Total Estimated Cost | $15000 | ||
Note: This is a simplified example. Actual costs may vary significantly depending on material choices, labor rates, location, and project complexity. Always obtain multiple quotes from reputable contractors.
Visual Examples of Siding and Trim Combinations
Choosing the right siding and trim combination significantly impacts a home’s aesthetic appeal and overall value. The interplay of colors, textures, and profiles creates a cohesive and visually pleasing exterior. This section explores three distinct home styles, illustrating effective siding and trim pairings.
Siding and Trim Combinations for a Craftsman Style Home
The Craftsman style emphasizes natural materials, handcrafted details, and horizontal lines. For a Craftsman home, consider using cedar shake siding in a warm, earthy tone like a medium brown or deep taupe. This natural texture provides visual interest and complements the style’s rustic charm.
The trim should be a contrasting color, but still within the same warm palette. A slightly lighter shade of brown, or even a muted green, would work well. For trim profiles, wide, simple casings around windows and doors, along with substantial eaves and rakes, would enhance the Craftsman aesthetic.
The use of stained wood for both siding and trim will further amplify the natural, handcrafted feel of the style. Imagine a home with deep brown cedar shake siding accented by a lighter brown wood trim, showcasing wide, simple casings around the windows and a prominent, slightly overhanging roofline.
Siding and Trim Combinations for a Ranch Style Home
Ranch homes often feature a low-pitched roof, long horizontal lines, and a focus on functionality. Vinyl siding is a popular and practical choice for this style due to its low maintenance. A neutral color like beige or light gray would create a clean, modern look.
To add visual interest without being overwhelming, choose a slightly darker shade of the same color for the trim. For instance, if the siding is a light beige, a medium beige or taupe could be used for the trim.
Simple trim profiles, such as narrow casings around windows and doors, are ideal for maintaining the clean lines of the ranch style. A crisp white trim could also be a striking contrast against a light gray or beige siding, adding a touch of sophistication.
Visualize a home with light gray vinyl siding, accentuated by crisp white trim around the windows and doors. The simple lines of the trim enhance the home’s clean, uncluttered appearance.
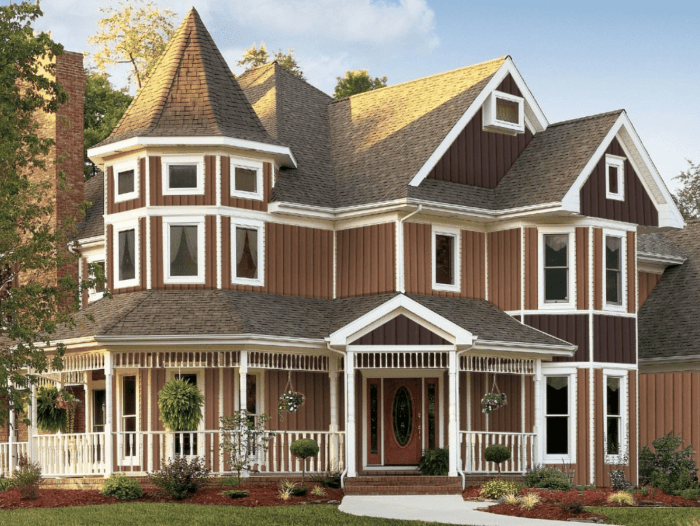
Siding and Trim Combinations for a Victorian Style Home
Victorian homes are characterized by intricate details, ornate trim, and a variety of textures. Fiber cement siding offers durability and the ability to mimic the look of wood clapboard, a common feature of Victorian architecture. A deep, rich color such as dark green or burgundy would be appropriate for the siding, reflecting the richness and complexity of the style.
The trim should be a contrasting color that complements the siding. For a dark green siding, a creamy white or off-white trim would create a striking contrast. In a Victorian home, the trim plays a crucial role, featuring elaborate crown molding, intricate window casings, and decorative brackets.
These elements add depth and visual interest, highlighting the home’s ornate details. Consider a home with deep burgundy fiber cement siding and off-white trim. The intricate crown molding, window casings, and decorative brackets showcase the Victorian style’s attention to detail, creating a visually rich and captivating exterior.
Impact of Siding and Trim Combinations on Curb Appeal
The strategic selection of siding and trim colors and profiles significantly enhances curb appeal. Contrasting colors can create visual interest and highlight architectural details. A well-chosen palette can make a home appear larger, more inviting, or even more modern.
For example, a light-colored siding with darker trim can make a home appear taller, while a monochromatic scheme can create a sleek, contemporary look. Conversely, a clashing color palette can detract from the home’s overall appeal and make it appear disjointed.
The thoughtful use of different trim profiles can also emphasize architectural details and add visual texture, further enhancing the home’s curb appeal. For instance, adding crown molding to a simple home can immediately add a sense of elegance and sophistication.
Visual Impact of Different Trim Profiles on Various Siding Types
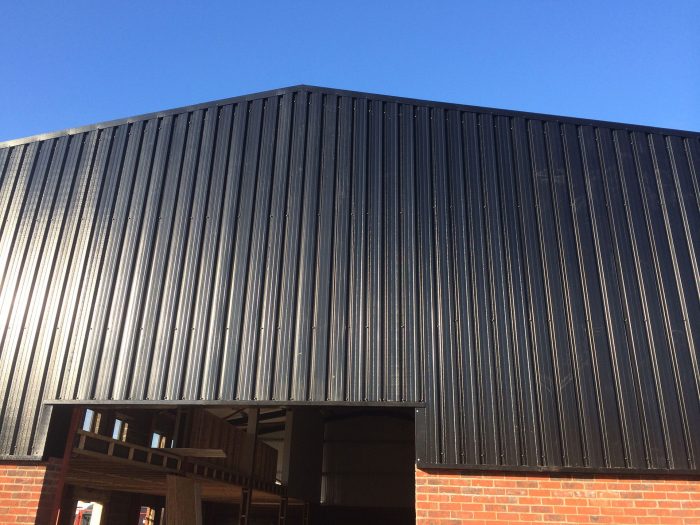
Different trim profiles interact uniquely with various siding types. For example, the bold lines of wide trim complement the rustic texture of clapboard siding, while thinner profiles might be more suitable for sleek, modern siding like fiber cement. Crown molding, often used to add visual height and sophistication, can be especially effective when paired with vertical siding.
Casings, which frame windows and doors, can be customized in width and profile to enhance the overall aesthetic. Baseboards, while less prominent than other trim elements, still contribute to the overall cohesiveness of the design, creating a unified look.
The interplay of textures and profiles creates visual depth and interest, adding to the home’s overall charm and appeal. For instance, a simple, clean-lined casing would complement modern vinyl siding, while intricate Victorian-style casings would pair well with ornate wood siding.
Maintenance and Repair
Proper maintenance is crucial for extending the lifespan and preserving the aesthetic appeal of your home’s siding and trim. Neglecting maintenance can lead to costly repairs and premature replacement. This section Artikels a maintenance schedule and addresses common issues to help you keep your home’s exterior looking its best.
Maintenance Schedules for Different Siding and Trim Materials
Regular maintenance varies depending on the material used. A consistent schedule helps prevent problems before they become significant.
| Material | Annual Maintenance | Every 2-3 Years | Every 5-7 Years |
|---|---|---|---|
| Vinyl Siding | Clean with water and mild detergent; inspect for damage. | Inspect caulking around windows and doors; re-caulk as needed. | Power wash (low pressure); inspect for cracks or loose panels. |
| Wood Siding | Inspect for insect damage, rot, and loose boards; clean with appropriate wood cleaner. | Re-stain or paint as needed; check and repair caulking. | Consider professional inspection for significant damage or repairs. |
| Fiber Cement Siding | Clean with water and mild detergent; inspect for damage. | Inspect for cracks or loose panels; repair or replace as needed. | Power wash (low pressure); inspect for signs of wear. |
| Aluminum Siding | Clean with water and mild detergent; inspect for dents or scratches. | Inspect caulking around windows and doors; re-caulk as needed. | Inspect for corrosion; repair or replace damaged sections. |
| Wood Trim | Inspect for insect damage, rot, and loose boards; clean with appropriate wood cleaner. | Re-stain or paint as needed; check and repair caulking. | Consider professional inspection for significant damage or repairs. |
| Vinyl Trim | Clean with water and mild detergent; inspect for damage. | Inspect caulking around windows and doors; re-caulk as needed. | Inspect for cracks or loose sections; repair or replace as needed. |
Common Siding and Trim Problems and Solutions
Several issues can affect siding and trim over time. Prompt attention to these problems can prevent larger, more expensive repairs.
- Cracked or Damaged Siding:Cracks in vinyl or fiber cement siding can be repaired with specialized patching compounds. Severely damaged sections may require replacement. For wood siding, rotted areas must be cut out and replaced with new wood.
- Loose or Missing Siding:Loose siding is often caused by improper installation or expansion and contraction due to temperature changes. Loose panels should be re-secured using appropriate fasteners. Missing panels require replacement.
- Caulk Failure:Caulk around windows and doors deteriorates over time, leading to water infiltration. Cracked or missing caulk should be removed and replaced with a high-quality exterior-grade caulk.
- Insect Infestation:Wood siding and trim are susceptible to insect damage. Regular inspections and prompt treatment with appropriate insecticides can prevent significant damage. Severe infestations may require professional pest control.
- Paint or Stain Degradation:Faded or peeling paint or stain on wood siding and trim reduces protection and aesthetic appeal. Repainting or restaining is necessary to maintain the appearance and protect the wood from the elements. For example, a home with southern exposure might require repainting every 3-4 years due to intense sun exposure, whereas a home in a shaded area might last 5-7 years.
Importance of Regular Inspections and Preventative Maintenance
Regular inspections are the cornerstone of effective siding and trim maintenance. Catching small problems early prevents them from escalating into costly repairs. For instance, a small crack in vinyl siding, if left unaddressed, could allow water penetration, leading to rot in underlying sheathing and requiring extensive repairs.
Preventative maintenance, such as cleaning and caulking, significantly extends the life of your siding and trim, saving you money in the long run.
Last Word
Ultimately, selecting the right siding and trim for your home involves careful consideration of your budget, aesthetic preferences, and long-term maintenance needs. By understanding the different materials, installation processes, and cost factors Artikeld in this guide, you can confidently choose the perfect combination to enhance your home’s beauty and value.
Remember that proper planning and execution, along with regular maintenance, will ensure your siding and trim remain attractive and functional for years to come. Transforming your home’s exterior is a rewarding endeavor, and we hope this guide has provided you with the knowledge and confidence to embark on this project successfully.