Trim for Siding: A Comprehensive Guide
Defining “Trim for Siding”
Trim for siding – Siding trim plays a crucial role in the overall aesthetic appeal and structural integrity of a building’s exterior. It’s more than just decoration; it protects the edges of siding, provides a clean finish, and enhances the home’s curb appeal.
Understanding the various types of siding trim, their materials, and applications is essential for homeowners and contractors alike.
Types of Siding Trim
Siding trim encompasses a wide variety of pieces designed to finish and protect the edges and intersections of siding. These include, but are not limited to, corner boards, J-channels, window and door casings, drip edges, rake trim, and fascia boards.
Each serves a specific purpose in completing the siding installation and preventing water damage. Corner boards protect exterior corners, J-channels cover the edges of siding panels, and casings frame windows and doors, creating a neat and finished look.
Drip edges prevent water from running behind the siding, while rake and fascia trim finish the edges of the roofline.
Materials Used for Siding Trim
Several materials are commonly used for siding trim, each with its own set of advantages and disadvantages.
Wood:A classic and versatile choice, wood trim offers a natural aesthetic and can be painted or stained to match any style. However, it requires regular maintenance, including painting or staining to prevent rot and insect damage.
Vinyl:Vinyl siding trim is a popular option due to its low maintenance, durability, and affordability. It’s resistant to rot, insects, and moisture, but can be less aesthetically pleasing than wood and may fade over time.
Aluminum:Aluminum trim is known for its strength, durability, and resistance to corrosion. It’s a low-maintenance option, but it can dent easily and may not offer the same aesthetic appeal as wood or vinyl.
Fiber Cement:Fiber cement trim combines the strength and durability of cement with the workability of wood. It’s highly resistant to fire, rot, and insects, but it’s more expensive than vinyl or aluminum and requires more specialized installation techniques.
Common Siding Trim Profiles and Applications
Various trim profiles are available to complement different siding styles and architectural designs. For instance, a simple, flat profile might be used for a modern home, while more ornate profiles might suit a Victorian-style home. The choice of profile often depends on personal preference and the overall design aesthetic.
Common profiles include:
Flat Trim:Used for simple, clean lines and often found in contemporary designs.
Cove Trim:Features a curved profile, adding a decorative element.
Crown Molding:A more decorative trim used around windows, doors, and along rooflines.
Baseboard:Covers the transition between the wall and the floor, often used at the bottom of siding.
Comparison of Siding Trim Materials
| Material | Pros | Cons | Cost |
|---|---|---|---|
| Wood | Natural beauty, versatile, paintable/stainable | Requires maintenance, susceptible to rot and insects, higher cost | High |
| Vinyl | Low maintenance, durable, affordable, resistant to rot and insects | Can fade, less aesthetically pleasing than wood, may dent | Low to Moderate |
| Aluminum | Strong, durable, corrosion-resistant, low maintenance | Can dent, may not be aesthetically pleasing to all | Moderate |
| Fiber Cement | Highly durable, fire-resistant, rot and insect resistant | More expensive, requires specialized installation | High |
Siding Trim Installation Methods
Installing siding trim correctly is crucial for a beautiful and long-lasting exterior. Proper installation ensures a weathertight seal, protecting your home from the elements and preventing costly damage. This process involves several key steps and techniques, depending on the type of siding and trim material used.
The installation process generally begins with careful preparation. This includes measuring and cutting the trim pieces to the precise lengths needed, ensuring accurate fit and minimizing waste. Pre-drilling pilot holes is also a vital step, especially for harder trim materials like wood or PVC, to prevent splitting and cracking during fastening.
Accurate measurements and careful cutting are essential for a professional finish. The next step involves securing the trim to the house, a process which varies depending on the materials and the specific application.
Securing Siding Trim to the House
Securing the trim involves selecting the appropriate fasteners and ensuring a weathertight seal. For wood trim, galvanized nails or screws are typically used. The choice between nails and screws often depends on personal preference and the specific application, with screws generally offering greater holding power and the ability to be easily removed if necessary.
For vinyl or composite trim, special siding nails or screws designed for these materials are essential to prevent damage. These fasteners are typically smaller and have a wider head to distribute pressure more evenly, reducing the risk of cracking or splitting the trim.
Always follow the manufacturer’s recommendations for fastener type and spacing.
Creating a Weathertight Seal Around Trim
A weathertight seal is paramount to protect the underlying structure from moisture damage. This is achieved through a combination of proper installation techniques and the use of appropriate sealants. Before fastening the trim, a bead of high-quality exterior-grade caulk should be applied to the areas where the trim meets the siding and the house’s framing.
This caulk acts as a barrier against water infiltration. Furthermore, ensuring a snug fit between the trim and the siding minimizes gaps where water could penetrate. The use of backer rod can also be beneficial in larger gaps, providing a consistent base for the caulk to adhere to and preventing excessive caulk usage.
Fastening Techniques for Various Siding Trim Materials
The fastening method varies depending on the trim material. Wood trim is typically nailed or screwed directly to the house’s framing, with nails or screws spaced according to the manufacturer’s recommendations. Vinyl or composite trim often uses special nails or screws designed to prevent damage to the material.
These fasteners are usually driven at a slight angle to allow for expansion and contraction due to temperature changes. Metal trim might require rivets or screws, depending on the specific design and material thickness. Proper fastener selection is crucial for ensuring a secure and long-lasting installation.
Essential Tools for Siding Trim Installation
Proper tools are essential for efficient and accurate siding trim installation. Having the right tools on hand will significantly streamline the process and contribute to a professional finish.
- Measuring tape
- Pencil
- Hand saw or miter saw
- Drill with appropriate drill bits
- Level
- Caulk gun
- Hammer or impact driver
- Safety glasses
- Work gloves
- Exterior-grade caulk
- Fasteners (nails, screws, rivets, etc.)
Siding Trim Maintenance and Repair: Trim For Siding
Proper maintenance and timely repairs are crucial for extending the lifespan of your siding trim and maintaining your home’s curb appeal. Neglecting these aspects can lead to costly repairs down the line, potentially compromising the structural integrity of your home’s exterior.
This section details essential maintenance tasks and repair methods to keep your siding trim in optimal condition.
Routine Maintenance Tasks
Regular inspections and preventative measures are key to preventing significant damage. A proactive approach significantly reduces the likelihood of extensive and expensive repairs. This includes addressing minor issues before they escalate into larger problems.
- Annual Inspection:Conduct a thorough visual inspection of all siding trim at least once a year, preferably in spring and fall. Look for cracks, loose pieces, signs of rot, insect infestation, or damage from weather exposure.
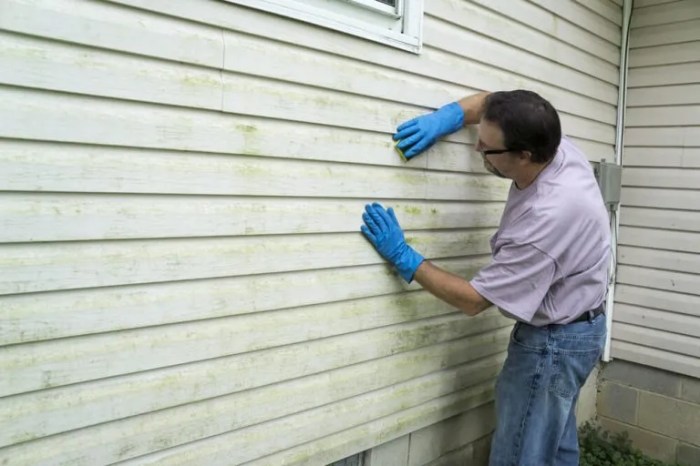
- Cleaning:Clean siding trim regularly using a soft-bristled brush, mild detergent, and water. For stubborn dirt or mildew, consider using a pressure washer at a low setting, being careful not to damage the trim. Always rinse thoroughly after cleaning.
- Caulking and Sealant:Regularly check caulking and sealant around windows, doors, and other areas where siding trim meets the house. Replace any cracked or deteriorated sealant to prevent water intrusion.
- Paint or Stain:Repainting or restaining wood trim every few years, depending on the climate and exposure, protects it from the elements and maintains its appearance. Use high-quality exterior-grade paint or stain appropriate for the type of wood.
Repairing Common Damage
Addressing damage promptly prevents further deterioration and safeguards your home’s exterior. Different repair methods are suitable for various types of damage.
- Cracks:Small cracks can often be repaired using wood filler. Clean the crack thoroughly, apply the filler, let it dry completely, and sand smooth before repainting or restaining.
- Rot:Rotted wood requires more extensive repair. The affected area must be cut out completely, ensuring all rotted wood is removed. Replace the damaged section with a new piece of wood of the same size and type, securing it with appropriate fasteners.
Apply wood filler to smooth the joint and finish with paint or stain.
- Dents:Minor dents in metal siding trim may be able to be carefully pushed back into place using a rubber mallet or similar tool. For more significant dents, replacement may be necessary.
Protecting Siding Trim from the Elements
The elements significantly impact siding trim’s longevity. Protective measures are essential to mitigate damage.
- Regular Cleaning:Removes dirt, mildew, and other debris that can accelerate deterioration.
- High-Quality Paint or Stain:Acts as a protective barrier against moisture, UV radiation, and other environmental factors.
- Caulking and Sealants:Prevents water from entering cracks and crevices, preventing rot and other damage.
- Proper Ventilation:Ensures adequate airflow to prevent moisture buildup, particularly important in areas prone to high humidity.
Siding Trim Maintenance Schedule
The following schedule provides a basic framework; adjustments may be necessary based on your climate and the condition of your siding trim.
| Task | Frequency |
|---|---|
| Visual Inspection | Twice yearly (Spring & Fall) |
| Cleaning | As needed, but at least annually |
| Caulking/Sealant Inspection & Repair | Annually |
| Repainting/Restraining | Every 3-5 years (depending on climate and paint/stain type) |
Siding Trim Styles and Design Considerations

Siding trim offers a remarkable opportunity to enhance a home’s aesthetic appeal and architectural character. The careful selection and installation of trim can significantly impact the overall visual impact, transforming a house into a home with distinct personality and style.
Understanding different trim styles and their applications is crucial for achieving a cohesive and visually pleasing exterior.
The choice of siding trim style should complement the home’s architectural design. Different styles lend themselves to various architectural periods and aesthetics. For instance, a Craftsman-style home might benefit from wider, more substantial trim, while a contemporary home might look best with sleek, minimalist trim details.
Beyond style, the strategic use of trim can create visual interest, highlight architectural features, and even subtly alter the perceived proportions of the house.
Siding Trim Styles and Their Architectural Applications
Various siding trim styles exist, each contributing unique visual characteristics. Consider the following examples, demonstrating how trim styles can be matched with different home architectural designs:
|
Style:Board and Batten Description:Vertical boards of varying widths, often with narrower battens covering the seams. Creates a rustic, traditional look. Architectural Styles:Farmhouse, Craftsman, Rural. Image Description:A photograph showing a farmhouse with wide, vertical board and batten siding. The trim is painted a contrasting color to the siding, emphasizing the vertical lines and adding visual interest. The trim is neatly mitered at the corners and around windows. |
Style:Colonial-Style Molding Description:More ornate and detailed trim, often featuring intricate profiles and decorative elements. Creates a formal, elegant look. Architectural Styles:Colonial Revival, Georgian, Victorian. Image Description:A picture depicting a Colonial Revival home with detailed crown molding and window casings. The trim is painted white, creating a sharp contrast against the darker siding. The molding exhibits elaborate curves and profiles, reflecting the style’s formal character. |
Style:Modern Minimalist Trim Description:Simple, clean lines and narrow profiles. Focuses on functionality and a streamlined aesthetic. Architectural Styles:Modern, Contemporary, Mid-Century Modern. Image Description:An image showing a contemporary home with flush-mounted siding and very thin, almost invisible trim. The emphasis is on clean lines and a lack of ornamentation. The trim is the same color as the siding, creating a seamless and unified appearance. |
Style:Craftsman-Style Trim Description:Characterized by wide, substantial trim with simple, often geometric designs. Often incorporates natural wood tones. Architectural Styles:Craftsman, Bungalow. Image Description:A photograph of a Craftsman bungalow featuring wide, horizontal trim boards around windows and doors. The trim is stained a rich, dark brown, complementing the natural wood siding. The simplicity of the design emphasizes the natural beauty of the materials. |
Common Design Elements Enhancing Curb Appeal with Siding Trim
Beyond the style itself, specific design elements incorporated with siding trim can greatly enhance a home’s curb appeal. Careful consideration of these elements can elevate the overall aesthetic impact.
Examples of these elements include the strategic use of contrasting colors to highlight trim details, the incorporation of decorative accents like corner blocks or quoins, and the careful alignment and proportioning of trim elements to create a visually balanced and pleasing facade.
The selection of high-quality materials that are durable and weather-resistant is also crucial for maintaining the home’s aesthetic appeal over time.
The Role of Siding Trim in Creating Visual Interest and Architectural Detail
Siding trim plays a pivotal role in adding visual interest and architectural detail to a home’s exterior. It provides a framework for the siding, defining windows, doors, and other architectural features. The strategic placement and design of trim can create visual depth, emphasize certain elements, and even subtly alter the perceived proportions of the house.
For instance, using darker trim can make a house appear more grounded and substantial, while lighter trim can create a feeling of airiness and openness.
Cost Considerations for Siding Trim
The cost of installing siding trim can vary significantly depending on several interconnected factors. Understanding these factors allows homeowners to make informed decisions and budget effectively for their projects. This section will explore the key cost drivers, provide illustrative pricing examples, and offer strategies for cost reduction without compromising quality.
Factors Influencing Siding Trim Costs
Material selection, labor costs, and project complexity are the primary determinants of overall siding trim expenses. The type of material chosen—whether vinyl, wood, fiber cement, or aluminum—directly impacts the initial material cost. Labor costs, influenced by factors such as regional wage rates and project scope, represent a substantial portion of the total expense.
Finally, intricate designs and difficult installations naturally increase labor hours and consequently the overall cost.
Pricing Ranges for Siding Trim Materials and Installation
Pricing varies considerably based on material and installation method. For example, vinyl siding trim, often the most economical option, might range from $1 to $5 per linear foot for materials, while installation costs could add another $2 to $8 per linear foot, depending on the complexity of the project.
Wood trim, particularly higher-quality hardwoods, commands a much higher price, potentially ranging from $5 to $20 per linear foot for materials, with installation adding a similar or even higher amount depending on the wood type and the intricacy of the design.
Fiber cement, known for its durability, usually falls between vinyl and high-end wood in terms of material cost, while aluminum siding trim often sits at a similar price point to vinyl. Note that these are broad estimates, and actual costs can deviate based on geographical location and market conditions.
Strategies for Reducing Siding Trim Installation Costs
Several strategies can help minimize expenses without compromising the quality of the final product. Careful planning and material selection are crucial. Choosing less expensive but durable materials, such as vinyl or a less expensive wood species, can significantly reduce material costs.
Similarly, opting for simpler trim designs can decrease labor costs. Homeowners can also consider DIY installation for less complex projects, although this requires significant skill and time commitment. Finally, securing multiple bids from reputable contractors allows for price comparison and potentially identifying more cost-effective options.
Sample Budget Breakdown for a Siding Trim Project
The following table provides a sample budget breakdown for a hypothetical 100-linear-foot siding trim project using vinyl siding. This is a simplified example and should be adjusted based on specific project requirements and regional pricing.
| Item | Quantity | Unit Cost | Total Cost |
|---|---|---|---|
| Vinyl Siding Trim Material | 100 linear feet | $3/linear foot | $300 |
| Labor (Installation) | 100 linear feet | $5/linear foot | $500 |
| Permits and Inspections (if required) | 1 | $100 | $100 |
| Contingency (10% of total cost) | – | – | $90 |
| Total Estimated Cost | – | – | $990 |
Troubleshooting Common Siding Trim Issues
Proper installation and regular maintenance are key to preventing siding trim problems. However, issues can still arise. Understanding how to identify and resolve these problems efficiently can save time, money, and frustration. This section details common siding trim issues and their solutions.
Gaps Between Trim and Siding
Gaps between siding trim and the main siding are unsightly and can compromise the weatherproofing of your home. These gaps often result from improper installation, expansion and contraction of materials due to temperature changes, or settling of the house.
To address gaps, you may need to carefully remove and reinstall the trim, ensuring proper sealing and fastening. In some cases, using a paintable caulk designed for exterior use to fill smaller gaps may suffice. The caulk should be flexible to accommodate movement of the materials.
Larger gaps will require more extensive repair.
Misaligned Siding Trim
Misaligned trim is a common aesthetic problem. It can occur due to inaccurate measurements, improper nailing, or warping of the trim material. Correcting misalignment depends on the severity of the issue. Minor misalignments may be addressed with careful adjustment and refastening.
Significant misalignment usually necessitates removal and reinstallation of the affected trim pieces. Ensure accurate measurements and use a level during reinstallation to prevent recurrence.
Water Damage to Siding Trim, Trim for siding
Water damage manifests as rot, warping, and discoloration. This is often caused by inadequate caulking, damaged flashing, or improperly installed trim. Addressing water damage requires identifying the source of the leak. This may involve inspecting flashing, caulking, and the underlying structure.
Damaged trim pieces must be replaced. Ensure proper sealing and flashing to prevent future water damage. In cases of extensive rot, you may need to replace sections of siding beneath the trim as well.
Damaged or Deteriorated Siding Trim
Deterioration can occur due to weathering, insect infestation, or impact damage. The solution depends on the extent of the damage. Minor scratches and dents may be repaired with wood filler and repainting. More significant damage, such as rot or severe cracking, requires replacing the affected trim piece.
Consider using durable, weather-resistant materials like composite trim to minimize future deterioration.
Troubleshooting Flowchart for Common Siding Trim Problems
A visual flowchart can aid in troubleshooting. The following describes a simplified flowchart:Start> Is there a gap?
-
-> Yes
Check caulking, consider removal and reinstallation. No: Proceed.
- > Is the trim misaligned?
- > Is there water damage?
- > Is the trim damaged or deteriorated?
-> Yes
Adjust and refasten or reinstall. No: Proceed.
-> Yes
Identify water source, replace damaged trim and seal properly. No: Proceed.
-> Yes
Repair minor damage, replace severely damaged pieces. No: End.
Ultimate Conclusion
Ultimately, understanding and properly implementing trim for siding is key to achieving a beautiful, durable, and weather-resistant exterior. By carefully considering material selection, installation techniques, maintenance practices, and design elements, you can significantly enhance your home’s curb appeal and protect your investment for years to come.
This comprehensive guide provides the knowledge and tools necessary to navigate this important aspect of home improvement, ensuring a successful and aesthetically pleasing outcome.