What is a Siding Square?
Defining “Siding Square”
What is a siding square – A siding square, in the context of home construction and improvement, refers to a specialized tool used to accurately measure and mark the cuts needed for installing exterior siding. It’s an essential tool for ensuring consistent and aesthetically pleasing results, particularly when working with various siding materials and complex architectural designs.
While not a structural component itself, its precise measurements are crucial for a successful siding installation.Siding squares are designed to simplify the process of cutting siding pieces to fit around corners, windows, doors, and other architectural features. They provide accurate measurements for both miter cuts (angled cuts) and butt cuts (straight cuts), eliminating the need for complex calculations and reducing the risk of errors.
Their purpose is to ensure that siding pieces align correctly and fit snugly together, creating a clean, professional finish.
Siding Square Materials
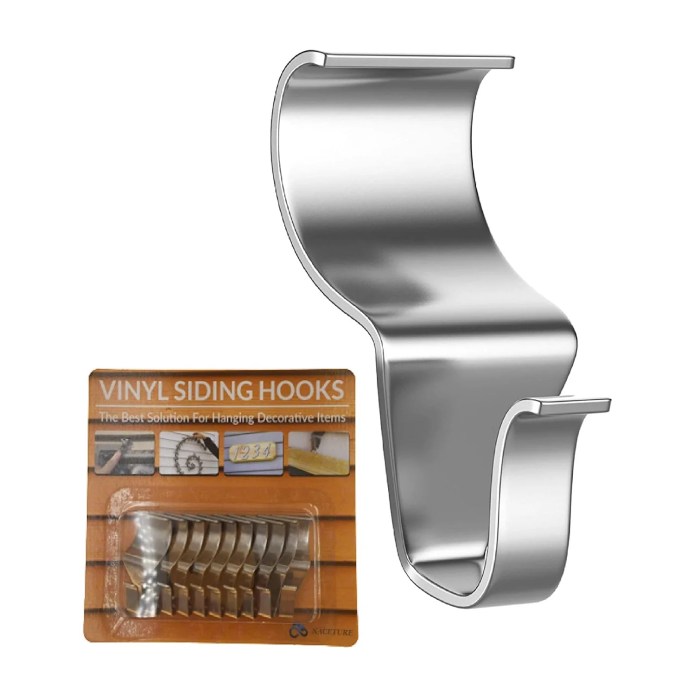
Siding squares are typically manufactured from durable materials that can withstand regular use in outdoor environments. Common materials include high-impact plastics, aluminum, and even heavy-duty steel for more robust applications. Plastic siding squares are lightweight and relatively inexpensive, making them a popular choice for DIY projects and smaller jobs.
Aluminum siding squares offer greater durability and resistance to bending or damage, while steel siding squares provide the highest level of strength and longevity but at a higher cost. The choice of material often depends on the scale of the project and the type of siding being installed.
Siding Square Designs and Styles
The design of a siding square can vary depending on its intended use and the type of siding being installed. Basic siding squares typically feature a right-angled design with clearly marked measurement scales. More advanced models may incorporate features such as adjustable arms, multiple angle settings, or integrated cutting guides.
Some siding squares are designed specifically for certain types of siding, such as vinyl, wood, or metal, while others are versatile enough to be used with various materials. For instance, a square designed for vinyl siding might have markings specific to common vinyl panel widths, while a more general-purpose square would feature standard measurements suitable for various materials.
A simple design might feature only a 90-degree angle and basic measurements, whereas a more complex design could incorporate multiple angles for intricate cuts, improving efficiency and accuracy.
Types of Siding Squares
Siding squares, also known as siding panels, come in a variety of materials, each offering unique properties impacting cost, durability, maintenance requirements, and aesthetic appeal. Understanding these differences is crucial for homeowners and contractors alike when selecting the best option for a particular project.
This section will explore the most common types of siding squares, detailing their characteristics and installation methods.
Vinyl Siding Squares
Vinyl siding squares are a popular choice due to their affordability and low maintenance. They are typically manufactured from polyvinyl chloride (PVC), a durable plastic material resistant to rot, insects, and moisture. This makes them ideal for various climates.
Installation involves interlocking the panels, a relatively straightforward process that can be handled by DIY enthusiasts with basic tools. However, vinyl siding can be susceptible to damage from impact and extreme temperatures, potentially leading to warping or cracking. Its relatively short lifespan compared to other materials should also be considered.
Wood Siding Squares
Wood siding squares offer a classic, natural aesthetic. They are typically made from cedar, redwood, or other durable wood species, offering a range of colors and textures. Properly treated and maintained, wood siding can last for decades, adding significant value to a property.
Installation, however, is more labor-intensive than vinyl, requiring precise cuts and careful fastening. Wood siding requires regular maintenance, including painting or staining, to protect it from rot, insects, and weathering. It is also more susceptible to damage from moisture and pests compared to other materials.
Metal Siding Squares
Metal siding squares, often made from aluminum or steel, are known for their exceptional durability and longevity. They are highly resistant to fire, insects, and rot, requiring minimal maintenance. They also offer superior protection against extreme weather conditions. Installation typically involves fastening the panels to a framework, a process that requires specific tools and expertise.
While durable, metal siding can be susceptible to dents and scratches, and its metallic appearance may not be aesthetically pleasing to all. Furthermore, it can be more expensive than vinyl or wood.
Fiber Cement Siding Squares
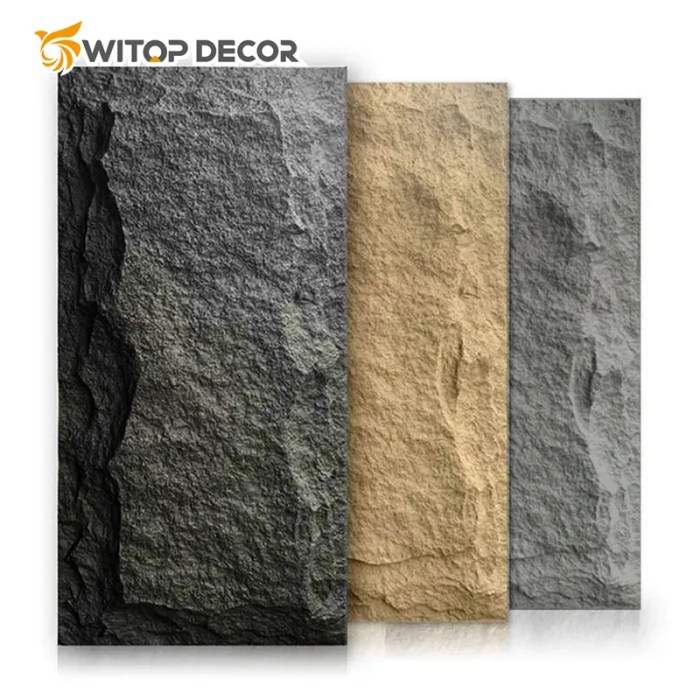
Fiber cement siding squares combine the durability of cement with the workability of wood fibers. This results in a low-maintenance, long-lasting material resistant to fire, rot, insects, and moisture. It offers a variety of textures and finishes, mimicking the appearance of wood or stone.
Installation is similar to wood siding, requiring careful cutting and fastening. While more expensive than vinyl, fiber cement provides excellent long-term value due to its superior durability and minimal maintenance requirements. However, it is heavier than other materials, requiring more robust framing.
Comparison of Siding Square Materials
| Material | Cost | Durability | Aesthetics |
|---|---|---|---|
| Vinyl | Low | Moderate | Wide variety, often mimicking other materials |
| Wood | Medium to High | High (with proper maintenance) | Natural, classic look; wide range of colors and textures |
| Metal | Medium to High | Very High | Modern, clean look; limited color and texture options |
| Fiber Cement | High | Very High | Versatile, can mimic wood or stone; wide range of finishes |
Siding Square Applications: What Is A Siding Square

Siding squares, while seemingly simple, offer a surprising range of applications in both residential and commercial construction projects. Their versatility stems from their ability to create visually appealing patterns and to facilitate the integration of different exterior materials. This section will explore the various ways siding squares are employed to achieve diverse architectural styles and functional benefits.Siding squares find their most prevalent use in creating aesthetically pleasing and durable exterior walls.
Their square shape allows for the creation of clean lines and geometric patterns, offering a modern or traditional look depending on the size, color, and arrangement of the squares.
Residential Applications
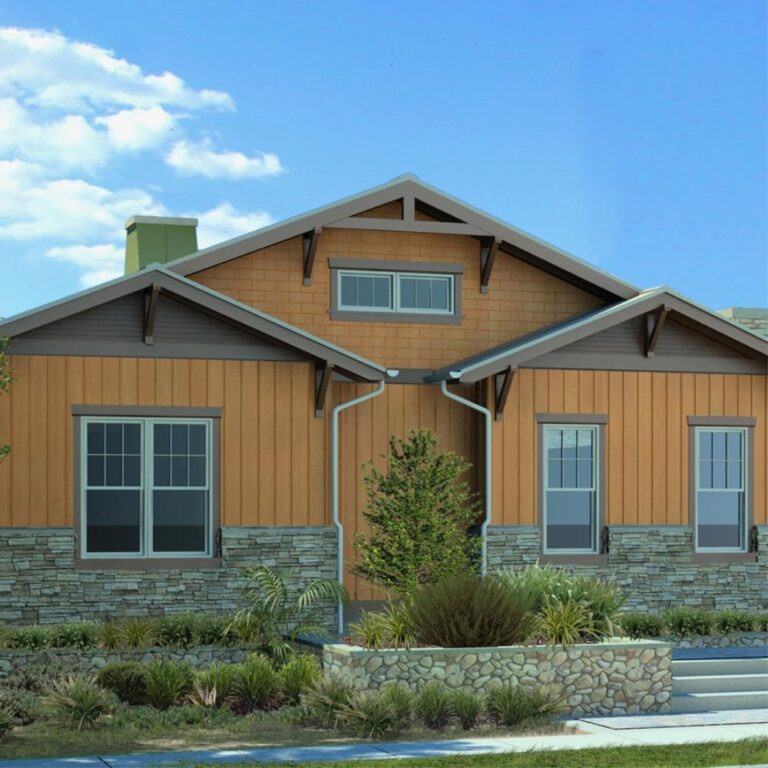
In residential construction, siding squares are frequently used to accentuate specific architectural features or to create a unique overall aesthetic. For instance, they can be used to clad the entire exterior of a home, providing a uniform and modern look.
Alternatively, they might be employed as accents around windows, doors, or along the roofline, adding visual interest and breaking up large expanses of other siding materials. Using contrasting colors or materials for the siding squares further enhances this effect.
A home with light-colored clapboard siding might incorporate dark brown or black siding squares around the windows to create a striking contrast.
Commercial Applications
The applications of siding squares extend to commercial buildings as well. Their durability and low maintenance requirements make them suitable for a variety of structures, from small retail shops to large industrial buildings. In commercial settings, siding squares are often chosen for their ability to create a clean, modern look that projects a sense of professionalism and efficiency.
Large-scale projects might use siding squares to create repeating patterns across expansive facades, while smaller buildings might use them as accents to highlight key features.
Integration with Other Exterior Materials
Siding squares integrate seamlessly with various other exterior materials. They can be used in conjunction with traditional clapboard, brick, stucco, or stone, creating a layered and textured effect. For example, a building might have a brick base, with clapboard siding covering the majority of the walls, and siding squares used as decorative accents around windows and doorways.
This combination of materials adds depth and visual interest to the building’s exterior.
- Accentuating architectural details such as windows and doors.
- Creating visually appealing patterns and textures on exterior walls.
- Improving the energy efficiency of a building by providing an additional layer of insulation (when used with appropriate backing).
- Protecting exterior walls from the elements, including rain, wind, and sun damage.
- Offering a low-maintenance and durable exterior cladding solution.
- Providing a cost-effective alternative to more expensive exterior cladding materials.
Siding Square Installation
Installing siding squares is a relatively straightforward process, but proper technique ensures a long-lasting, aesthetically pleasing, and weather-resistant finish. Careful preparation and attention to detail are key to a successful installation. This section Artikels the steps involved and offers tips for optimal results.
Step-by-Step Installation Process
The installation process begins with thorough preparation of the underlying surface. This ensures proper adhesion and prevents future problems. Next, the siding squares are carefully positioned and secured, paying close attention to alignment and overlap. Finally, any necessary finishing touches are applied to complete the installation.
- Surface Preparation:Clean the surface to be sided thoroughly. Remove any loose debris, dirt, or old paint. Repair any damaged areas, ensuring a smooth, even surface for optimal adhesion. Prime the surface if necessary, according to the manufacturer’s instructions for the siding and primer used.
- Layout and Measurement:Plan the siding square layout, considering the size and shape of the area to be covered. Accurate measurements are crucial to minimize waste and ensure a neat, professional finish. Mark the starting points for the first row of siding squares.
- Installation of the First Row:Begin installing the first row of siding squares, ensuring they are level and aligned. Use appropriate fasteners, such as nails or screws, to secure the squares firmly to the underlying surface. Follow the manufacturer’s recommendations for fastener spacing and type.
- Installation of Subsequent Rows:Install subsequent rows, maintaining consistent spacing and alignment. Ensure proper overlap between rows to create a weathertight seal. Use a level and measuring tape to check alignment regularly.
- Caulking and Finishing:Once all siding squares are installed, apply caulk to seal any gaps or joints between the squares and the surrounding surfaces. This helps prevent water infiltration and enhances the overall aesthetic appeal.
Siding Square Installation Illustration
Imagine a wall section prepared for siding. The underlying surface is clean and even, perhaps a layer of sheathing or existing wall. The first row of siding squares is installed horizontally, each square overlapping the previous one slightly.
Each square is fastened securely with nails or screws, spaced evenly according to the manufacturer’s instructions. These fasteners are driven straight and flush with the surface of the siding to avoid damage. Subsequent rows are installed similarly, with the bottom edge of each row overlapping the top edge of the row below.
The vertical joints between squares are staggered to avoid creating continuous vertical lines of weakness. Finally, caulk is applied along the top and bottom edges of the siding, as well as around any penetrations, such as windows or doors.
This creates a weathertight seal and prevents water from entering behind the siding.
Tips and Best Practices
- Use the correct fasteners for your siding material and substrate. Over-driving fasteners can split the siding.
- Maintain consistent spacing between fasteners to avoid warping or buckling.
- Work in manageable sections to maintain accuracy and avoid fatigue.
- Always check for level and alignment frequently throughout the installation process.
- Use quality caulk to ensure a watertight seal.
- Protect the installed siding from damage during the installation process.
Common Mistakes to Avoid
- Improper surface preparation leading to poor adhesion and premature failure.
- Inconsistent spacing between siding squares, creating an uneven or unprofessional look.
- Using incorrect fasteners or driving them too deeply, damaging the siding.
- Failing to adequately caulk joints, leading to water infiltration and damage.
- Not checking for level and alignment regularly, resulting in a misaligned installation.
Maintenance and Repair of Siding Squares
Proper maintenance and timely repairs are crucial for extending the lifespan and preserving the aesthetic appeal of your siding squares. Regular cleaning and inspections can prevent minor issues from escalating into costly repairs. Different materials require slightly different approaches, so understanding your siding’s composition is the first step to effective care.
Routine Maintenance for Different Siding Square Materials
Regular maintenance varies depending on the material of your siding squares. Vinyl siding, for instance, is relatively low-maintenance, requiring only occasional cleaning. However, wood siding demands more attention, needing regular sealing and painting to protect it from the elements.
Fiber cement siding, while durable, may require occasional cleaning to remove dirt and mildew. Metal siding, typically aluminum or steel, is also durable but may need periodic cleaning and touch-ups to address rust or scratches. Inspecting your siding regularly for loose or damaged pieces is important regardless of the material.
Repairing Common Damage to Siding Squares
Cracks, dents, and discoloration are common issues that can affect siding squares. Minor cracks in vinyl siding can often be repaired with vinyl caulk, carefully matching the color. Larger cracks or holes may require replacing the damaged section.
Dents in metal siding can sometimes be carefully pushed back into place, while more significant damage might necessitate panel replacement. Discoloration can often be addressed through cleaning; however, persistent staining may require repainting or specialized cleaning solutions. For wood siding, filling cracks with wood filler and repainting is a common repair method.
Remember to always use materials that are compatible with your siding type.
Cleaning and Protecting Siding Squares from the Elements, What is a siding square
Regular cleaning is vital for maintaining the appearance and longevity of siding squares. For most materials, a simple solution of mild detergent and water, applied with a soft brush or sponge, is sufficient. Power washing can be effective but should be used cautiously, as excessive pressure can damage the siding.
Always test any cleaning solution on a small, inconspicuous area first. After cleaning, allowing the siding to dry completely is important to prevent mold and mildew growth. For added protection, consider applying a sealant or protective coating specifically designed for your siding material, following the manufacturer’s instructions carefully.
This helps repel water, preventing damage from moisture and extending the life of your siding.
Recommended Cleaning Products and Techniques
The choice of cleaning products and techniques depends heavily on the material of your siding squares. It’s crucial to avoid harsh chemicals that could damage the surface.
- Vinyl Siding:A mixture of mild dish soap and water, applied with a soft brush or sponge, is generally sufficient. Rinse thoroughly with clean water. Avoid abrasive cleaners or power washing at high pressure.
- Wood Siding:Use a solution of mild detergent and water, followed by a thorough rinsing. For mildew, a solution of bleach and water (always following manufacturer’s instructions) may be necessary. Regular sealing and repainting are essential for protection.
- Fiber Cement Siding:A pressure washer can be used, but maintain a safe distance and use a low-pressure setting to avoid damage. Use a mild detergent solution for stubborn stains.
- Metal Siding:A simple soap and water solution is usually adequate. For rust, use a rust remover specifically designed for metal siding, following the product instructions carefully.
Cost Considerations
The cost of installing siding squares is influenced by several interconnected factors, making it crucial to understand these variables before embarking on a project. A clear grasp of these factors will allow for more accurate budgeting and prevent unexpected expenses.
This section will detail the primary cost drivers and provide examples to illustrate typical pricing ranges.
Factors Influencing the Cost of Siding Squares
Material selection significantly impacts the overall cost. Different materials, such as vinyl, fiber cement, wood, and metal, have varying price points. Vinyl siding is generally the most affordable option, while fiber cement and metal siding tend to be more expensive due to their durability and longevity.
Wood siding, depending on the type and quality, can fall anywhere within this range. Beyond material cost, labor costs vary depending on the complexity of the installation, the size of the project, and the geographical location. Labor rates are typically higher in urban areas and for projects requiring specialized skills, such as intricate detailing or working on multi-story buildings.
Permits and inspections are also necessary expenses and can vary depending on local regulations and project size. Finally, unforeseen circumstances, such as the need for repairs or material waste, can add unexpected costs.
Cost Comparison of Siding Square Materials and Installation Methods
Vinyl siding typically costs between $3 and $12 per square foot, including materials and installation. Fiber cement siding, known for its durability and resistance to fire and pests, usually ranges from $8 to $20 per square foot. Metal siding, offering exceptional longevity and low maintenance, can cost between $10 and $30 per square foot.
Wood siding, a classic choice, can vary greatly depending on the type of wood and its quality, ranging from $6 to $25 or more per square foot. Installation methods also influence costs. Simple installations with standard siding squares are less expensive than complex installations requiring specialized techniques or extensive preparation work.
Examples of Pricing Ranges for Various Siding Square Projects
A small project, such as siding a single-story shed (approximately 200 square feet), might cost between $600 and $2,400 depending on the chosen material. A medium-sized project, like siding a single-family home (approximately 1,500 square feet), could range from $4,500 to $30,000.
Larger, more complex projects, such as commercial buildings or multi-story homes, can cost significantly more, potentially reaching tens of thousands of dollars or more. These figures are estimates and actual costs may vary based on the factors discussed previously.
Cost Breakdown of a Typical Siding Square Installation Project
The following table provides a sample cost breakdown for a typical siding square installation project of approximately 500 square feet using vinyl siding. These figures are estimates and should be adjusted based on specific project requirements and location.
| Item | Quantity | Unit Cost | Total Cost |
|---|---|---|---|
| Vinyl Siding | 500 sq ft | $5/sq ft | $2500 |
| Underlayment | 500 sq ft | $2/sq ft | $1000 |
| Fasteners & Trim | As needed | $200 | $200 |
| Labor (Installation) | 500 sq ft | $3/sq ft | $1500 |
| Permits | 1 | $300 | $300 |
| Total Estimated Cost | $5500 |
Final Wrap-Up
In conclusion, understanding what a siding square is and how it functions is vital for anyone involved in home construction or renovation. From selecting the right material based on budget and aesthetic preferences to mastering the installation process, attention to detail is key to a successful outcome.
By understanding the various types, applications, and maintenance requirements, homeowners and contractors can ensure a durable and visually appealing exterior that enhances the overall value and curb appeal of any property. The careful consideration of cost, durability, and aesthetics ultimately leads to a long-lasting and satisfying exterior finish.